Intro to the Data Virtualization Web Interface
This article provides an introduction to the Data Virtualization Web Interface. The interface allows you to create and manage data services, which combine and expose your raw sources in any way you wish. The resulting data services are accessible in a number of ways including REST, OData, and JDBC. In this article, we will step through creation of a MySQL service, a Salesforce service and a Mashup service which joins the MySQL and Salesforce data.
Prerequisites:
Please follow these setup steps first. You will (1) deploy Data Virtualization to OpenShift, (2) add & populate a MySQL database on the OpenShift instance, and (3) get a Salesforce demo account.
1. Provision Data Virtualization on OpenShift
- Go to the article Provision Data Virtualization on OpenShift . The article shows you how to deploy the Data Virtualization cartridge.
1a. The DV WebUI war can also be downloaded from jboss.org here - and installed into a local DV6.1 server (instead of OpenShift).
2. Add a MySQL database
- Go to the article Add a MySQL database to your OpenShift Data Virtualization instance
- Make sure you restart the cartridge per the article instructions.
3. Get a Salesforce developer account
- Go to http://www.developerforce.com/events/regular/registration.php?d=70130000000EjHb , to register for your account. You will get an email with a link to login into your account.
- Login to Salesforce interface with your user/password, then go to "Personal Setup > Reset My Security Token". Reset the security token. You will get another email with the security token.
- When you establish connectivity to the Salesforce instance in the example below, use the Salesforce username. The password is the combination of Salesforce password + security token.
- The developer account is populated with some data, which we will use in our example.
Access the Web Interface
After completing the prerequisite steps above, go to the deployed Web interface on OpenShift at http://<APP-NAME>-<DOMAIN-NAME>.rhcloud.com/dv-ui (APP-NAME is the name you gave the application in step 1, and DOMAIN-NAME is your OpenShift domain name). For the developer preview, login credentials are username: admin , password: admin
The screen below shows your empty Data Library. In this article, you will create data services to populate your library.
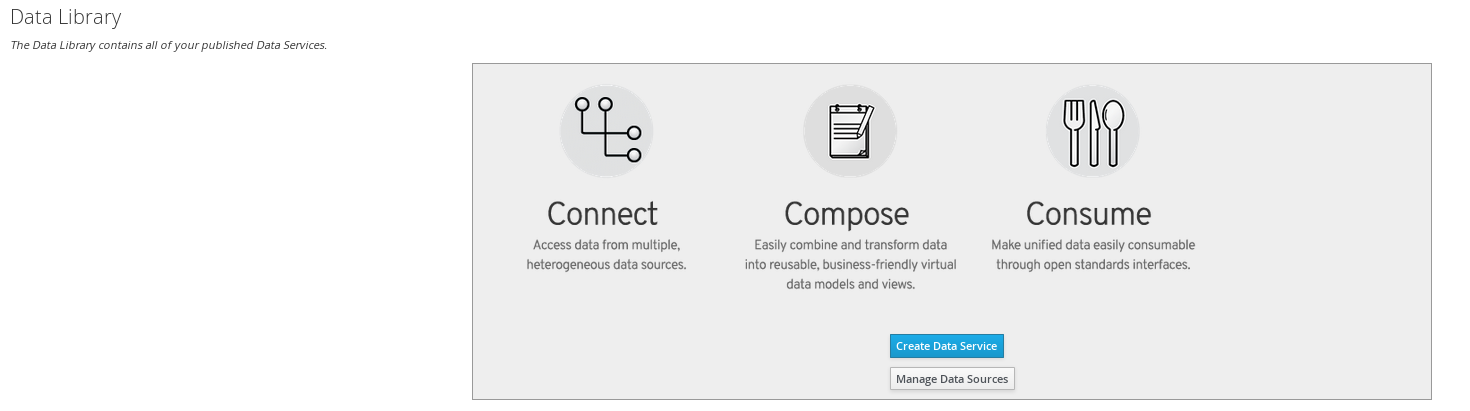
Configure Data Sources
From the Data Library screen above, click the Manage Data Sources button. You will be directed to the Manage Data Sources page, shown below:

MySQLDS Data Source
Click on the MySQLDS source - it is configured, but inactive. Select the mysql5 translator for the source and click the Save Changes button. Upon deployment, the source should become active (green check mark).
SalesforceDS Data Source
Next, create a Data Source using the Salesforce account you created in the prerequisite steps.
1) Click the Add Source button. This will create a placeholder data source called New Data Source.
2) Click on New Data Source. In the displayed properties,
- Click salesforce for the Source Type.
- Enter SalesforceDS for the Source Name
- Under Connection Properties, enter the user name for your salesforce account. Enter the password+token combination for the password.
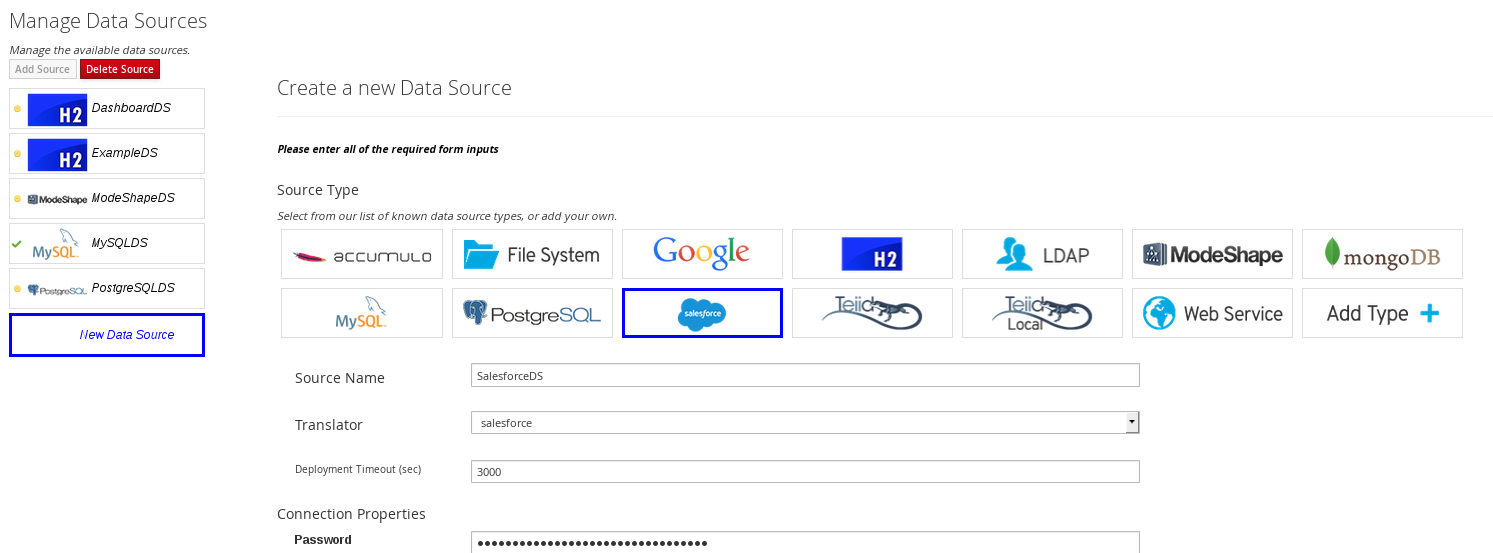
3) Click on the Save Changes button. The salesforce source will deploy (it will take a couple of minutes to finish).
When complete, MySQLDS and SalesforceDS should both be available (green checkmarks). Go to the Data Library, then click the Create Data Service button:
Create Data Services
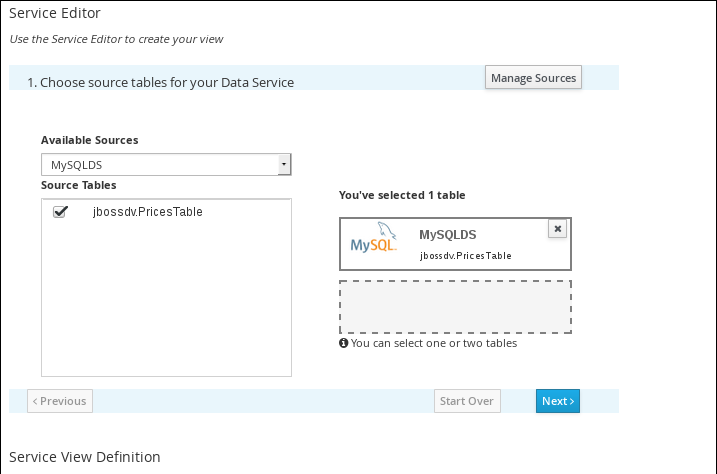
1. MySQL Data Service
To create a data service which accesses a MySQL database table
1) Enter MySQLService for the service name. Enter a description for the service.
2) In the Service Editor, select MySQLDS from the Available Sources dropdown. Check PricesTable in the Source Tables. This will move the PricesTable to the selected tables area. Click Next>
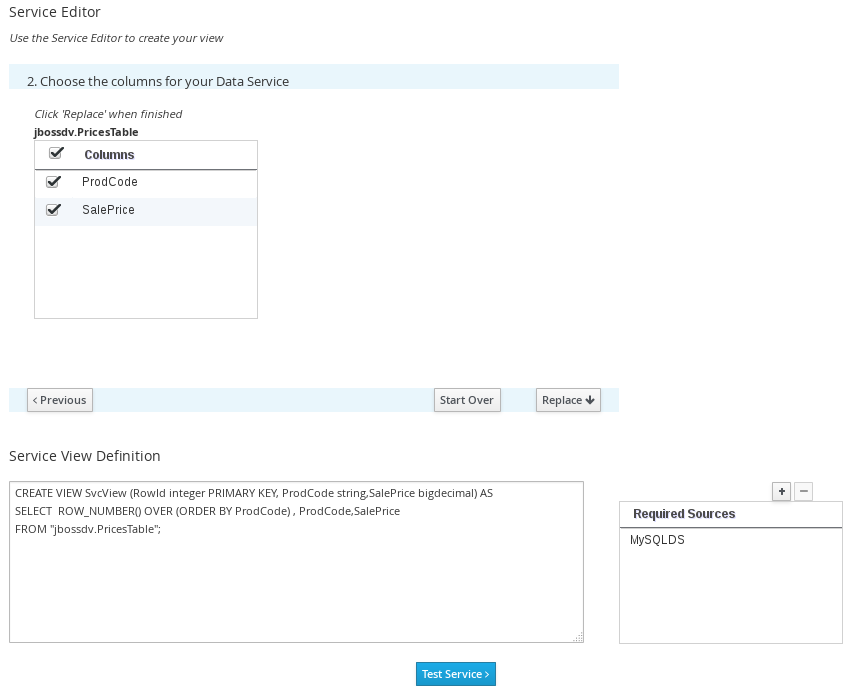
3) On page 2 of the Service Editor, select both columns for PricesTable via the checkboxes. Click the Replace button to generate the Service View Definition.
4) Now, click the Test Service button to test the service. You should see a table of sample results like this:

6) Once you've successfully tested the service, click Create Data Service. This will accept your entries and create the service. You will be redirected to the Data Service Details page, as shown below:
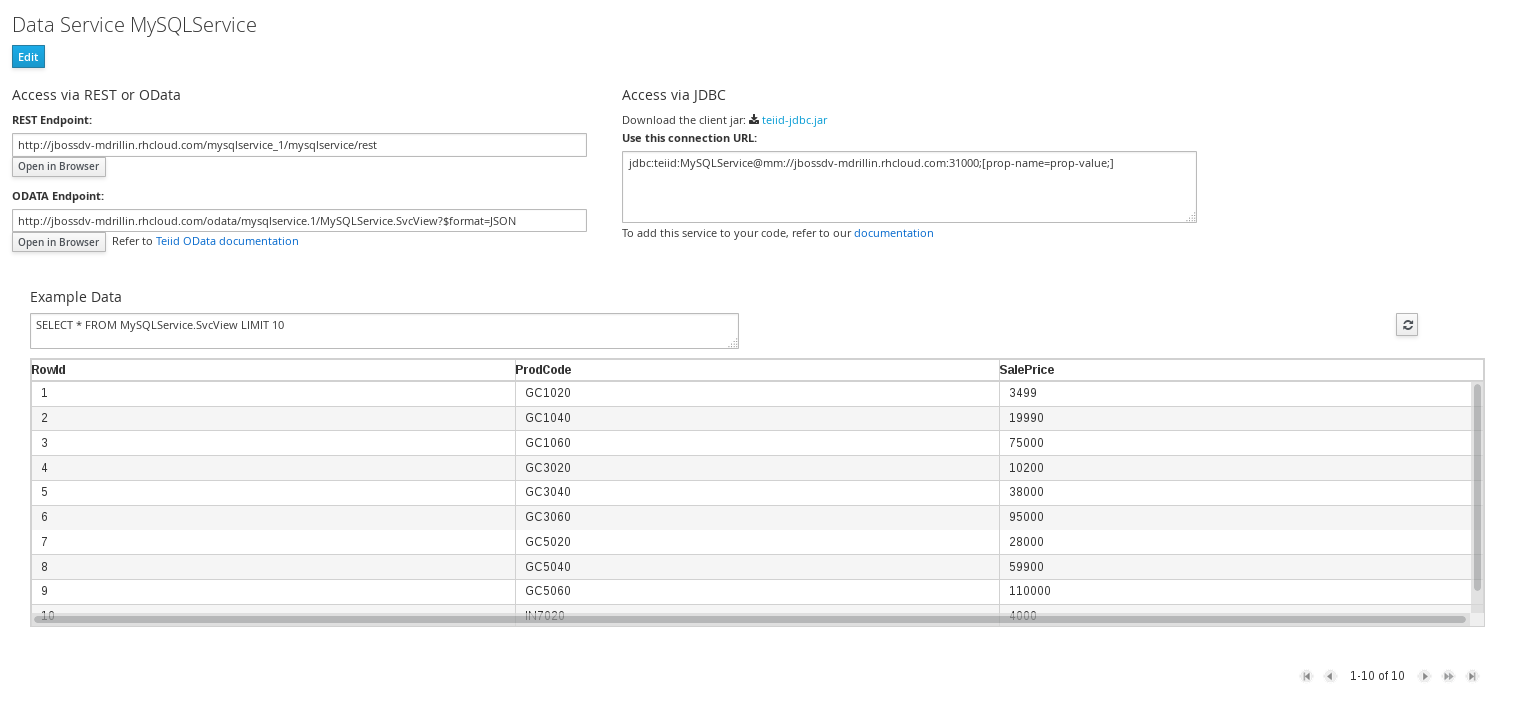
The Data Service Details page shows a sample of data - and also provides connection instructions and urls for the different connection options.
2. Salesforce Data Service
The steps to create a salesforce-only service follow the same pattern. Go back to the Data Library then click the Create Data Service button to create a new service.
On the Create Data Service page:
1) Enter SalesforceProductService for the service name. Enter a description for the service.
2) In the Service Editor, select SalesforceDS from the Available Sources dropdown. Check Product2 under Source Tables. This will move Product2 to the selected tables area. Click Next>
3) On page 2 of the Service Editor, select the Name and ProductCode columns for Product2 via the checkboxes. Click the Replace button to generate the Service View Definition.
4) Click the Test Service button to test the service as before, then click Create Service to publish the data service.
3. Mashup Data Service
Again, the steps to create a mashup service follow the same pattern. Go back to the Data Library then click the Create Data Service button to create a new service.
On the Create Data Service page:
1) Enter MashupService for the service name. Enter a description for the service.
2) In the Service Editor, select MySQLDS from the Available Sources dropdown. Check PricesTable to move it to the selections area.
Then select SalesforceDS from the Available Sources dropdown. Check the Product2 table to move it to the selections area. Click Next>

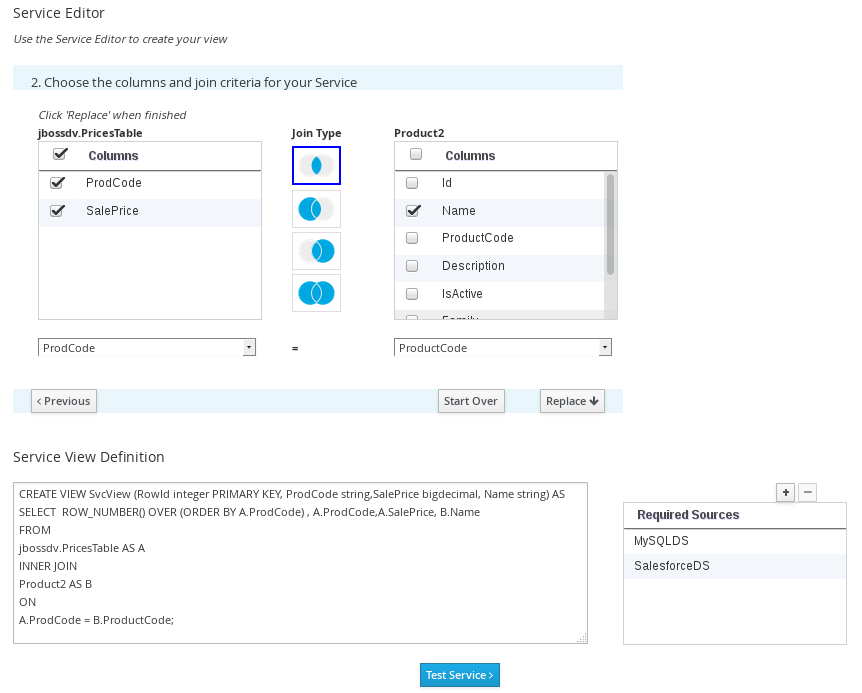
3) On page 2 of the Service Editor (below), check the ProdCode and SalePrice columns for PricesTable. Check the Name column for Product2.
4) Leave the JoinType selection on Inner Join.
5) Select ProdCode for the left Join Criteria column. Select ProductCode for the right Join Criteria column.
6) Click the Replace button to generate the Service View Definition.
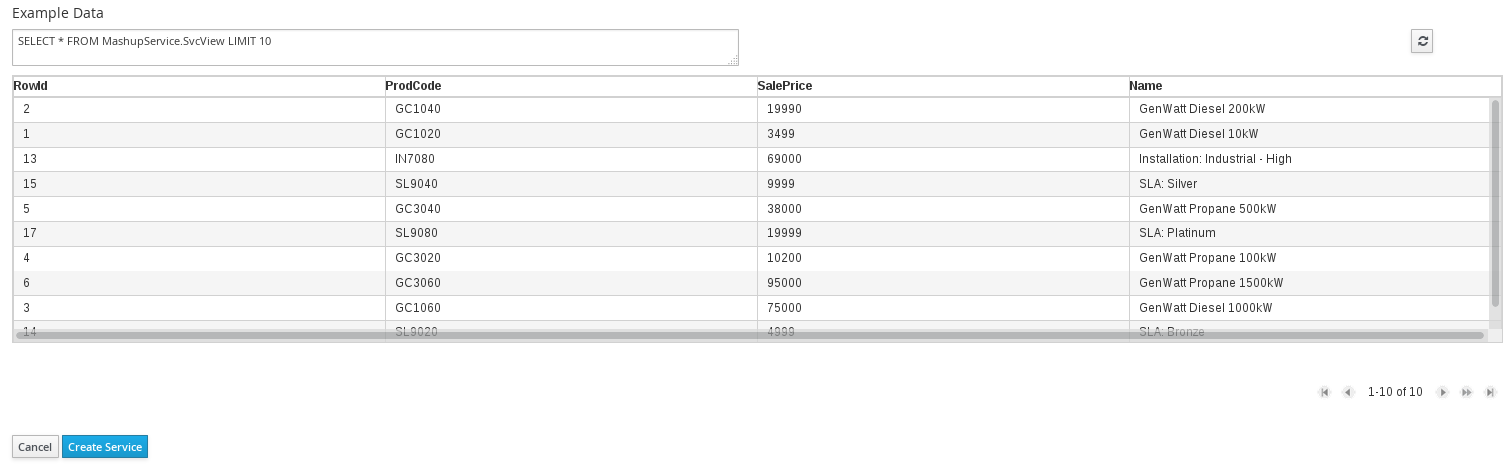
7) Click the Test Service > button to see example data, which will look like this:
8) Click the Create Service button to create the Mashup service. You will be redirected to the Data Service Details page, as shown below:
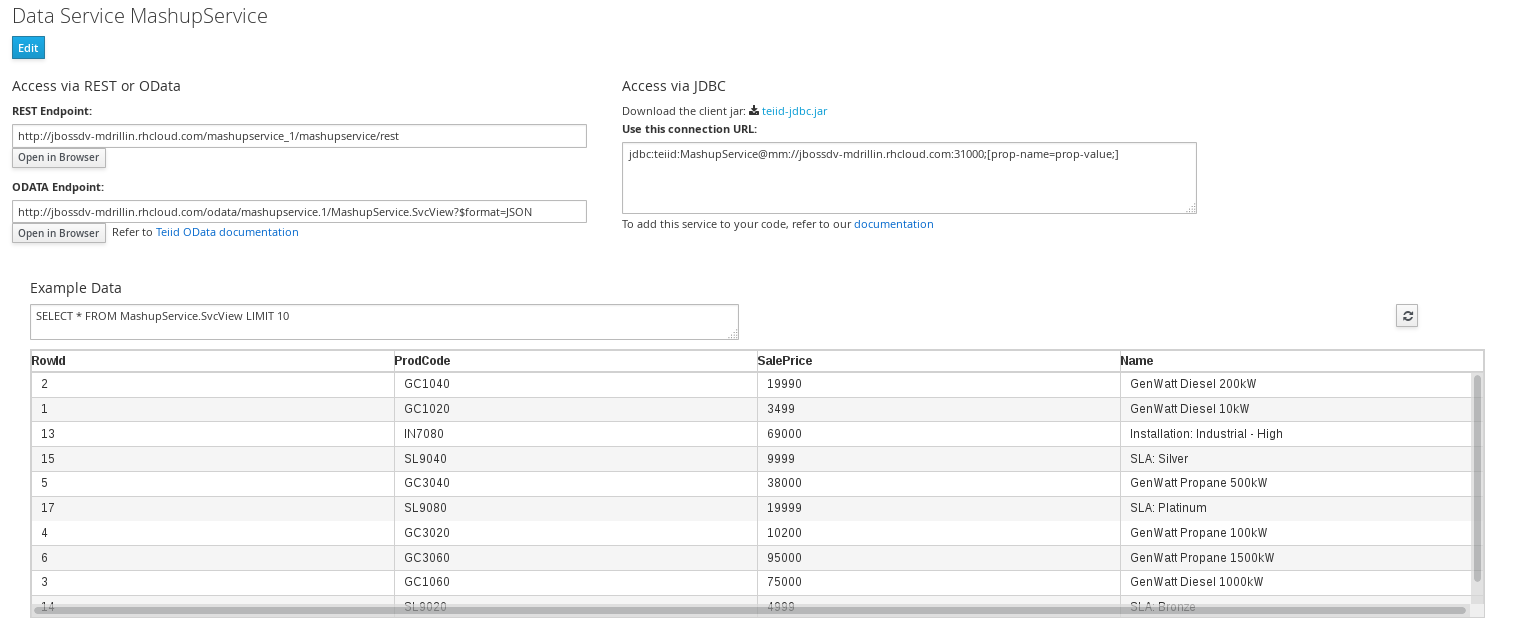
The Data Service Details page shows a sample of data - and also provides connection instructions and urls for the different connection options.
Data Library
Click the <Back to Library link to go back to your Data Library. On the Data Library page you will see the three services that we just created, as shown below:
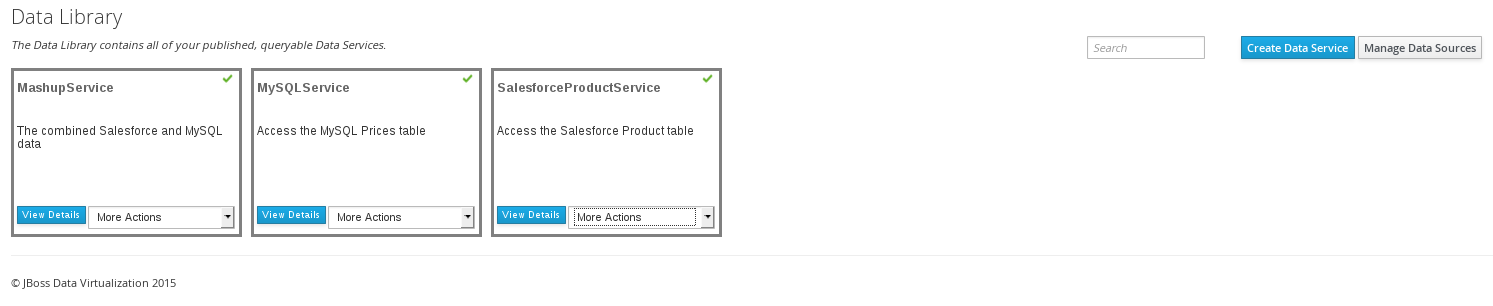
Notice that for each service, there are More Actions available:
- Edit - redirects to the Edit Data Service page.
- Duplicate - makes a copy of the selected service.
- Delete - delete the selected service.
- Export - A service is backed by a teiid 'Dynamic VDB'. This action exports the dynamic VDB xml to a file.
Summary
This article has provided an introduction to the Data Virtualization Web Interface on OpenShift. We followed the steps necessary to create three different data services: (1) MySQL Data Service, (2) Salesforce Data Service and (3) Mashup Data Service. Other services can be created in the same manner using different data source combinations. Please visit the Teiid and Teiid Designer communities to submit your feedback!
Comments