Home | Sample Data | Back to Examples....
Access a cloud database (Azure) as a source using Data Virtualization
This article provides instructions for connecting to a cloud database (Microsoft Azure) using Designer and JBoss Data Virtualization.
We will use JBoss Developer Studio with Teiid Designer to:
- Import the metadata (structure) of the Azure cloud database.
- Demonstrate how to access the cloud data via JBoss Data Virtualization.
Let's Begin!
- Install JBoss Data Virtualization
- You have several options:
- install the latest JBoss Data Virtualization locally
- install the latest Teiid community release locally, or
- provision Data Virtualization on OpenShift online.
- You have several options:
- Install Teiid Designer
- Follow the Teiid Designer installation instructions to install Designer.
- After installing, launch JBDS / Teiid Designer.
- Add the Data Virtualization / Teiid server in Teiid Designer and start it
- Follow the instructions in the article Provision Data Virtualization on OpenShift and connect from Teiid Designer to add a server instance in Designer. The local server and OpenShift server instructions are the same, but for the OpenShift server you will mark the server as 'externally managed' (see the referenced article).
- If the server is installed locally, you can simply start the server from the Servers View in Designer
- If the server is an OpenShift instance, follow the article instructions to start the server.
- Create and populate the Azure cloud database
- If you already have an Azure database, you can continue to the next step.
- If not, go to the Azure instructions . You will need to create an account, then create and populate the database.
- Get the cloud database jdbc connection string
- Get the JDBC connection string for your Azure database. In the Azure management portal, click on the database then find the Connect to your database section.

- Click on the View SQL Database connection strings... link. This will give you the jdbc strings similar to that below.

- Register your server IP with the cloud database
- The cloud database requires that the IP address of the machine accessing it be registered in its firewall rules. On the Azure database dashboard, there is a section similar to this

- Click Manage allowed IP addresses, then add the IP address of your server. This is straightforward if the DV instance resides on your local server.
- If the DV instance is deployed on OpenShift, do the following
- ssh into your OpenShift instance.
- On the command line, enter ping $OPENSHIFT_GEAR_DNS. The first line of the ping response will look like this:
PING ec2-54-221-126-53.compute-1.amazonaws.com (10.181.128.66) 56(84) bytes of data.
You can infer the IP of your server from the ec2 name:
ec2-54-221-126-53 --> ( 54.221.126.53 )
Register the derived ip address in the cloud db firewall rules.
- Import the cloud database structure
- JBoss Data Virtualization uses a model-driven approach. First, you will create a source model by connecting to the source and importing its structure.
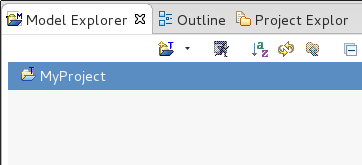
- In Designer, open the Teiid Designer perspective. Then create a new Model Project by selecting File > New > Teiid Model Project. On the first wizard page, enter MyProject for the project name - then click Finish. The project will be created as shown below.
- Next in ModelExplorer, click MyProject, then Rt-Click > Import... > JDBC Database >> Source Model. Click Next.
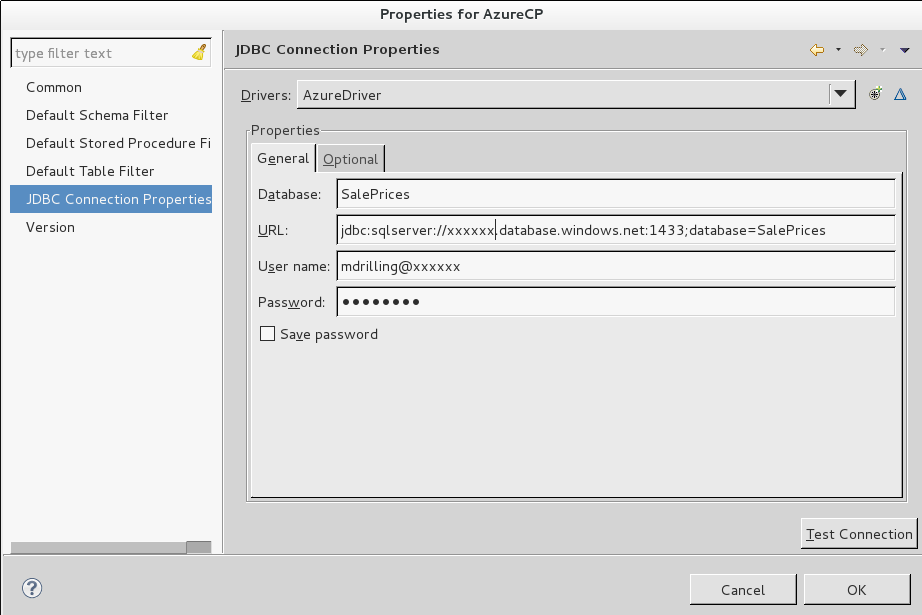
- On the Import Database via JDBC wizard, click the New... button to create a new Connection Profile. Select Generic JDBC for the type. Enter AzureCP for the Name. Click Next.
- Next to the Drivers combo box, select the New Driver Definition icon to create a new driver. Select the Generic JDBC Driver template, then enter AzureDriver for the Name. On the JAR List tab, click the Add JAR/Zip... button, then select a SQL Server type 4 driver jar that you've previously downloaded to your file system. Click OK to finish creating the Driver Definition.
- For the connection, enter the general properties as shown below (using your database name, etc as provided in the cloud db connection string).
- Next, enter the Optional properties from the connection string as shown:
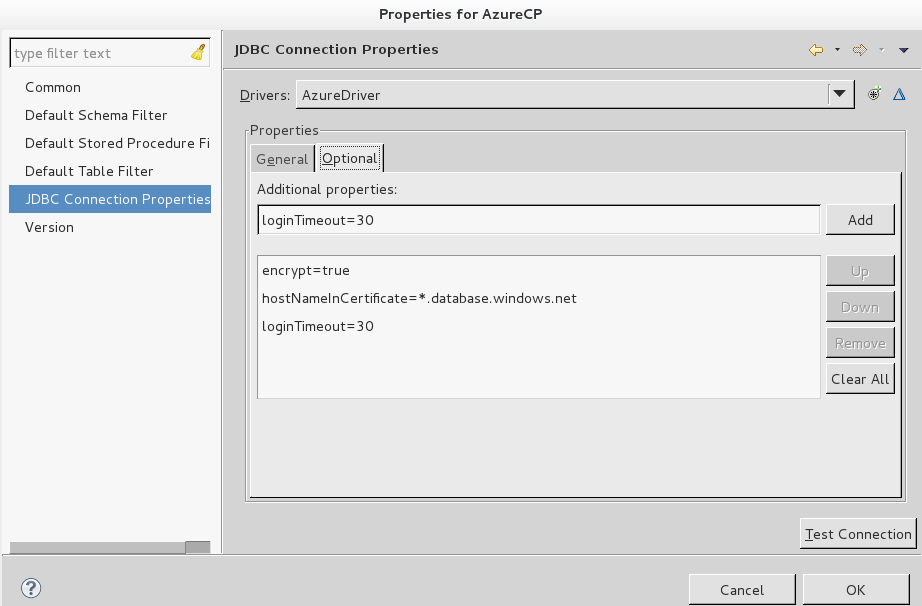
- Finally, click the Test Connection button to ensure a successful connection. Click Finish
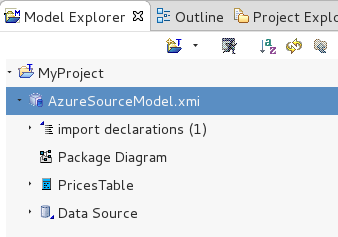
- Continue in the JDBC import wizard, selecting the tables etc that you want to import. Choose a name for your source model (eg AzureSourceModel). Upon completion of the import wizard, the source model will be created within your model project similar to this:
- Preview Data and Create/Execute a VDB
- After the source model has been created, you can now preview data from the cloud db source:
- In Designer, make sure your server is running.
- Select a table, then click the 'running man' icon in the toolbar. This will display the content in your cloud db table.
- You can also create more complex transformations using the source model that you just created: Create additional views which transform and join sources in any way you like!
- After the source model has been created, you can now preview data from the cloud db source:
Congratulations, you've completed this example!
This is a simple example that illustrates how to connect to a cloud database - in this case the Azure cloud database. Go to our JBoss Data Virtualization page to learn more!
Comments