Summary
This tutorial provides an example of modeling a remote Flat File data source containing delimited column data values. The example exercise the following features:
- Create a model project
- Create a connection to a remote flat file data source
- Create a relational model of your flat file connection (import its metadata)
- Create a relational view model which transforms the file source data and presents it as a relational view
- Add a user-defined function (UDF) to your view model
- Add a view to your view model which utilizes your UDF
- Test the view
- Create and test a VDB (Virtual DataBase) containing your models
| Prerequisites |
|---|
This script was created and tested against against the following configuration: Tooling Server - EAP 6.1 + Teiid 8.5 or greater
or - JBoss Data Virtualization (DV) 6.0
|
| STEP 1 - Create Model Project |
|---|
| Summary: The Teiid Model Project is really just an Eclipse typed project with a nature that allows Teiid-specific validation and other behaviors. In particular, the dependent model validation is scoped per project, so when you are developing your VDBs, Designer allows developing/building and adding models in a given project to any VDBs within that same project. |
|
Actions - Make sure JBDS is using the Teiid Designer perspective
- Select Window > Open Perspective > Other


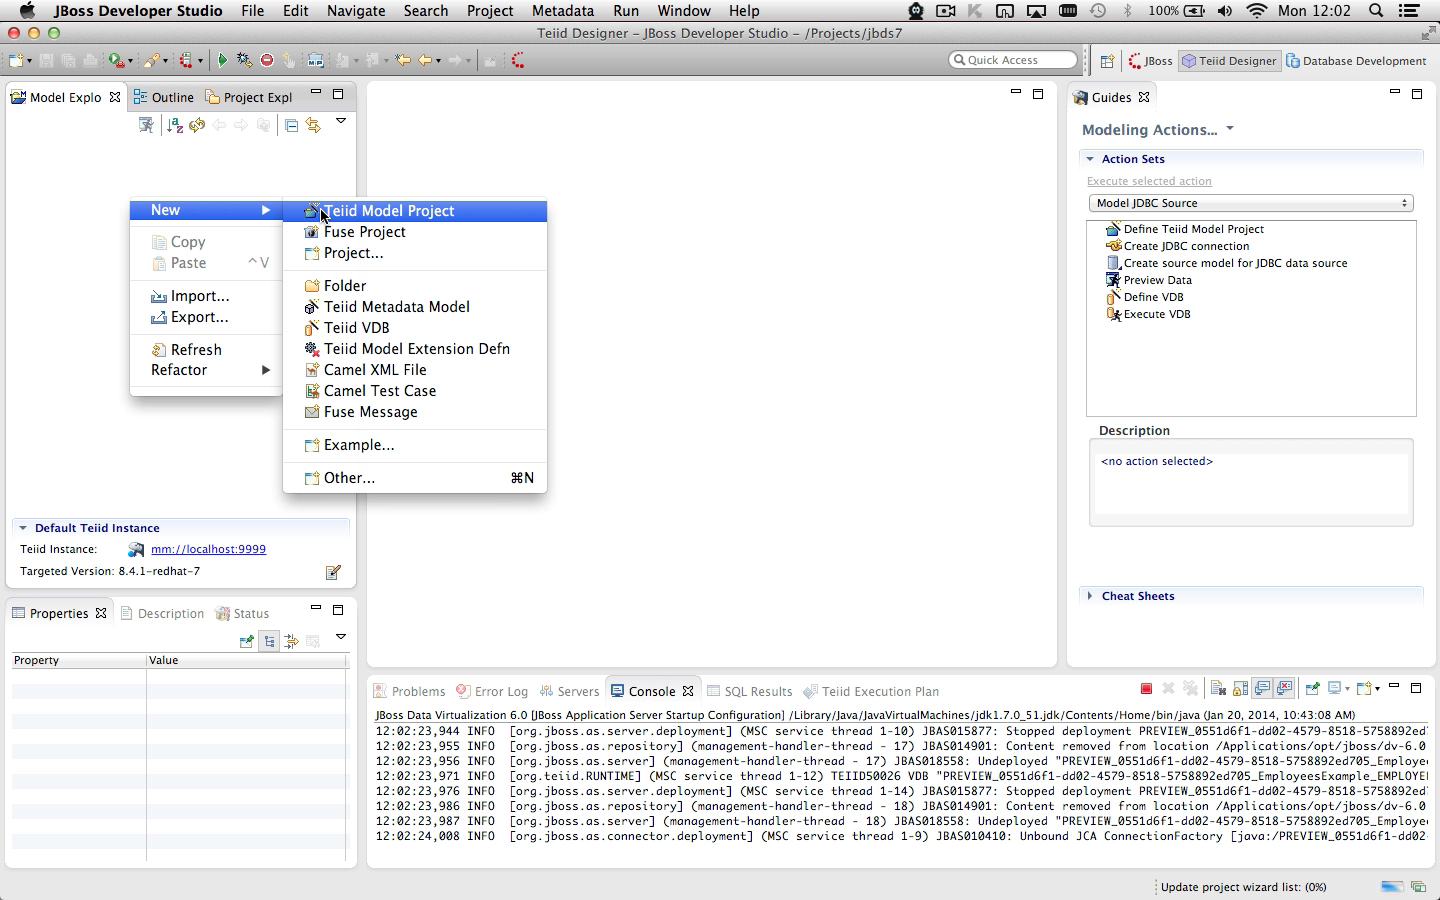
- Right-click in the Model Explorer and select the New > Teiid Model Project action.

- Enter valid project name (i.e. EmployeesExample).

|
| STEP 2 - Import Flat File Metadata |
|---|
Summary: This step will lead you through the process of defining your Remote Flat File connection profile, defining your relational columns for the delimited file. - For data source connection management, Teiid Designer utilizes Eclipse's Data Tools project framework and it's connection profile definition. This will be installed as a dependency when installing Designer. Most import wizards utilize a connection profile - Designer supports JDBC, flat file, xml file, web services (WSDL) and Salesforce data sources.
- Source models define the relational structure for your data sources. When added to a VDB and the data source JNDI name is specified the Teiid runtime framework can access the data source and return your source data. This step will create a relational model containing a product data table defined in the file URL in the previous step. Details of this import option can be found in our main docs at: http://docs.jboss.org/teiid/designer/8.2/user-guide/en-US/html/importers-chapter.html#flat-file-import-section
|
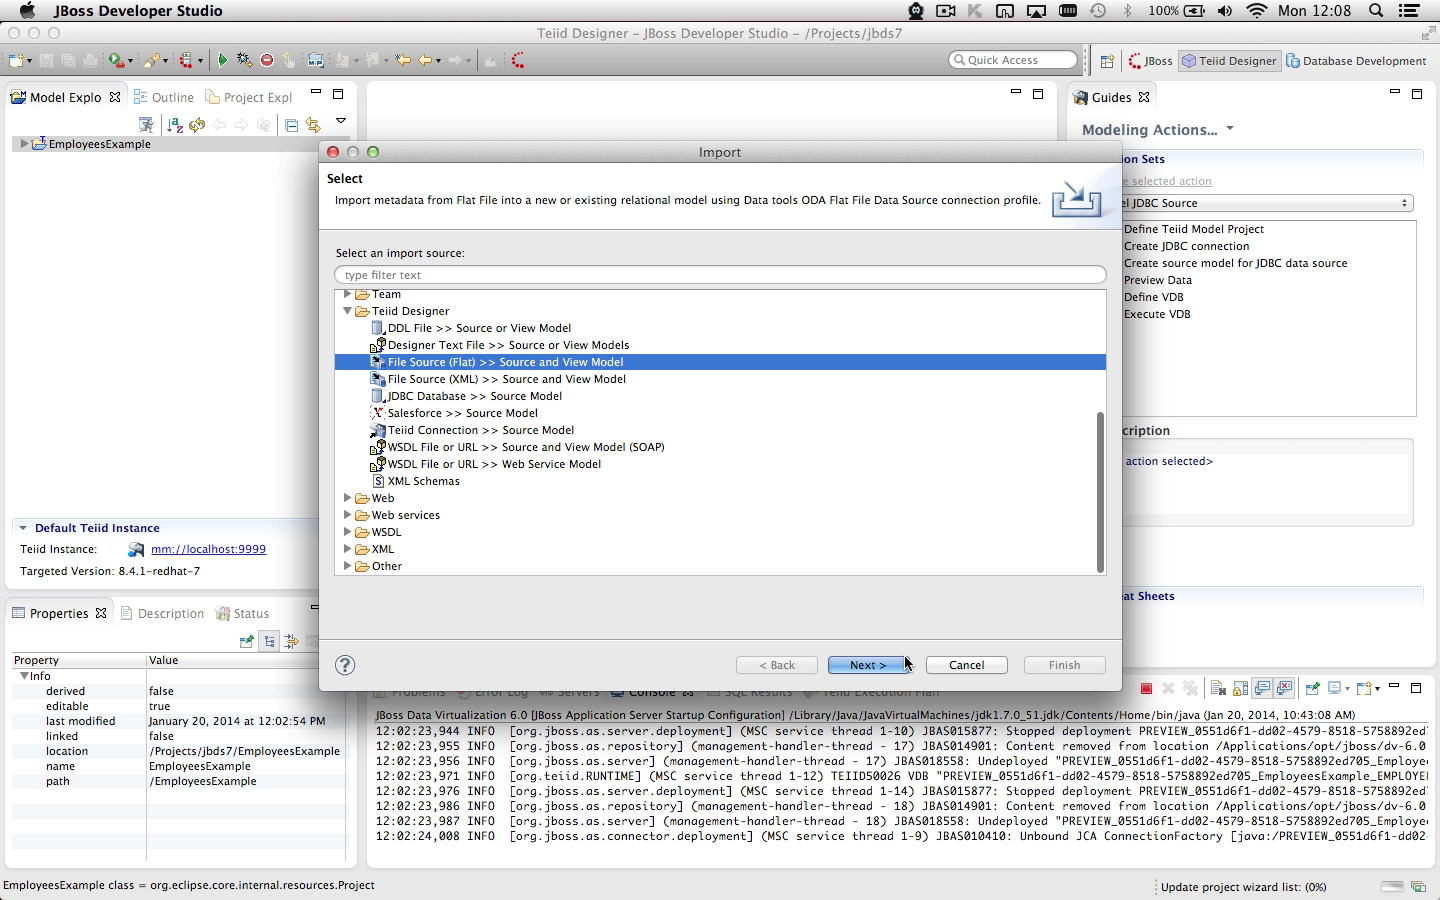
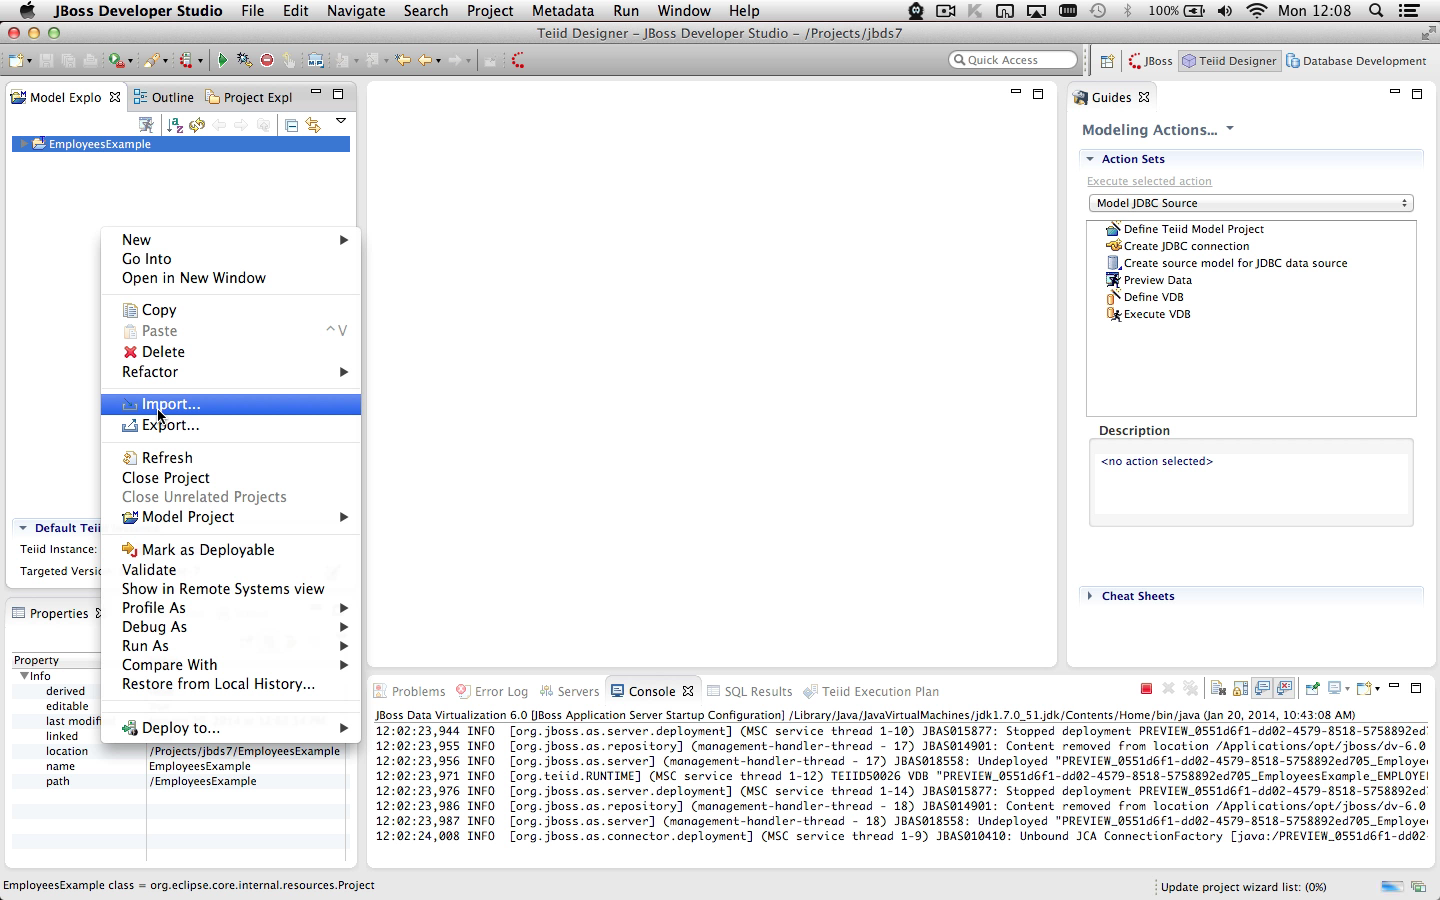
Actions - Right-click in the Model Explorer and select the Import... action.

- In the Import wizard, open the Teiid Designer category (folder) and select the File Source (Flat) >> Source and View Model option and click Next > when done.
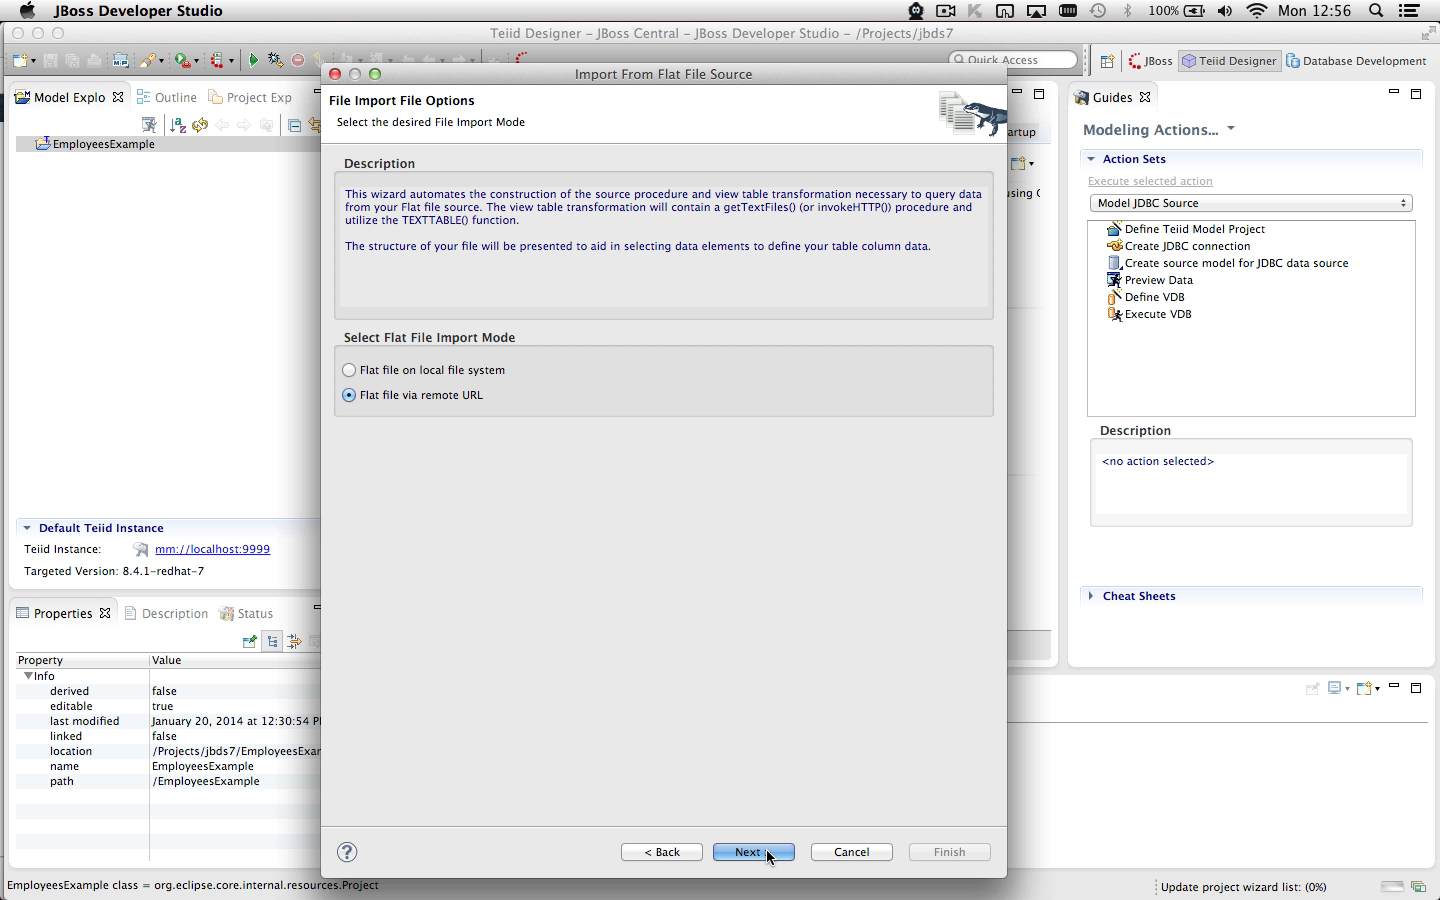
- This launches the Import From Flat File Source wizard
- On the first page of this wizard, File Import File Options:
- Select the Flat file via remote URL option
- Click Next >
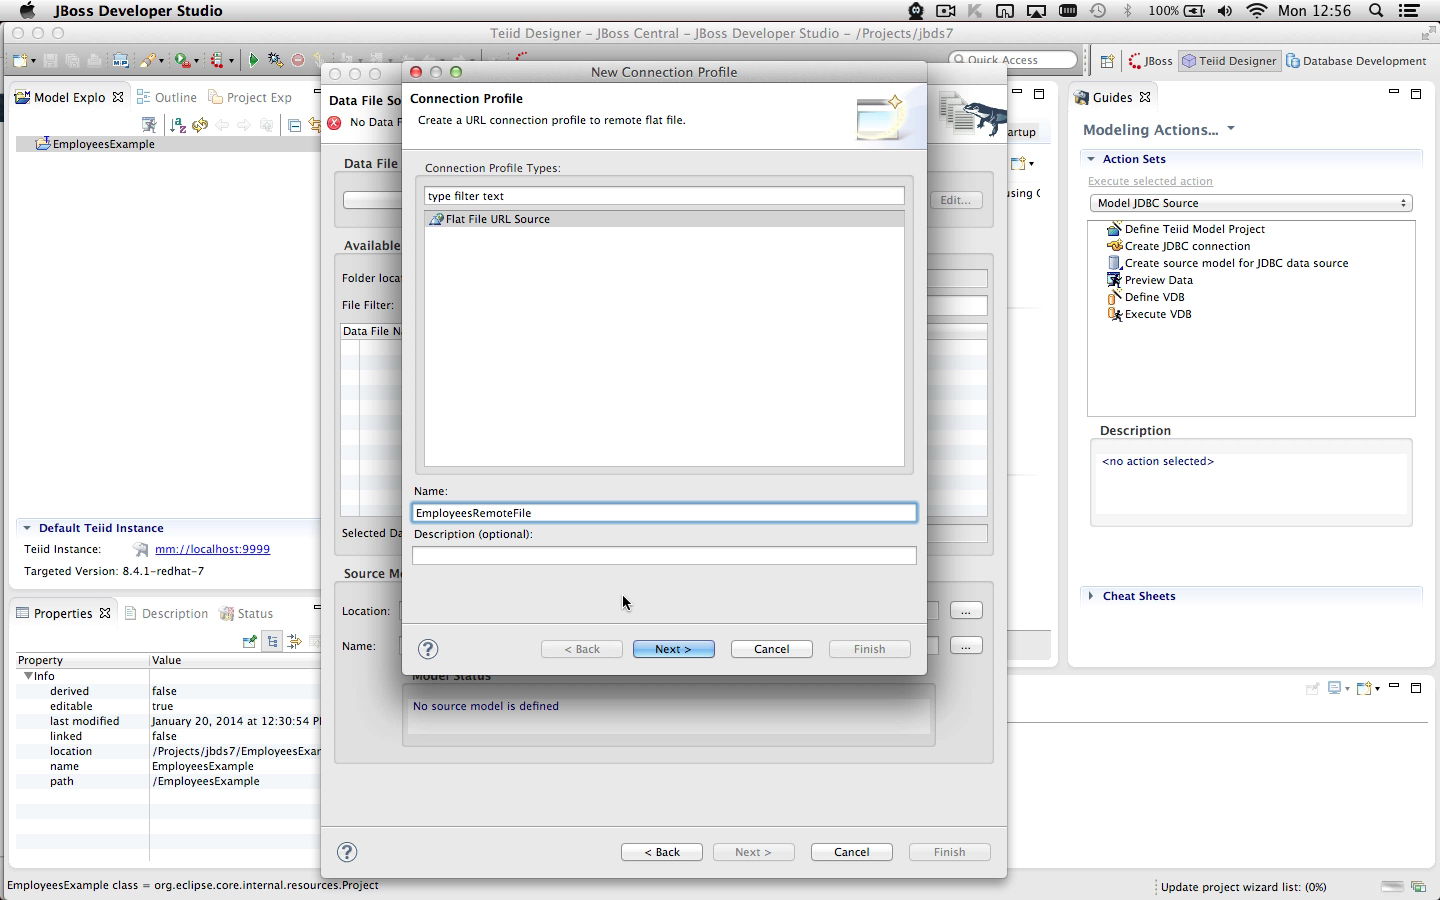
- On the second page named Data File Source Selection :
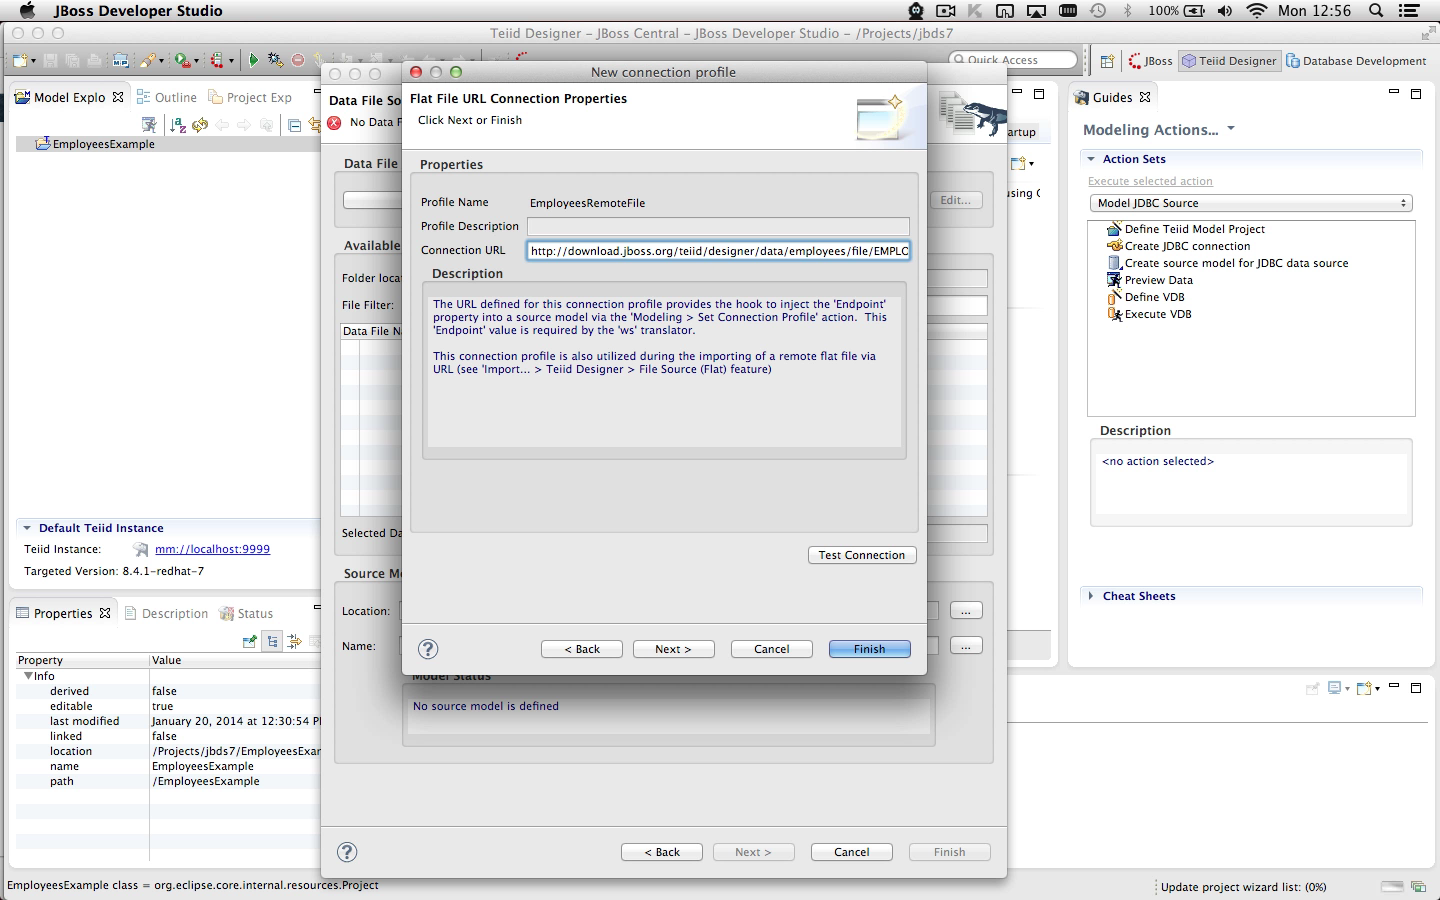
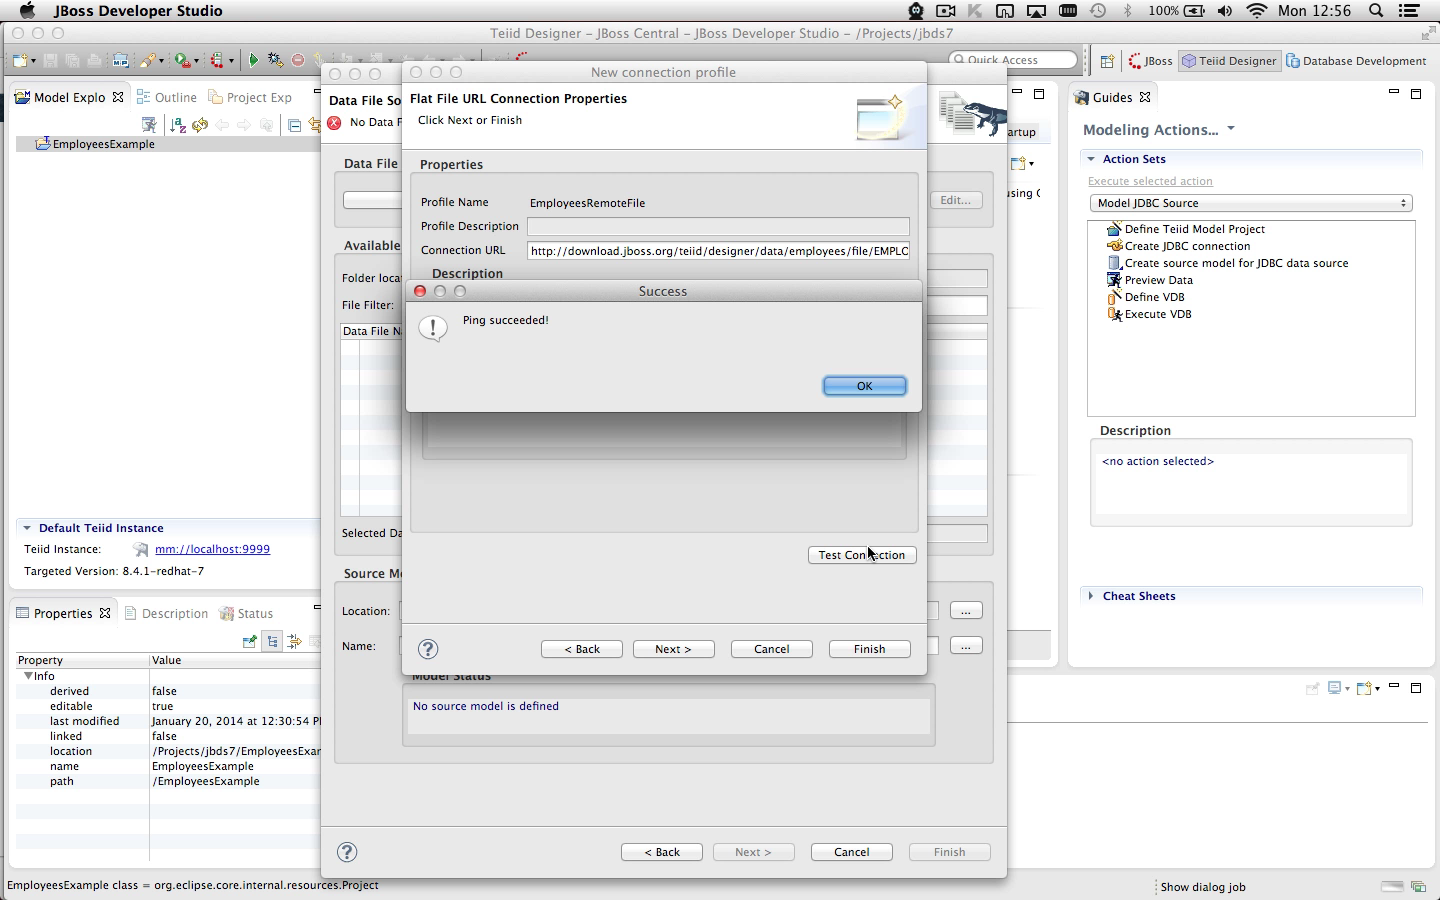
- Select the New.. button in the Data File Source section at the top to create a connection profile defining your remote flat file connection properties
- Enter a unique name for this profile (i.e. EmployeesRemoteFile) and click Next >

- Click Test Connection to verify access to this URL

- Click Finish to complete profile creation
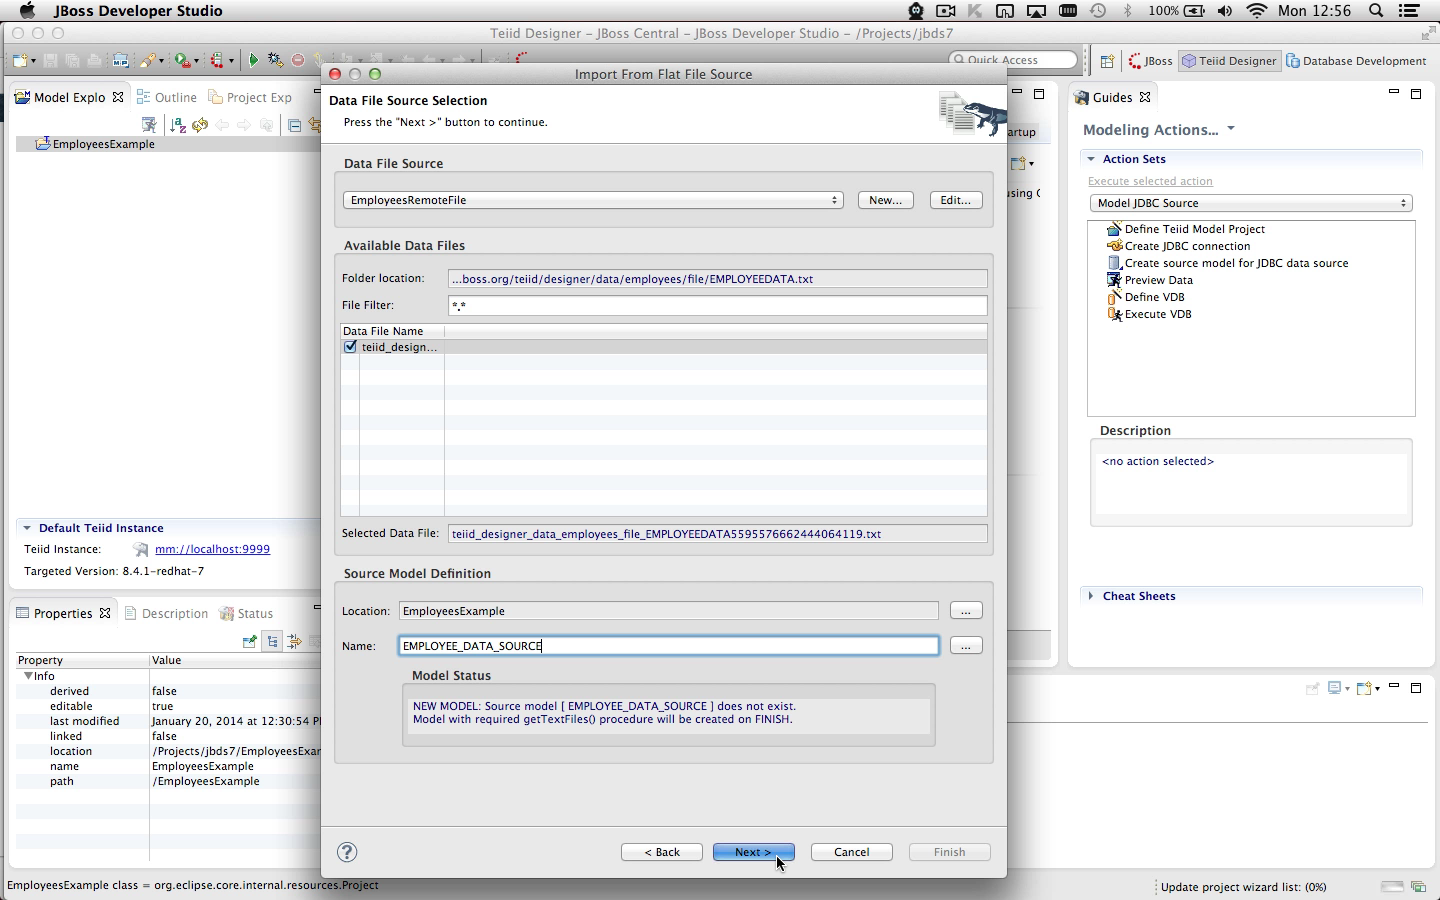
- At the top, the Data File Source box should already show the EmployeesRemoteFile selected and the Available Data Files section should contain the teiid_designer_data_employees_file_EMPLOYEEDATA.......txt file.
- Select that file. In the Source Model Definition section, your model project should be defined as well as a name for your model based on your data file (i.e. teiid_designer_data_employees_file_EMPLOYEEDATA......._source)
- Change the name to something simpler like: EMPLOYEES_DATA_SOURCE
- Click Next >

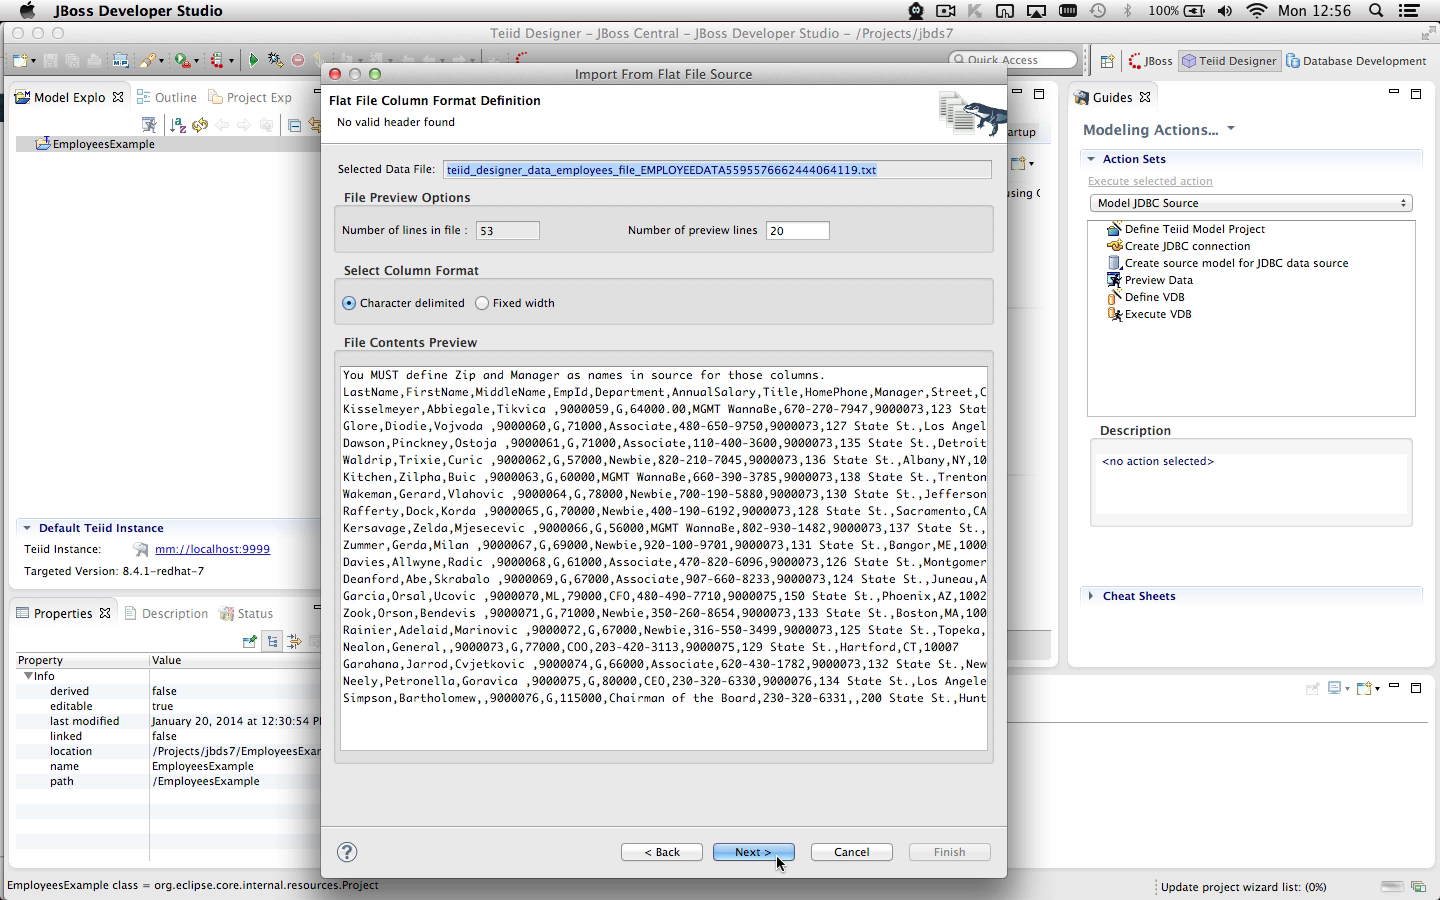
- The third page, Flat File Column Format Definition, allows for selecting either the character delimited or fixed width data file format.
- Select the Character delimited option
- Click Next >

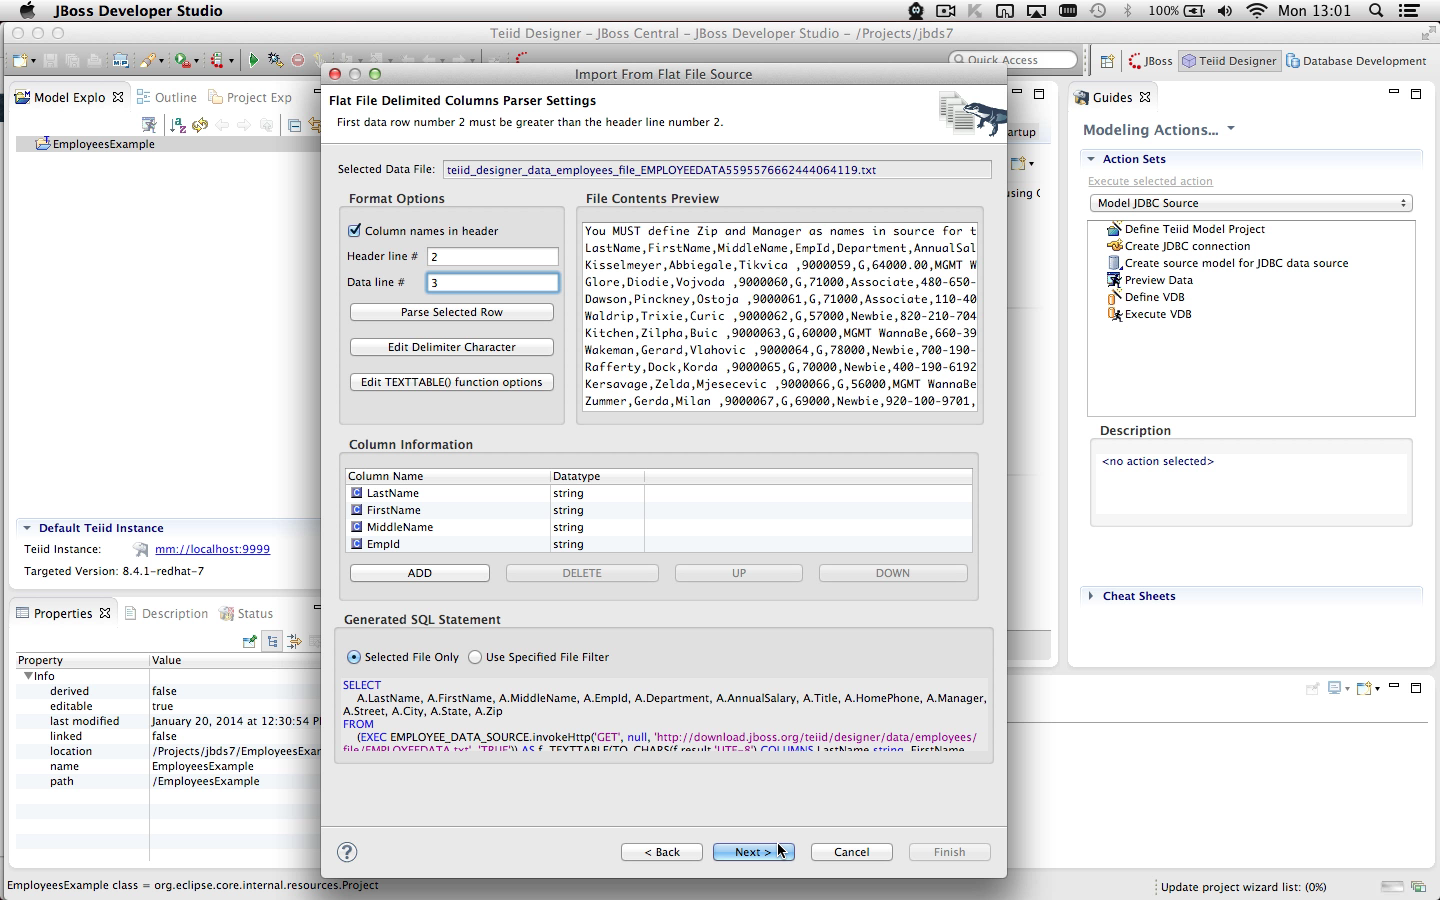
- The fourth page, Flat File Delimited Columns Parser Settings, provides options to customize the columns definition including name and datatype. In addition, there are a number of options to help identify the structure of your data file and to define the query necessary to return a relational column data via TEXTTABLE() definition.
- The EMPLOYEEDATA.txt source file contains column name (header) information, though it's not required.
- For this file, change the Header line # to 2 and Data line # to 3 so the file parser locates the available column names
- The Column Information should now contain appropriate column names like LastName, FirstName, etc....
- These values will be used when constructing the relational model.
- This page also shows a template of the Generated SQL Statement that will be injected into the relational view required to convert flat file data to relational result sets.
- Click Next >

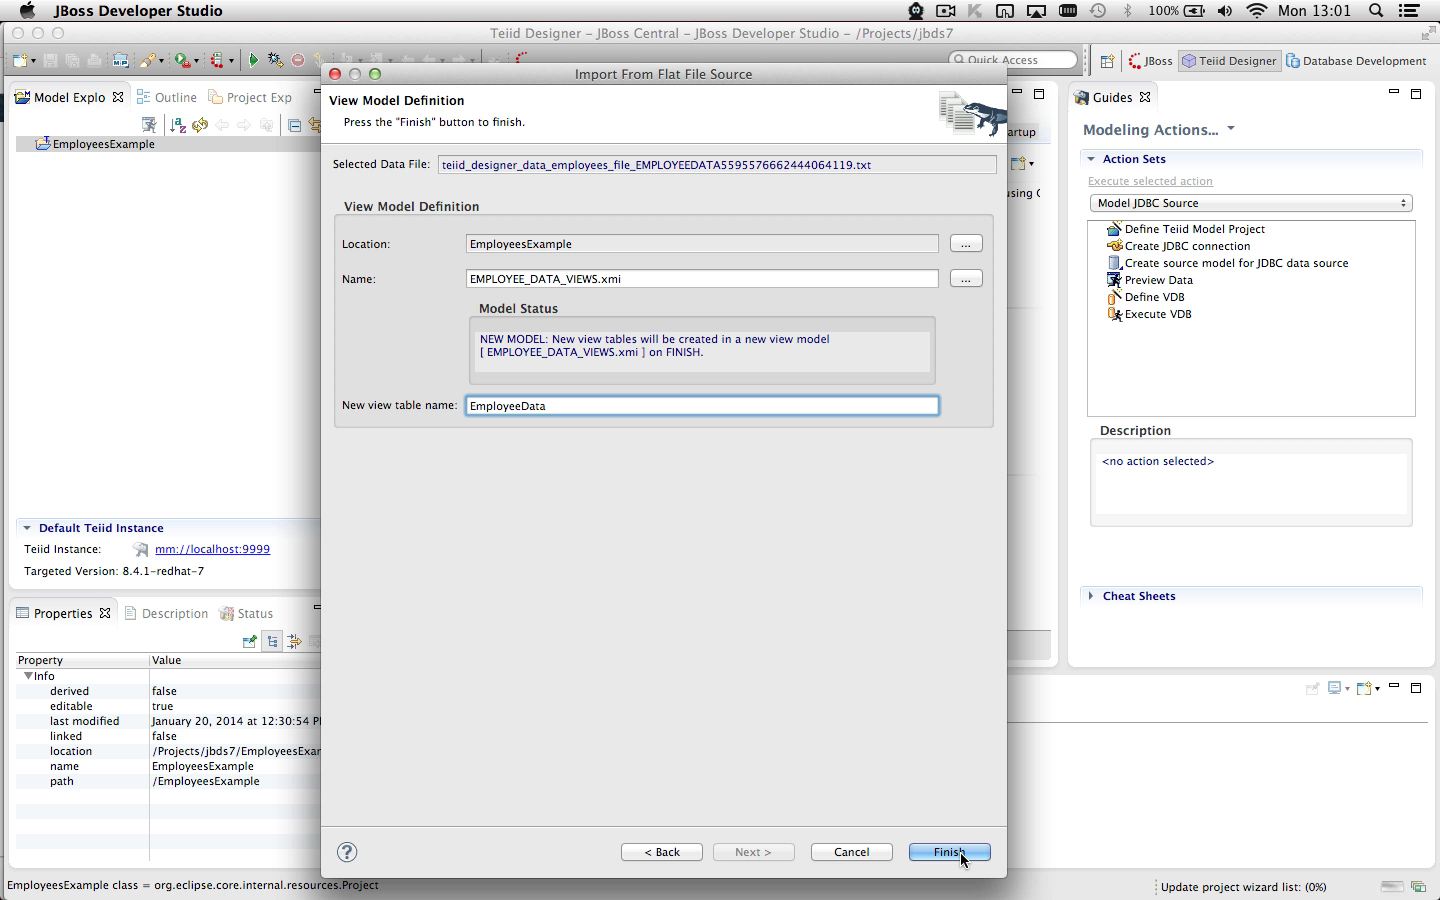
- The last page, View Model Definition allows defining the generated view model information including model folder location, view model name and name of the generated view.
- Change the generated view model name to something simpler like : EMPLOYEE_DATA_VIEWS
- Change the generated view table name to something simpler like EmployeeData.
- Click Finish
- Ensure that all models are saved
|
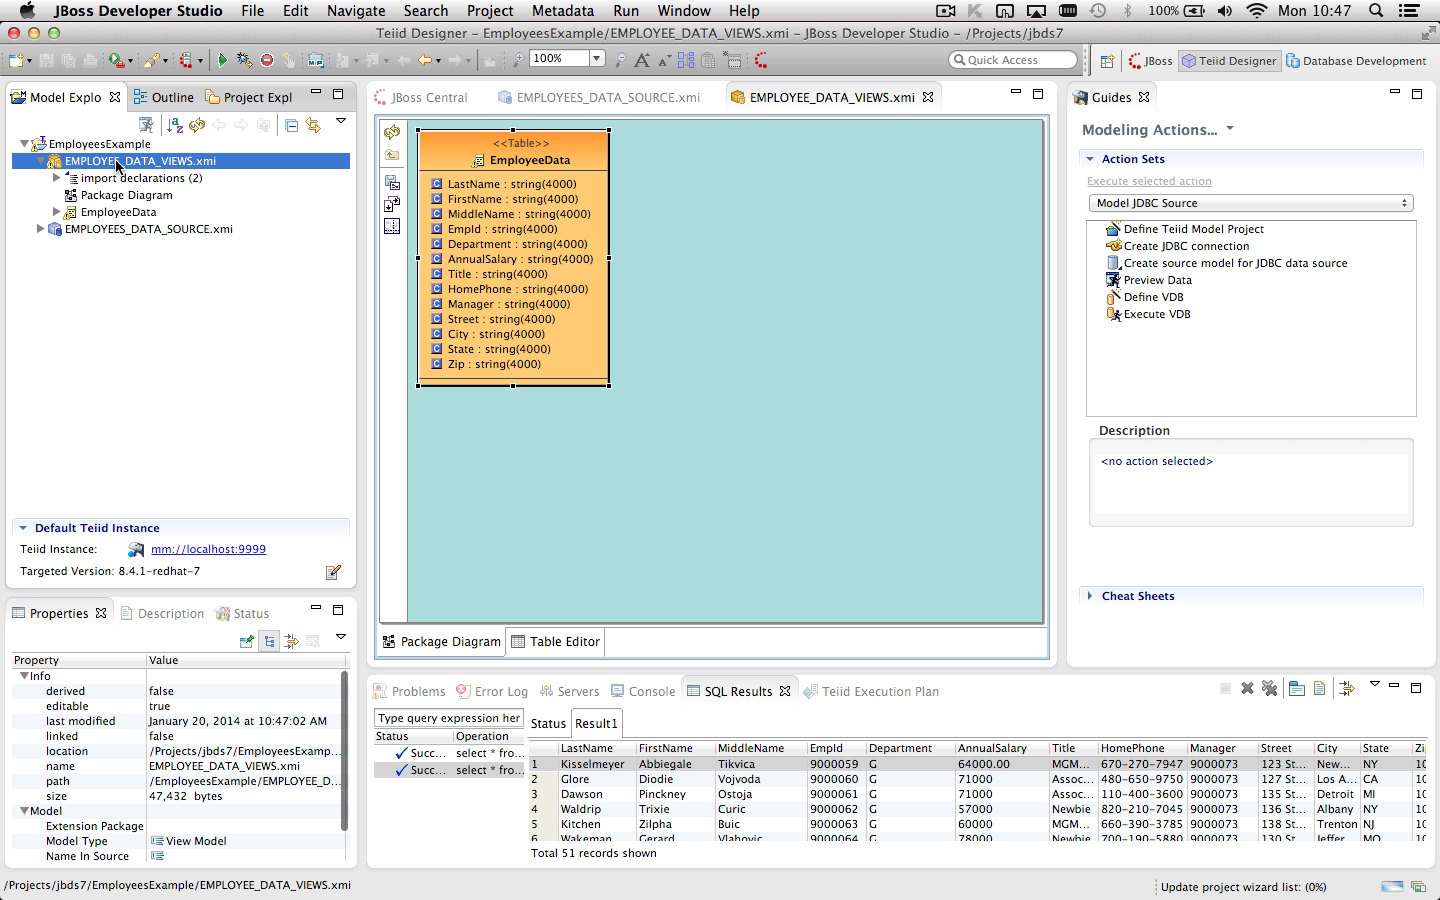
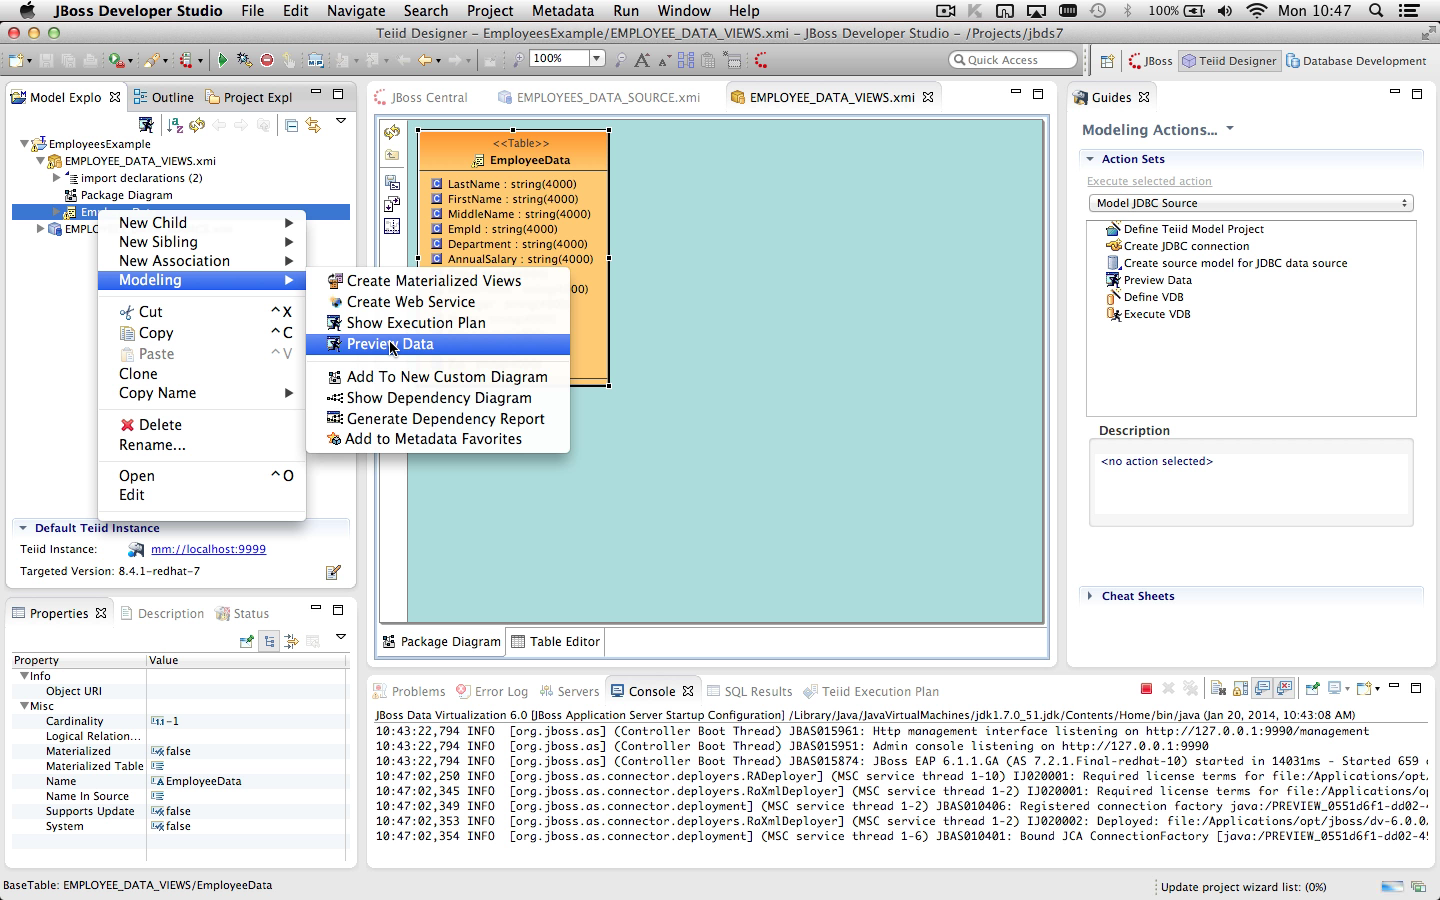
STEP 3 - Preview Your Data
|
|---|
| Summary: Though your final deployable artifacts will be VDBs containing your modeled metadata, you can preview your data through your models without creating VDBs. By simply selecting a table or procedure and executing Preview Data action the necessary temporary artifacts will be auto-deployed to a running server and results will be returned. |
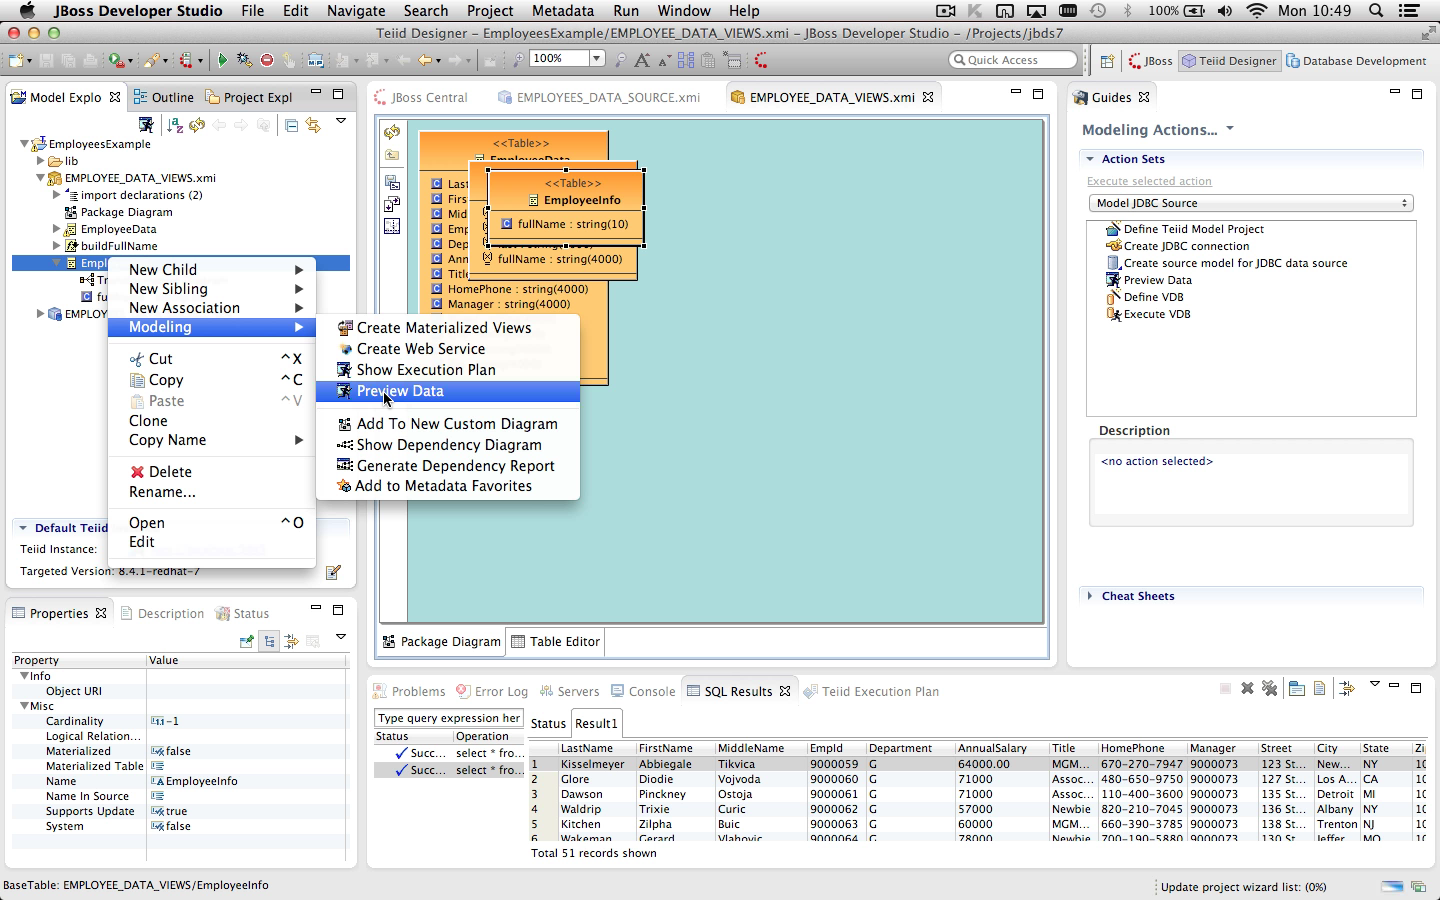
Actions - Select the EmployeeData view in your EMPLOYEE_DATA_VIEWS model in the Model Explorer
- Right-click select Modeling > Preview Data action
- Note you can also click the Preview Data button in the Model Explorer's toolbar

- Assuming your server is running, a simple SELECT * FROM EMPLOYEEDATA will be submitted and the results displayed in table form in the SQL Results view.
|
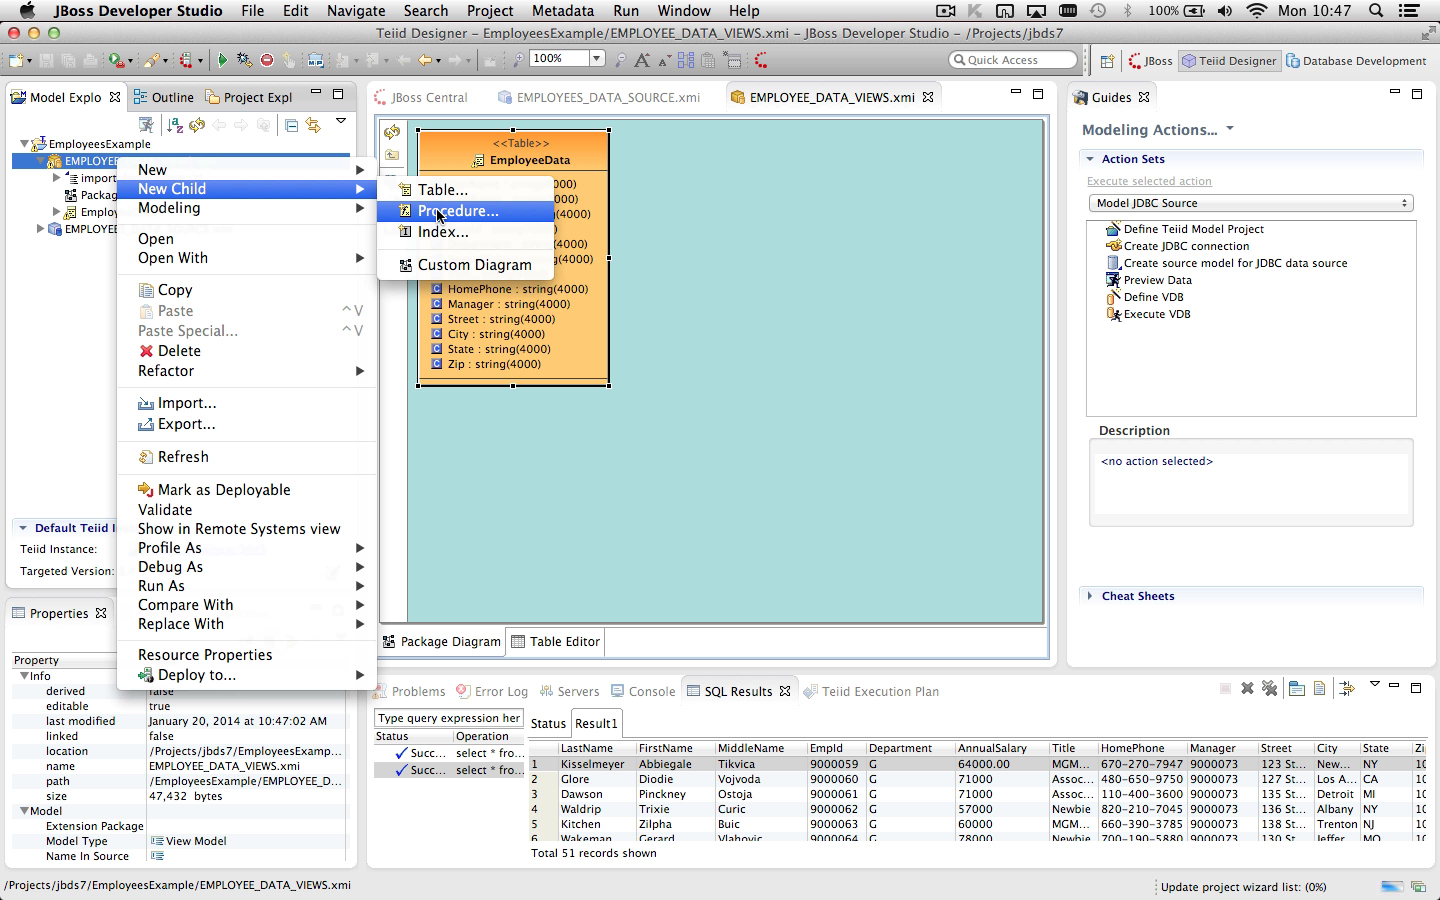
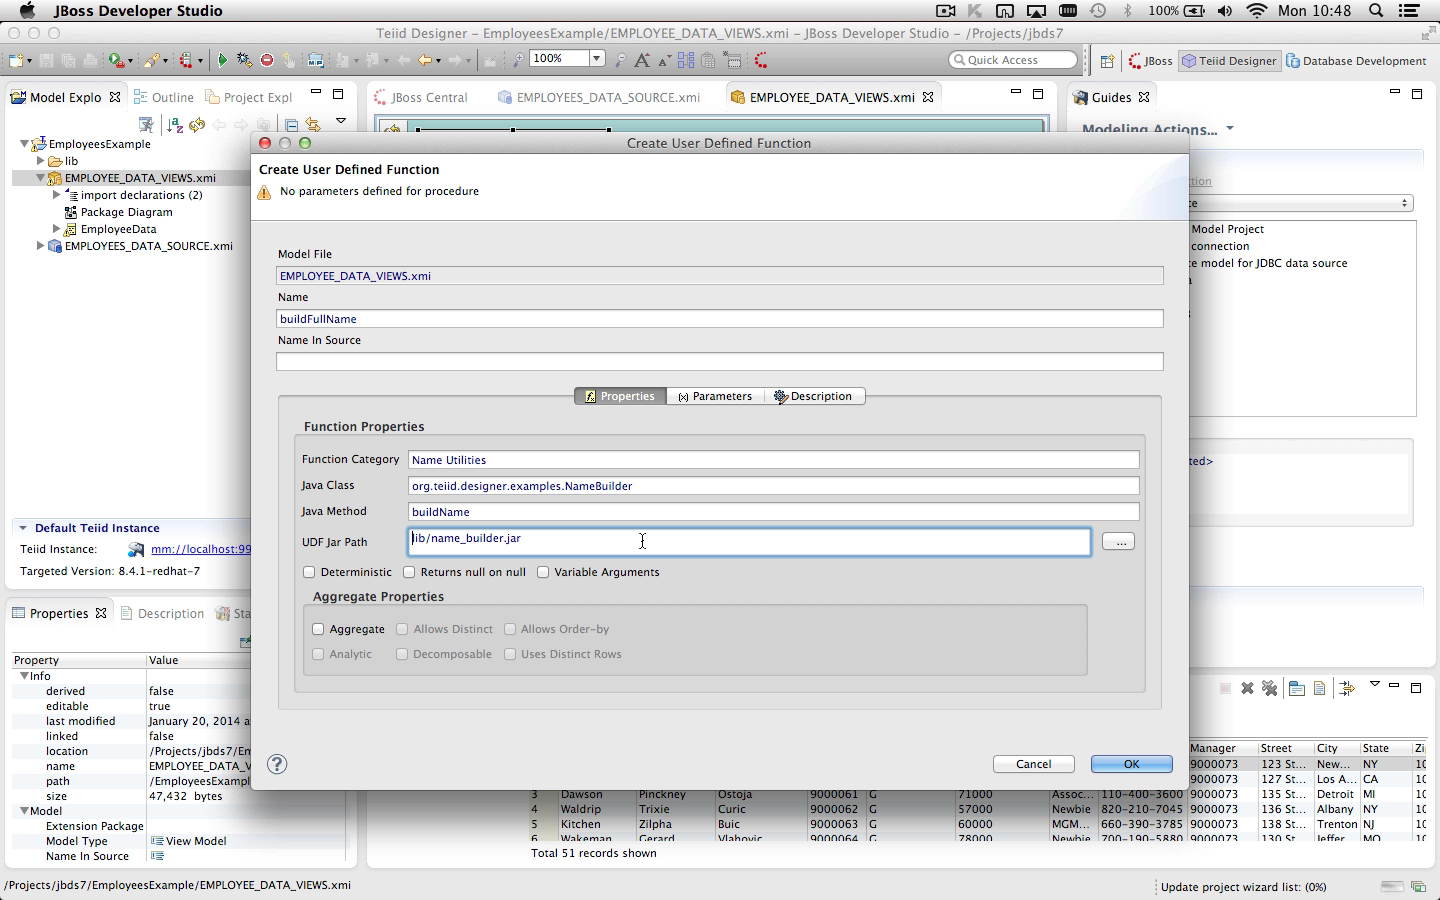
| STEP 4 - Model User Defined Function |
|---|
Summary: User-defined functions provide users the ability to use custom functions within the SQL of their views. Definition of a user-defined function (UDF) requires the following: - Compiled jar containing the NameBuilder.class
- Modeled procedure representing the function
|
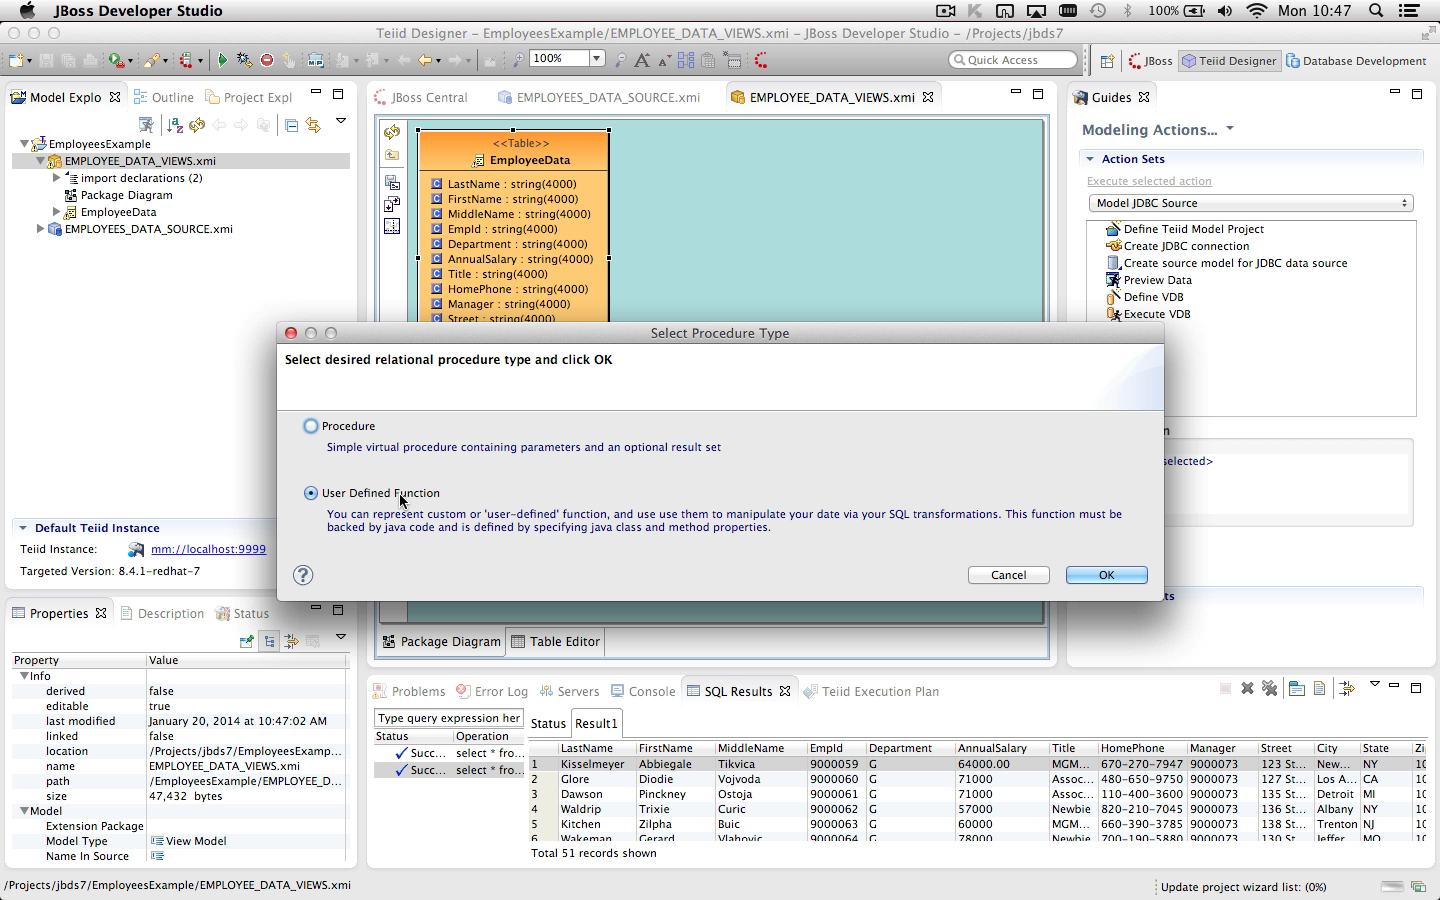
Actions - Select your EMPLOYEE_DATA_VIEWS model and right-click select New Child > Procedure... action
- In the first dialog named Select Procedure Type:
- Select User Defined Function option
- click OK
- In the second dialog, Create User Defined Function...
- Enter a unique function name (i.e. buildFullName )
- Enter Function Category (i.e. Name Utilities)
- Enter Java Class name: org.teiid.designer.examples.NameBuilder
- Enter Java Method name : buildName
- Select the ... browse button to the right of the UDF Jar Path field.
- Browse your file system to locate and select the jar you downloaded in the Set Up
- Selecting this jar will:
- Create a lib folder under your project
- Place a copy of your jar in this lib folder
- Set the value of the UDF Jar Path to this location based on file system path
- Note that this jar will later be added to your VDB so it can be deployed to the server and so the function source will loaded and available at VDB execution time.

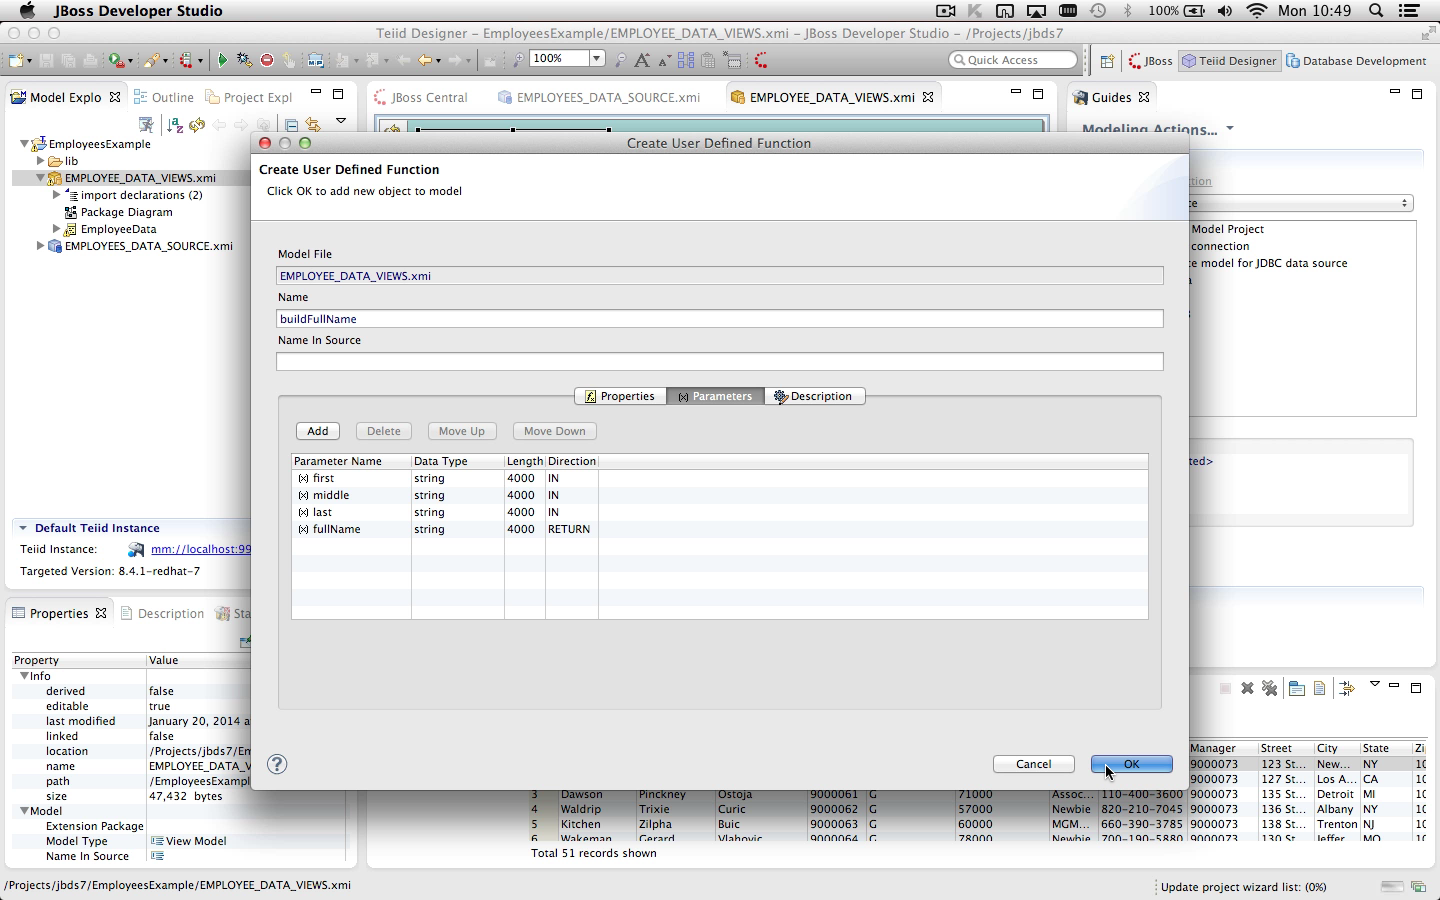
- Select the Parameters tab
- Add 4 parameters and name them first, middle, last, fullName
- Change the direction of the fullName parameter to RETURN
- Click OK

- Ensure that all models are saved
|
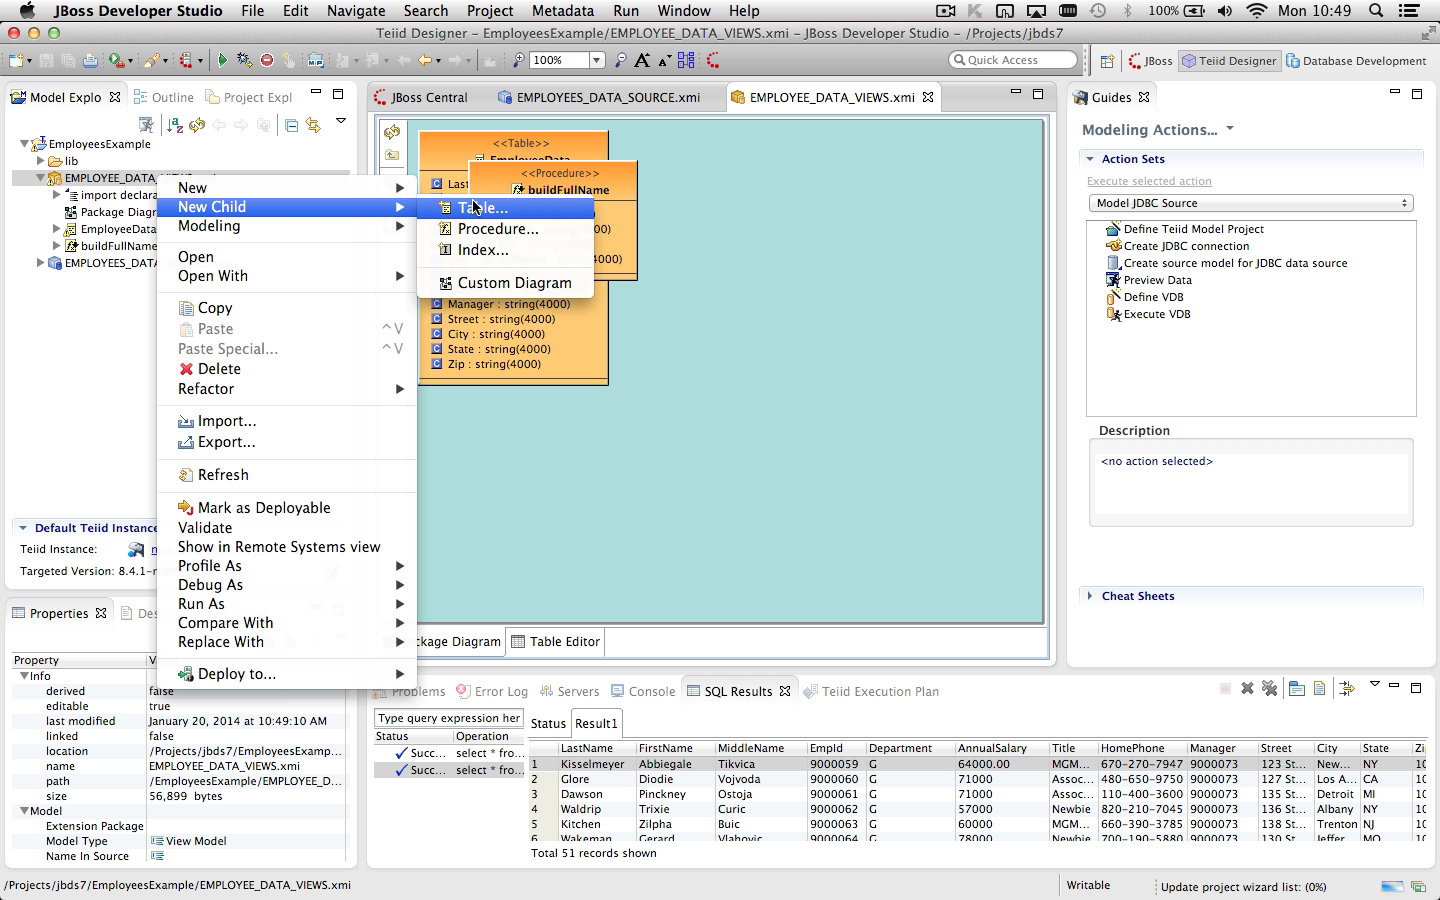
| STEP 5 - Create A View Using User Defined Function |
|---|
| Summary: Now that you've created a UDF you can now use it in a transformation to manipulate your data. In this case, the buildName() function will convert a first, middle (optional) and last name into a full name string. |
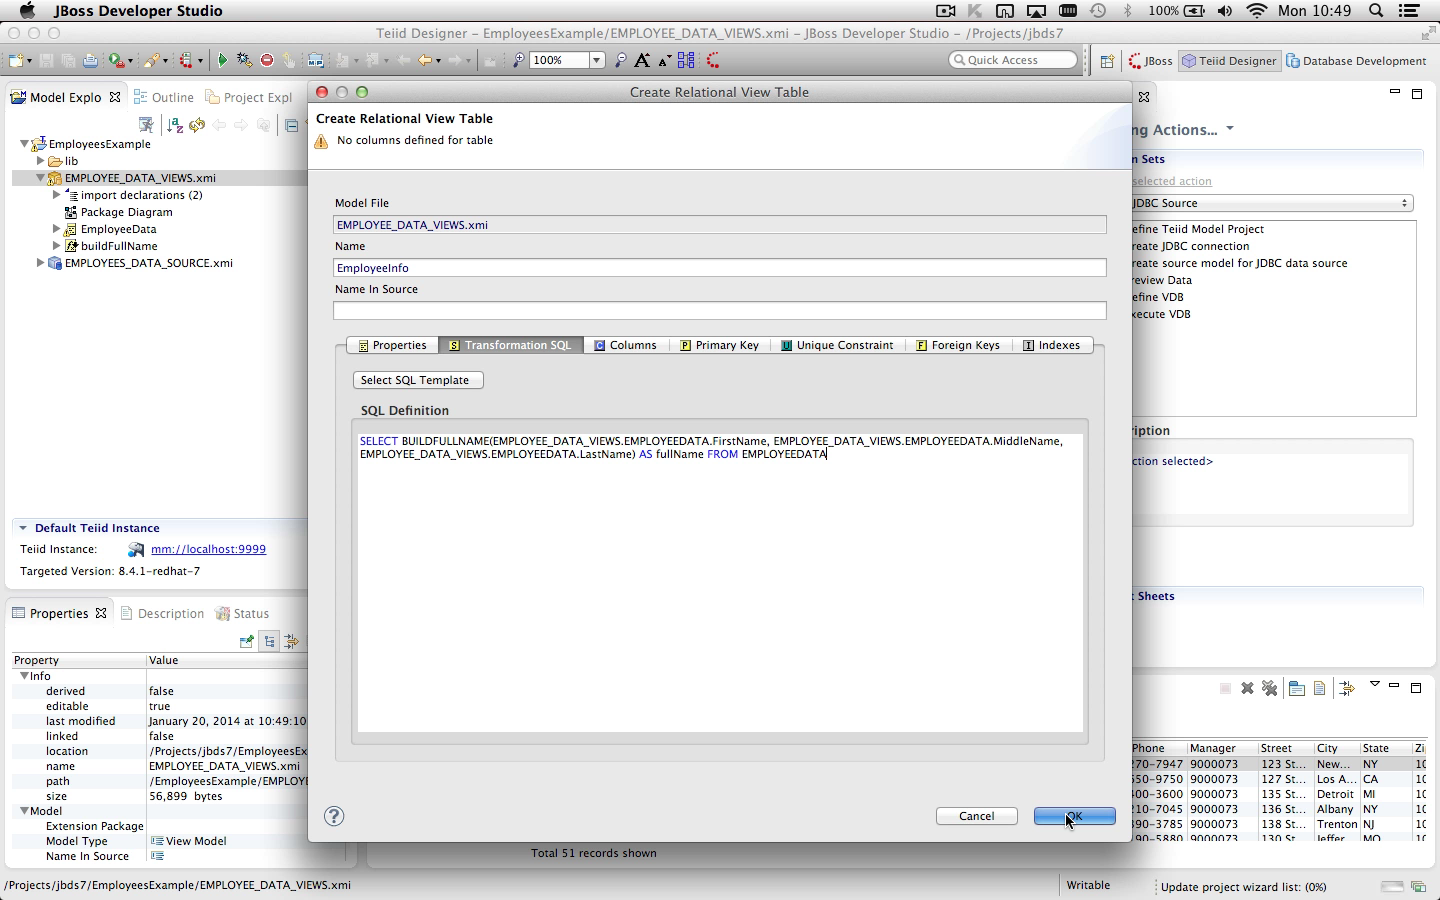
Actions - Select your EMPLOYEE_DATA_VIEWS model and right-click select New Child > Table... action

- In the Create Relational View Table Dialog
- Enter a unique view table name (i.e. EmployeeInfo )
- Select the SQL Transformation tab
- Enter the following SQL statement
- SELECT BUILDFULLNAME(EMPLOYEE_DATA_VIEWS.EMPLOYEEDATA.FirstName, EMPLOYEE_DATA_VIEWS.EMPLOYEEDATA.MiddleName, EMPLOYEE_DATA_VIEWS.EMPLOYEEDATA.LastName) AS fullName FROM EMPLOYEEDATA
- Click OK

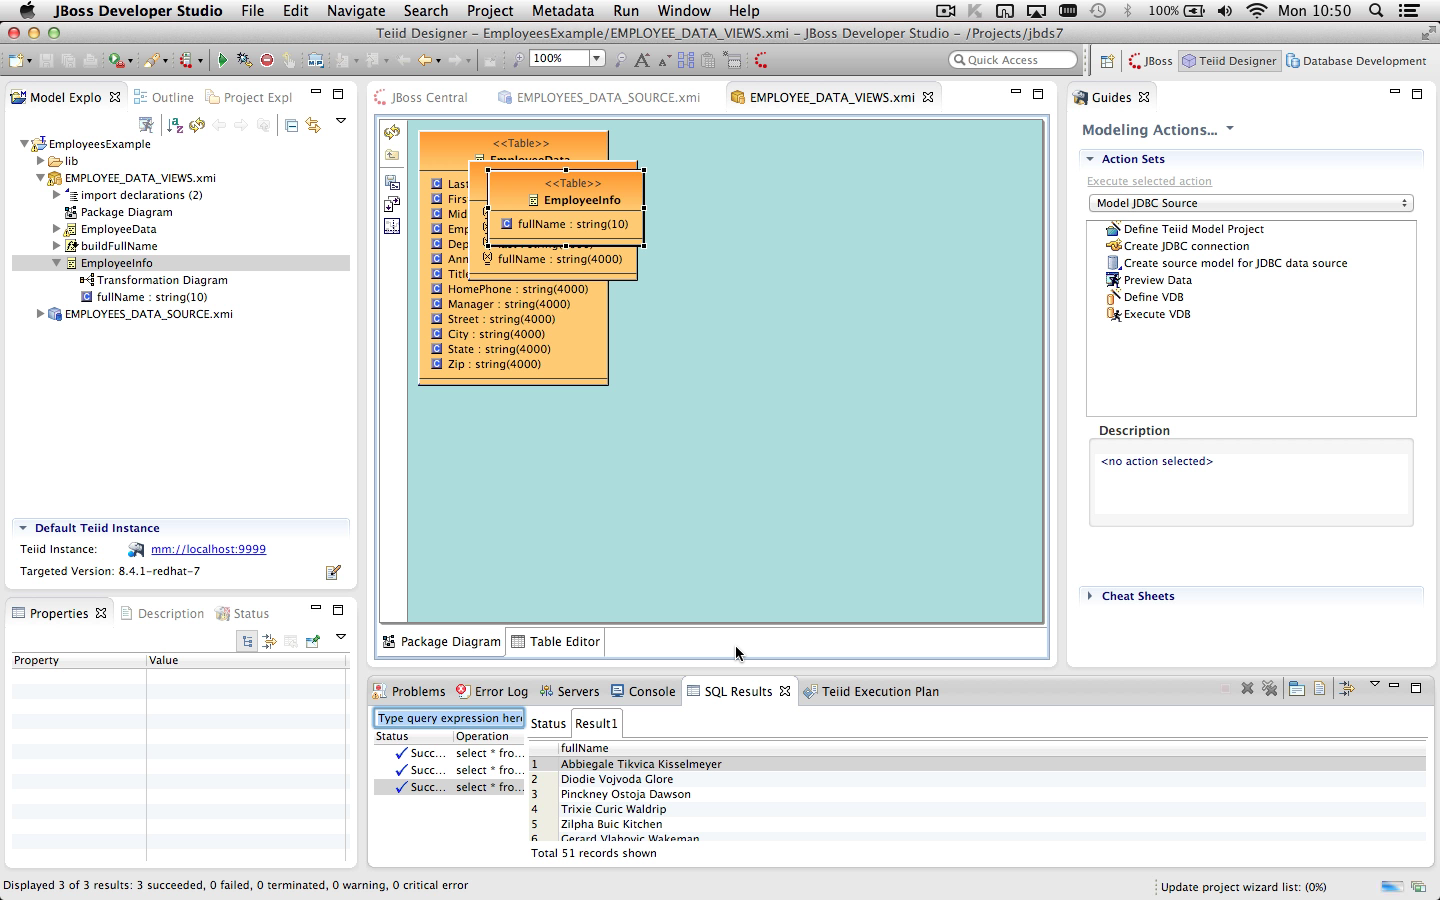
- You can test your new EmployeeInfo table by selecting it and launching the Preview Data action described in Step 3


|
| STEP 6 - Define Your VDB |
|---|
| Summary: As was discussed above, the VDB (Virtual DataBase) is Teiid's primary deployable artifact. This VDB can contain one or more models. When viewed or accessed via JDBC, these VDBs contain data base schema (models) containing tables, procedures, indexes etc... |
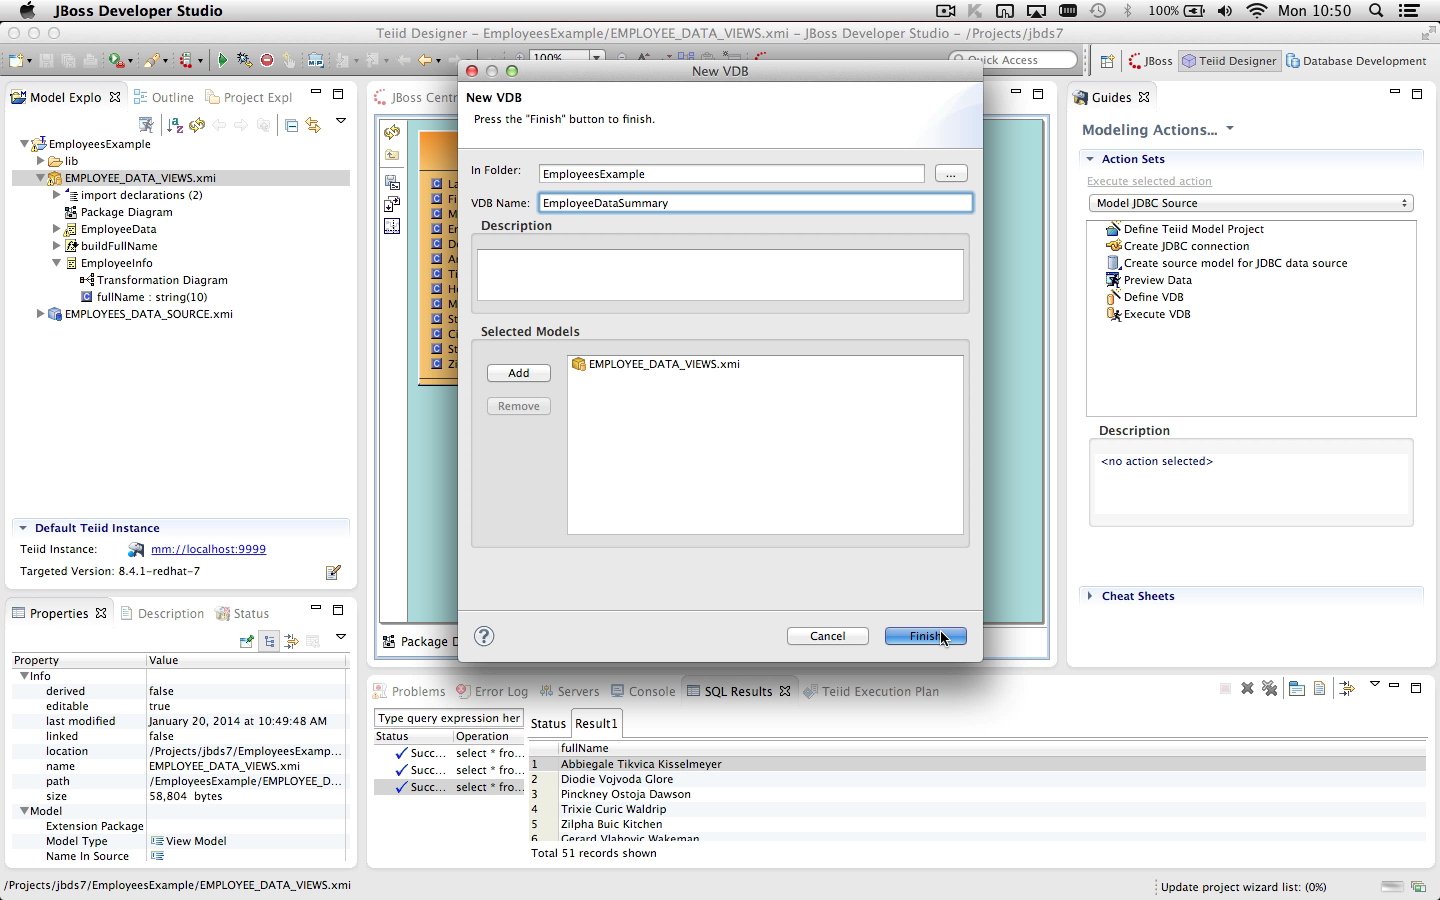
Actions - Select your EMPLOYEE_DATA_VIEWS model in the Model Explorer and right-click select the New > Teiid VDB action.
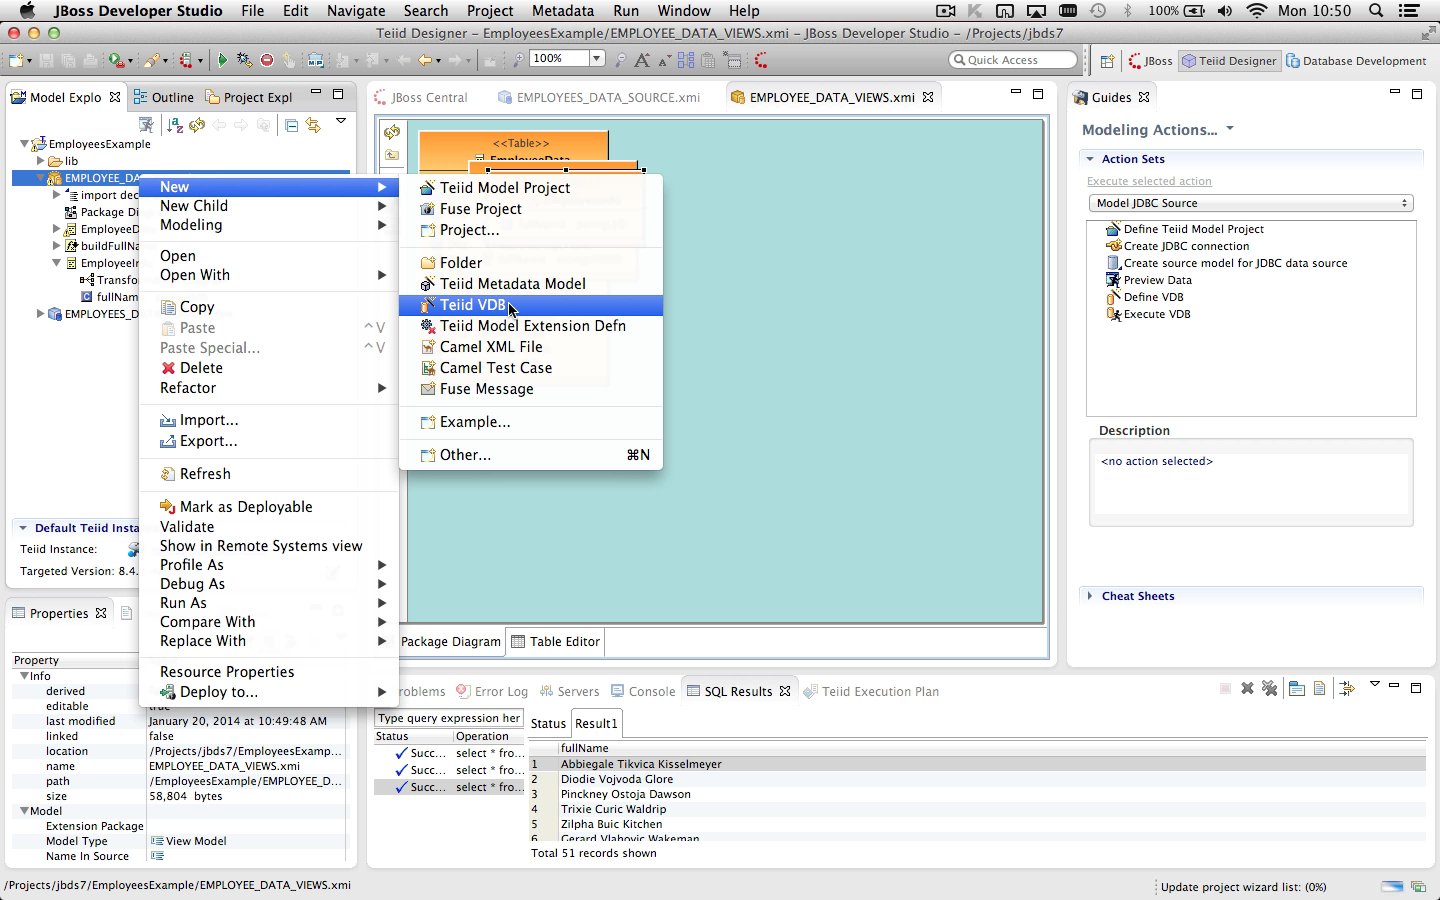
- In the New VDB dialog:
- Enter a unique VDB name (i.e. EmployeeDataSummary)
- Note that the EMPLOYEE_DATA_VIEWS model is already selected to be added to the VDB
- Note that any dependent models, in this case EMPLOYEE_DATA_SOURCE, will also be added to this VDB.
- Click Finish
|
| STEP 7 - Test Your VDB |
|---|
| Summary: This step deploys and executes a VDB to test/query actual data. JBDS simplifies this process via Deploy VDB and Execute VDB actions. |
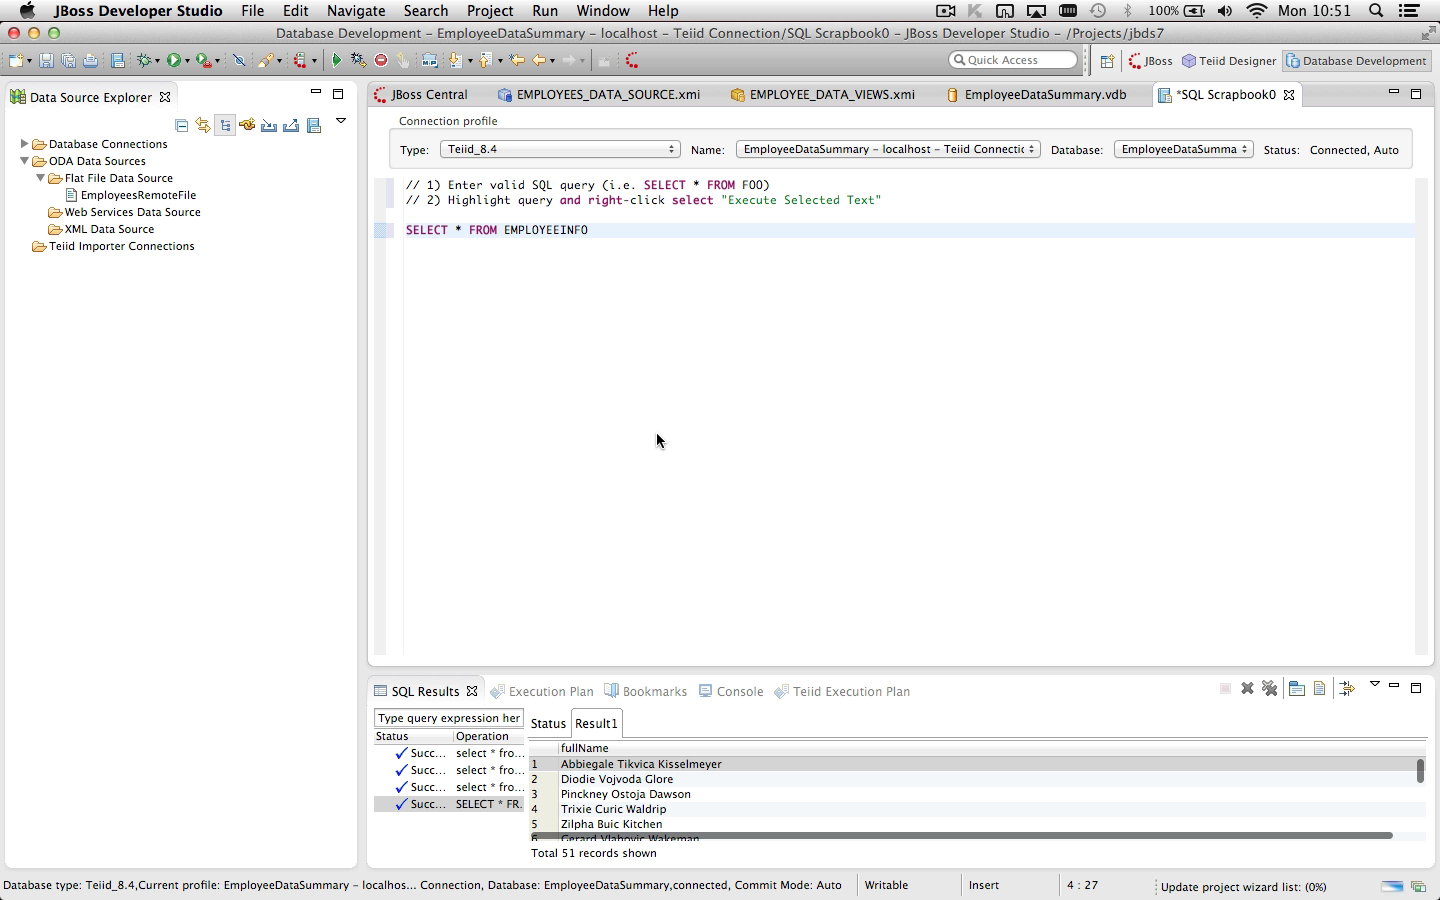
Actions - Select your VDB in the Model Explorer and right-click select Modeling > Execute VDB action.
- This action will perform the following operations.
- Deploy your VDB to your running server
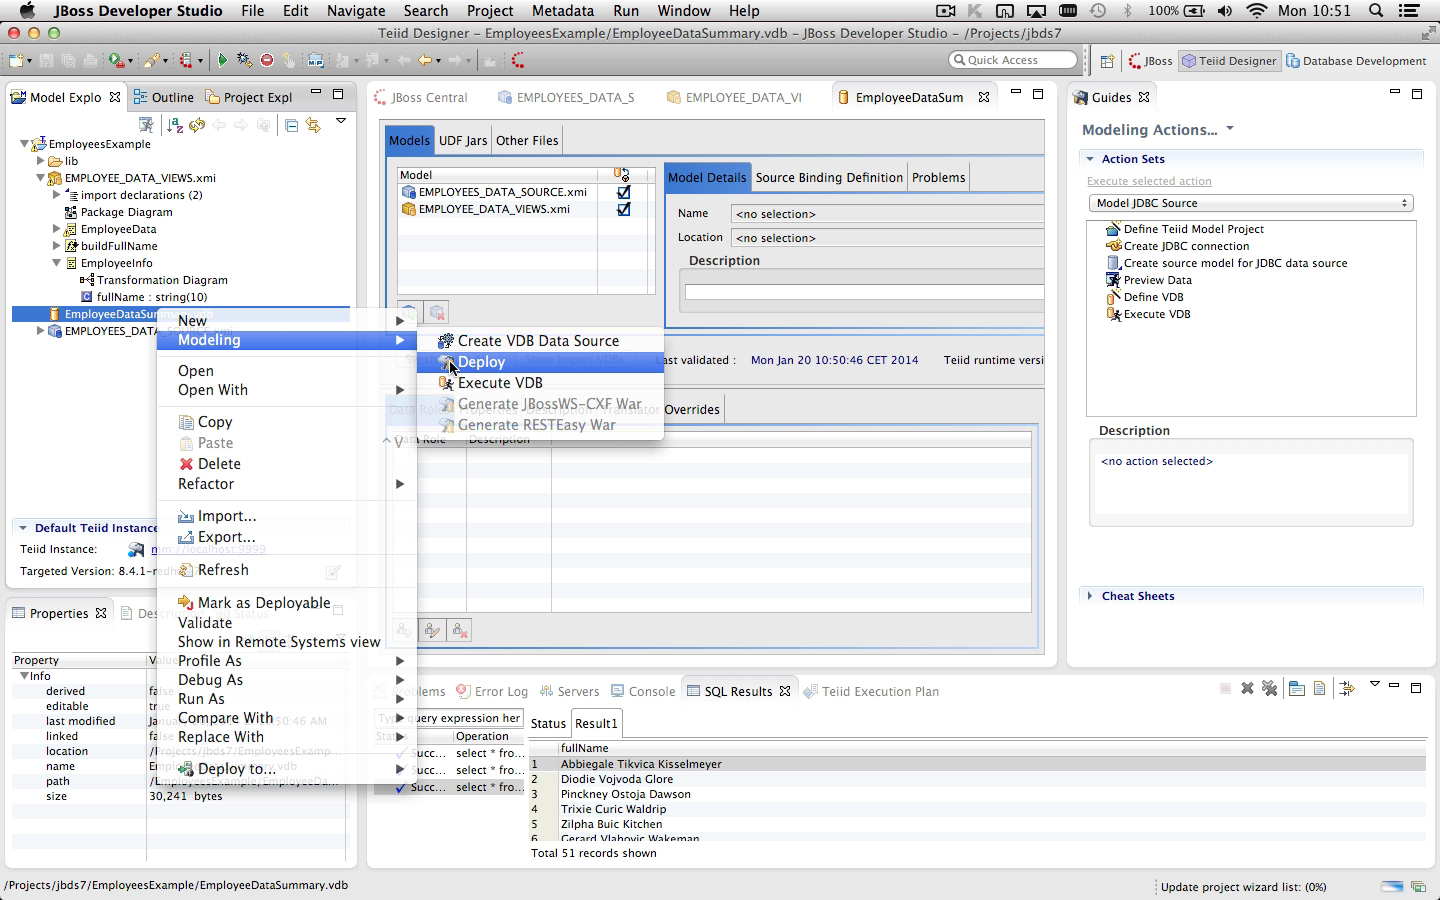
- Create and open a connection to the VDB via JDBC connection profile in Data Source Explorer
- Open a SQL Scrapbook Editor (Data Tools editor) containing instructions to execute custom queries on your data. Query results will also be shown in the SQL Results view
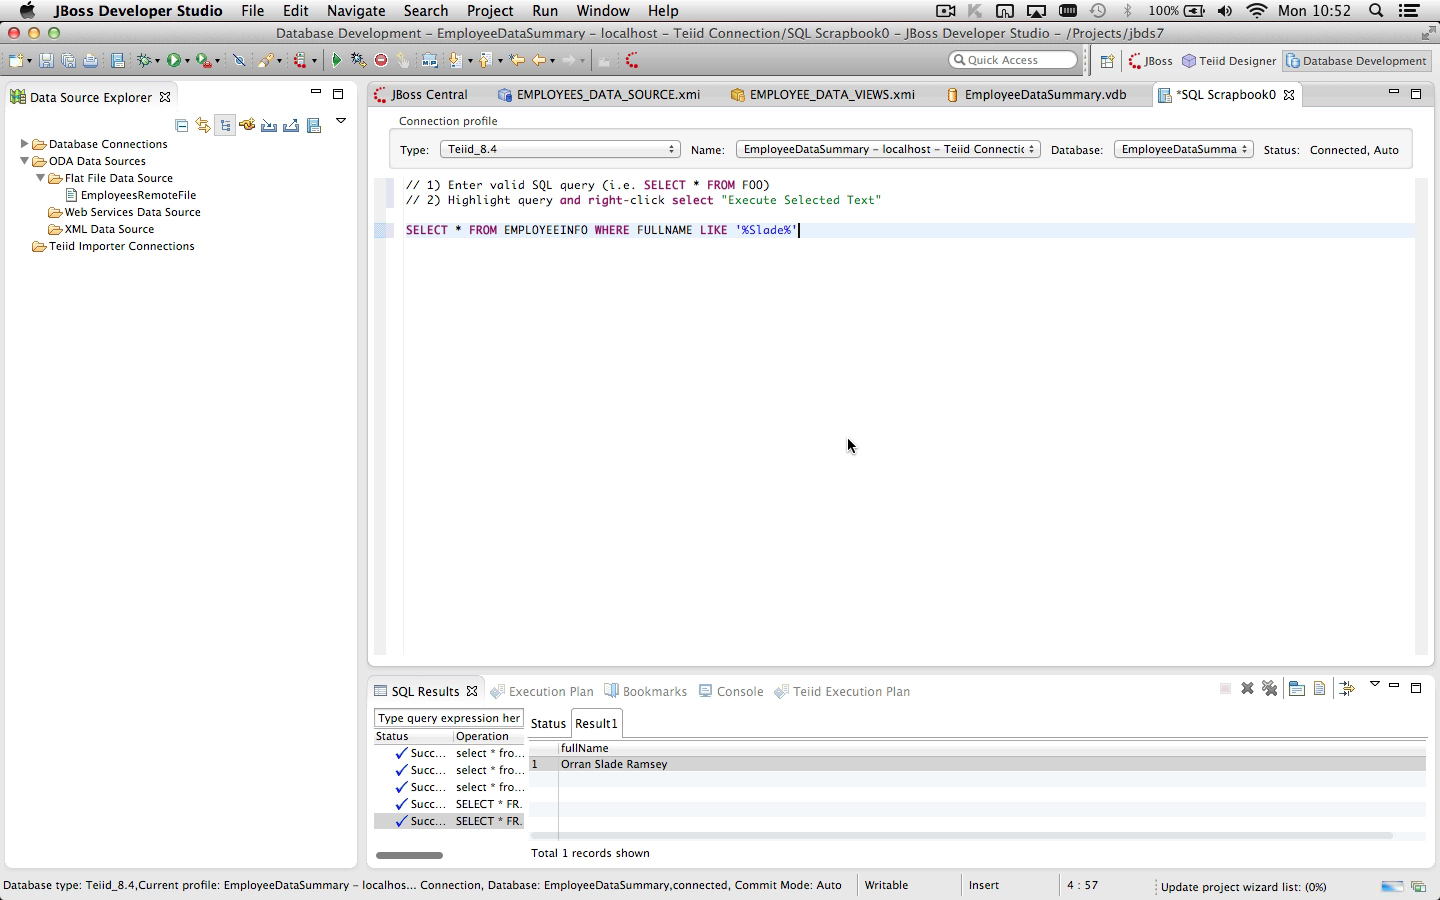
- Edit the SQL statement in the SQL Scrapbook editor and change the SQL to : SELECT * FROM EMPLOYEEINFO
- Select the SQL statement and right-click select Execute Selected Text action
- Results should return 51 full names

- Add the following statement with criteria: SELECT * FROM EMPLOYEEINFO WHERE FULLNAME LIKE '%Slade%'
- Select the SQL statement and right-click select Execute Selected Text action
- Results should return 1 name : Orran Slade Ramsey
|
Note that all of the actions you performed in this quick start are available via context menu items in the Model Explorer or standard Import or New wizards. See our users guide sections: Metadata-specific Modeling and Appendix D: Teiid Designer UI Reference for more details.


Comments