Introduction
The OData protocol is an increasingly popular RESTful interface for data access. It was originally introduced by Microsoft, but is now in the process of becoming an OASIS specification. Red Hat, SAP, IBM and others are providing support for OData with IBM, Microsoft and SAP implementing support for v4. Red Hat has been working with SAP to integrate with its OData-based SAP Gateway server and, as a result, has also implemented generic support for v2 and parts of v3 of the protocol. This article will provide an example of how to expose any datasource as an OData source and then consume the source using OData URLs.
Exposing a Relational Source via OData
Teiid, the community project which is the basis for the Red Hat's Data Virtualization product, provides an out-of-the-box OData interface for any deployed source. To demonstrate this, I will deploy a MySQL source in a Teiid virtual database and then access the data via an OData URL.
Requirements for this example
- Teiid Designer 8.2
- JBoss Application Server 7 (EAP 6.1 Alpha for Teiid 8.4+)
- Teiid 8.4
- Create a Books database instance. You will find the DDL required to create a Books database in the attached artifacts. You can create using any database you prefer, but I created a MySQL instance using this DDL. You may need to tweak it if you want to use another DBMS. This example will refer to MySQL. Create a new data source in your JBossAS instance based on the Books database.
1. Create Project
1.1 In Teiid Designer, click File->New-> Teiid Model Project
1.2 Name the project ODataBooks
2. Create Source Model
2.1 Import Books from MySQL using Import->JDBC Database>>Source Model
2.1.1 Create a new connection profile for your Books instance
2.1.2 Select the "Books" table.
2.1.3 Use BooksMySQL as the model name.
2.1.4 Click Finish button on last page of the wizard. New source model should be created.
2.1.5 Add a Primary Key on ISBN in the source table. This is a requirement to expose as an OData Entity.
3. Create Virtual Database (VDB)
3.1 File->New->Teiid VDB (use ODataBooks as VDB name)
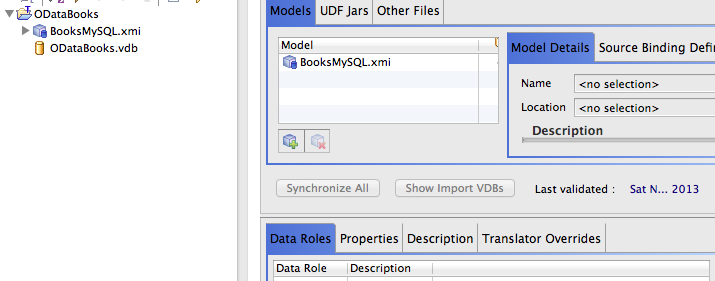
3.2 Add your source model to your VDB and click Finish.
Your workspace should look like this:
4. Create Server and Deploy
4.1 In the Server view, create a server instance for your EAP installation and start the server.
4.2 The Teiid OData provider enabled HTTPBasic security by default. Add a user/role to the teiid-security files in the Configuration folder of EAP. For example: "user=odata".
4.2 Right-click on your VDB and select Modeling->Deploy. Your VDB will be deployed and available for access via OData.
4.3 Access your VDB in a browser using http://localhost:8080/odata/ODataBooks/$metadata to see and OData representation of your VDB's metadata.
To view the Books table in JSON format, use: http://localhost:8080/odata/ODataBooks/BooksMySQL.BOOKS?$format=JSON or
http://localhost:8080/odata/ODataBooks/BooksMySQL.BOOKS for XML.
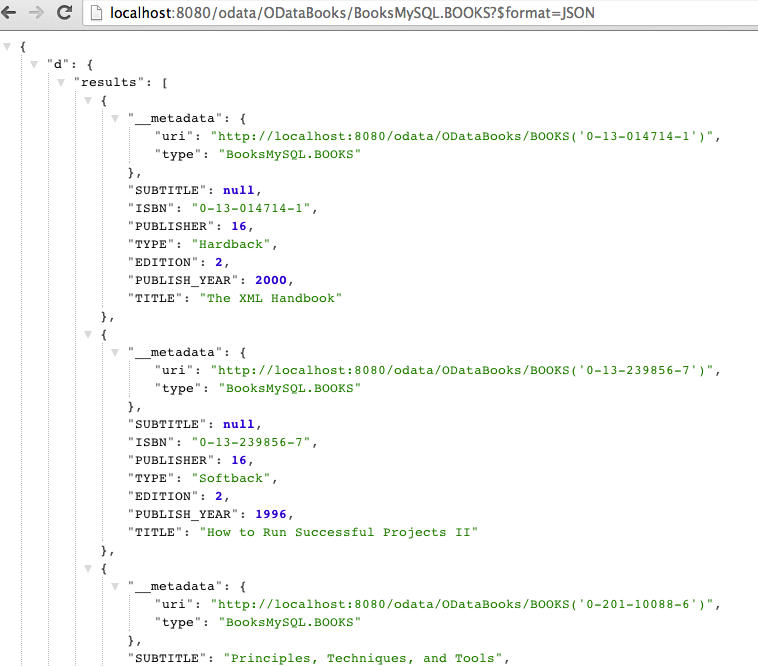
Okay.. we have now exposed our Books table via OData. Let's go full circle and consume our OData source.
5. Import Books OData Service into Teiid Designer
5.1 File->Import->File Source (XML) >> Source and View Model.
5.2 For XML File Import Mode, select XML File via Remote URL.
5.3 Create a new XML Connection Profile. For Connection Profile Options, choose REST Web Services URL. Name your Connection Profile and click Next.
5.4 For URL, enter: http://localhost:8080/odata/ODataBooks/BooksMySQL.BOOKS
5.5 Set security to HTTPBasic and enter the credentials for your user.
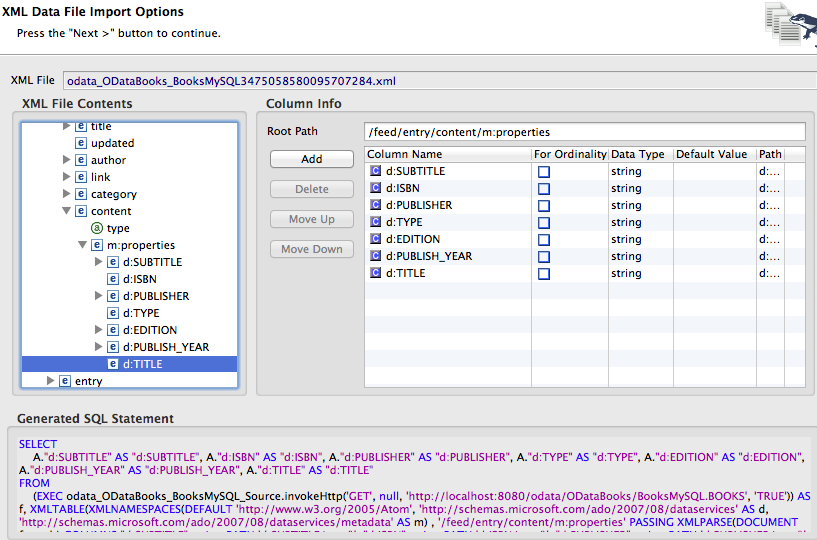
5.6 After clicking Next, you will be presented with a tree view of your Books OData response. Drill down to /feed/entry/content/m:properties and set m:properties as your root.
5.7 You can then add your columns under the m:properties node. Notice your SQL transformation is updated for you as you add columns.
5.8 Click Next to select you model and view and then click Finish. This will generate the needed source and view tables and procedures to access your OData source.
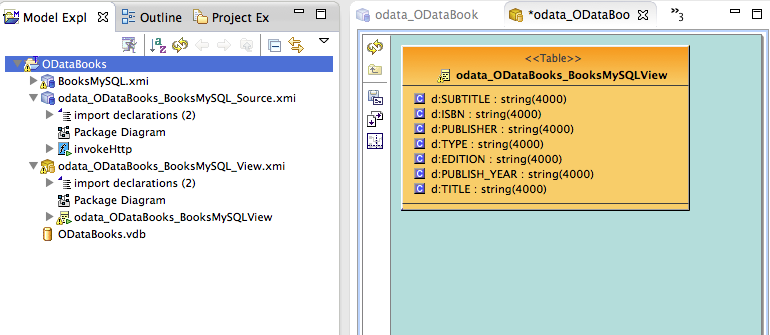
5.9 You are now ready to preview your data to see a relational representation of your OData service.
5.9.1 Right-click on odata_ODataBooks_BooksMySQL_View (or whatever you named your view) and select Modeling->Preview Data.

That's it! You have successfully created and consumed an OData service using Teiid and Teiid Designer! I have attached a completed Teiid Designer project as well as the DDL needed for this demo. Have some fun and take this demo to the next level! Add more sources and federate with the MySQL Books to create a unified OData view of ALL your data. That is the true power of data virtualization after all!
Comments