There are many ways of developing mobile web applications. This article is going to show you how to get started quickly to HTML5 + REST development. This approach uses a pure HTML5 based front end which interactions with server side content through RESTful endpoints. First we'll get the application up and running on JBoss AS 7, including tests, and mobile device access. Then we'll go over all the technical details in the companion article HTML5 Mobile Quickstart & Archetype Deep Dive.
If you are new to the mobile web, or want more information before you get started take a look at these links:
This guide will walk you through creating a new HTML5 mobile application with REST resources using a Maven archetype, deploying it to JBoss Application Server 7, executing server/client test suites, and give an overview basic behavior of the application. This will include both command line, and JBoss Tools instructions.
Prerequisites
- Java 6.0 (Java SDK 1.6)+
- Maven 3+
- JBoss Application Server 7.1+
- JBoss Tools 3.3 (optional)
Using JBoss tools is optional. Any IDE that can generate and consume projects from Maven archetypes will work. Even standard Maven command line tools are fine.
An HTML5 compatible browser is required such as Chrome, Safari 5+, Firefox 5+, or IE 9+, and note that some behaviors will vary slightly (ex. validations) based on browser support, especially IE 9. For more details on AeroGear's target browser support see AeroGear Based Examples Browser Support Targets.
Mobile web support is limited to Android and iOS devices for now, however it should run on HP, and Black Berry devices as well. Windows Phone, and others will work as jQuery Mobile announces support.
As was mentioned before there are multiple ways to create this application from the Maven archetype. The archetype is located in the Maven central repository so there is no need to follow any special Maven setup steps.
Command Line
Move to the directory you wish to create the project in. Then execute the following Maven archetype command:
mvn archetype:generate \
        -DarchetypeArtifactId=jboss-html5-mobile-archetype \
        -DarchetypeGroupId=org.jboss.aerogear.archetypes \
        -DarchetypeVersion=1.0.0.M5
Maven will download the archetype, and its dependencies then ask you some questions:
- GroupId: the base package for the project
- ArtifactId: the name of the project
- Version: the starting version of project
- Package: if you want it different from the groupId
This example uses the default ExampleDS, and a single table. You can change the table's suffix by passing `-DtableSuffix=<your desired suffix>` when running `mvn archetype:generate`. This comes in handy if you are running multiple applications generated by the same archetype, or other examples that use the same table name.
Select whatever values you wish, and when Maven asks to proceed just type "Y". You'll then have the project generated in a directory named whatever you chose for the artifactId. The projects "README.md" files contains a lot of great information to get you started.
Deploying
First you need to start the JBoss container. To do this, run
$JBOSS_HOME/bin/standalone.sh
or if you are using windows
$JBOSS_HOME/bin/standalone.bat
Note: Adding "-b 0.0.0.0" to the above commands will allow external clients (phones, tablets, desktops, etc...) connect through your local network.
For example:
$JBOSS_HOME/bin/standalone.sh -b 0.0.0.0
To deploy the application, you first need to produce the project war using the following Maven goal in the project root directory:
mvn package
You can now deploy the artifact by executing the following command:
mvn jboss-as:deploy
Access your application at http://localhost:8080/<artifactId>
To undeploy run this command:
mvn jboss-as:undeploy
Testing
This application uses two different approaches for testing. We use Arquillian to provide in-container testing of our services and we use QUnit for verifying our JavaScript. We'll discuss the details of these tests in a companion deep dive article, but for now we'll cover how to execute the tests.
Arquillian
By default, tests are configured to be skipped. The reason is that the sample's test is an Arquillian test, which requires the use of a container.
Make sure you start the JBoss AS instance as described above. Then, run the test goal with the following profile activated:
mvn test -Parq-jbossas-remote
QUnit
QUnit is a JavaScript unit testing framework used and built by jQuery. The client application includes a set of QUnit tests in order to verify JavaScript that is core to this HTML5 application. Executing QUnit test cases is quite easy. First start the JBoss AS container as described above, and then just load the following HTML file in the browser you wish to test.
<app-root>/src/test/qunit/index.html
For more information on QUnit tests see http://docs.jquery.com/QUnit
JBoss Tools
With JBoss Tools it is even easier to create, deploy, test, and develop this application than using the command line alone. The instructions below assume you've already installed JBoss Tools, and JBoss AS 7 as a server in the IDE.
Starting with JBoss Tools 3.3 there is a new splash screen called JBoss Central. This gives you quick access to loads of JBoss quickstarts, tutorials, news, and more.
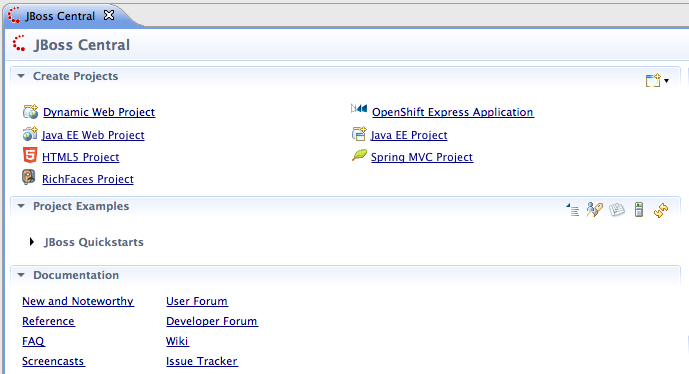
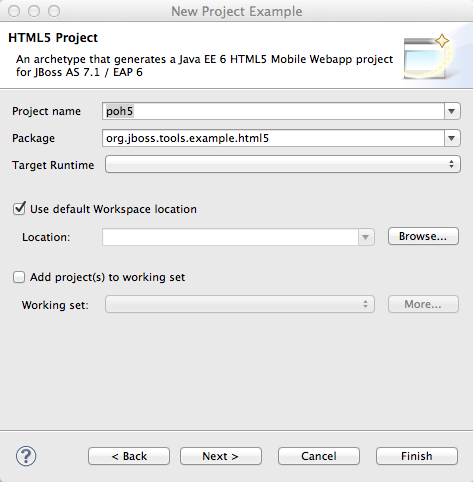
We are going to select the HTML5 Project link which is tied to this archetype. Following the wizard below enter the project name, package, target runtimes, etc... then click the Next button.
The next page should be pre-populated with values from the previous screen, and you can update if needed. When you are all set click the Finish button.
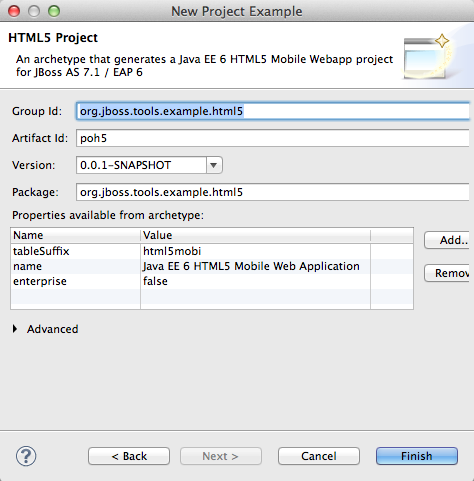
JBoss Tools will then create the application and import it as a new project in your workspace!
Deploying
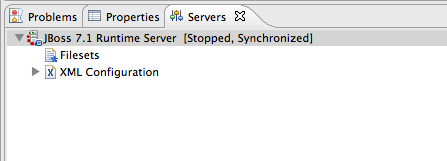
Getting the application deployed to JBoss AS7 is snap. Assuming you followed the JBoss AS7 setup instructions above you should have a server tab that looks like this:
Right click on the "JBoss 7.1 Runtime Server" and select "Add and Remove...". You should see the following screen:
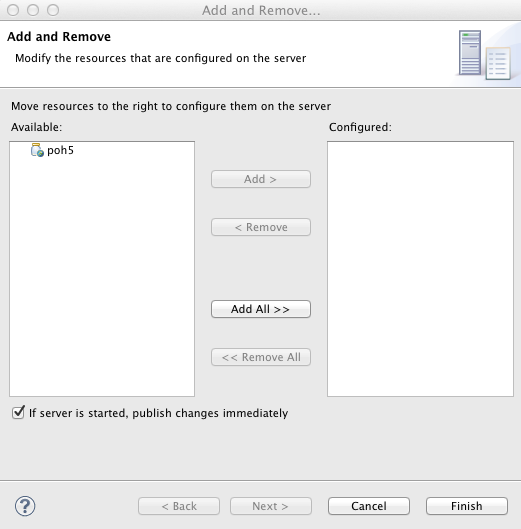
Using this wizard select your application on the left and choose to add it to the right. Click the Finished button when ready.
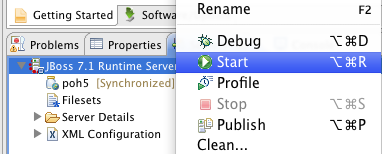
You can then start, stop, republish, and debug your application right from here:
Go ahead and start the server, and when completed (super fast because it's JBoss AS7) you can access your application at:
http://localhost:8080/<artifactId>
Testing
For our application we'll use Arquillian for testing services in-container, and QUnit for verifying our client code. We'll discuss the details of these tests in a companion deep dive article, but for now we'll cover how to execute the tests.
Arquilian
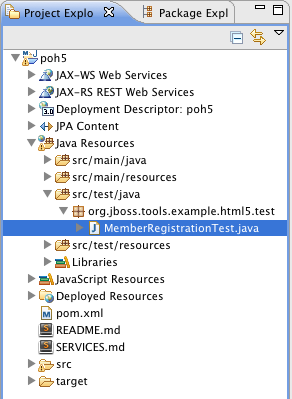
Arquillian's in-container tests can be executing like any other JUnit test in eclipse. The only thing is that for our configuration we'll need to have our JBoss container started following the JBoss Tools instructions above.
Then navigate to MemberRegistrationTest.java as shown below:
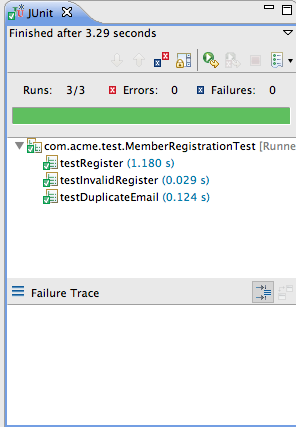
Right click on the file, and select Run As --> JUnit Test. The JUnit tab should appear, and the console should show you the tests being deployed and executed. If all goes according to plan you should see something like this:
If you run into deployment trouble with the test, please be sure to check that the "arq-jbossas-remote" maven profile is active in your projects configuration. This can be accessed by right clicking on the project and selecting Maven --> Select Maven Profiles....
QUnit
QUnit is a JavaScript unit testing framework used and built by jQuery. This application includes a set of QUnit tests in order to verify JavaScript that is core to this HTML5 application. Executing QUnit test cases is quite easy, especially in JBoss Tools.
Start the JBoss AS container as described above and then just navigate to the QUnit index.html file as shown below, right click on this and choose to Open With --> Web Browser.
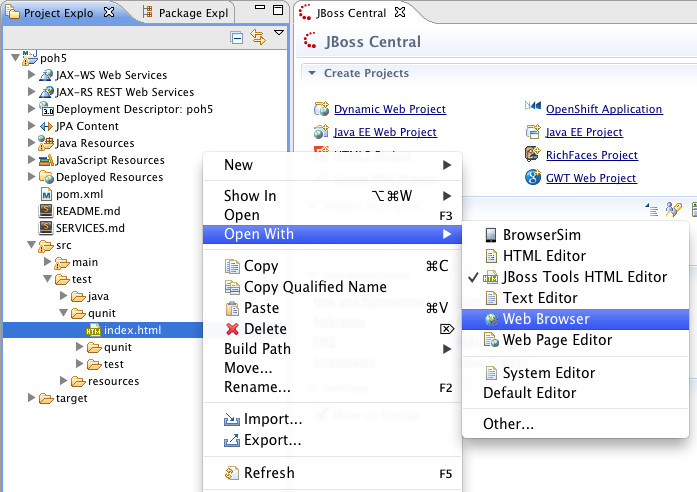
Your default browser should launch, loading, and executing the QUnit tests in the process. The browser window should look something like this:
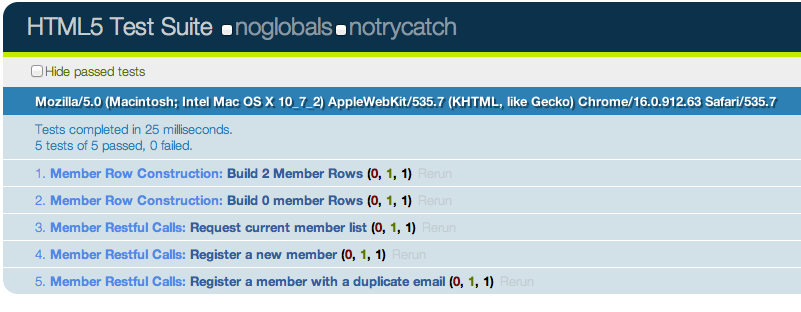
This is showing you the results of the tests that were executed.
Application in Action
Now that we've seen how to get this application running lets review some of the application screens, on both desktop and mobile devices.
Below is the application's main page when viewed with a desktop browser:
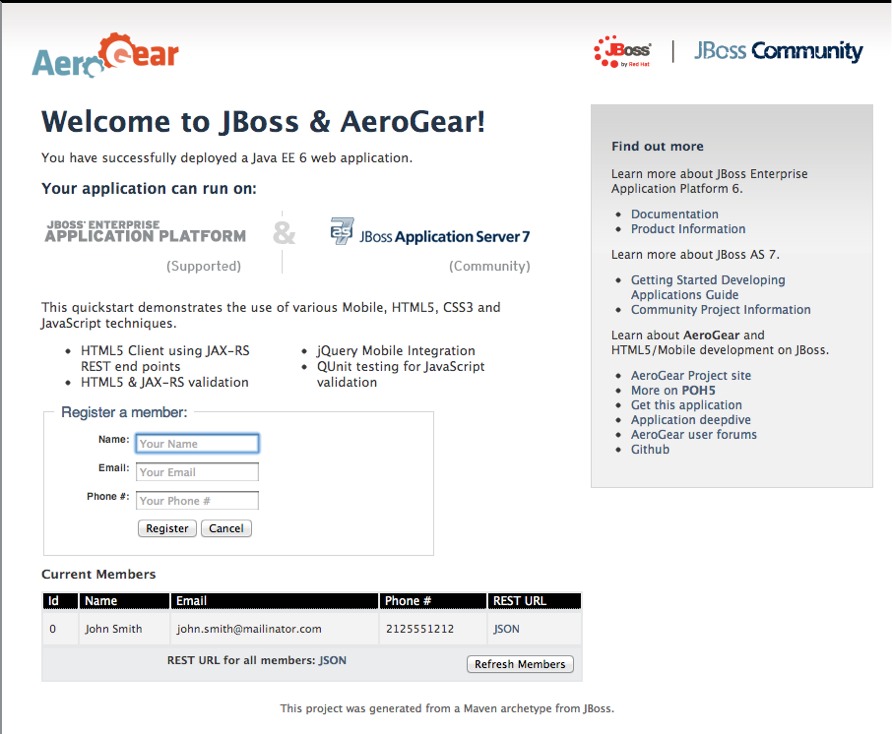
You can create new members using the form, and you will see all current members in a table at the bottom of the page. We're using jQuery to help us make JAX-RS requests to the JBoss AS7 server, handling POST and GET requests/responses, and handling errors. We're also taking advantage of new HTML5 form and page elements to help with client side validation (Chrome, FireFox only), and more.
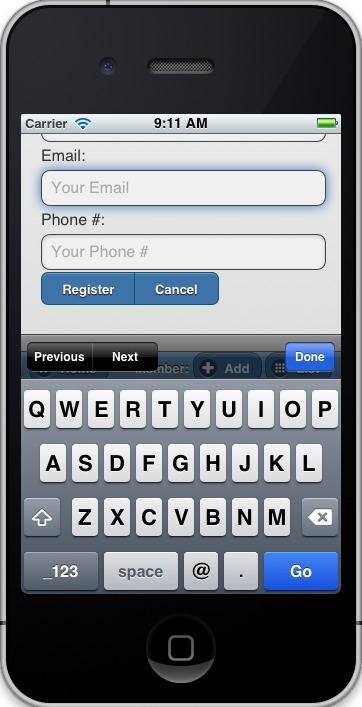
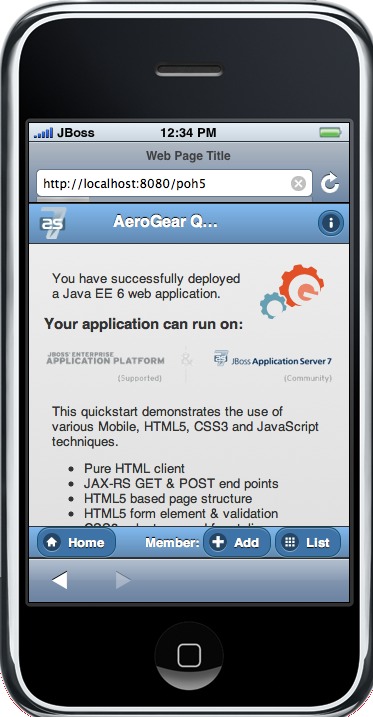
Looking at this same page from an iPhone or Android device results is something quite different:
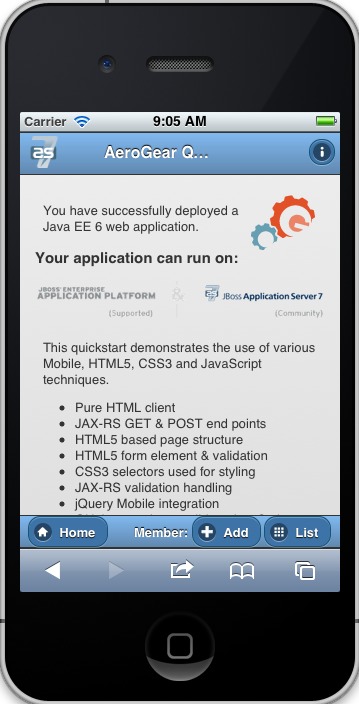
Here we're using jQuery Mobile to help us transform the same basic content into a mobile web optimized application. In the mobile version we're creating "pages" that jQuery mobile then transitions too as we make various requests. This application uses the same JAX-RS endpoints and resources as the desktop, allowing for reuse across clients. Since we're also using those HTML5 form elements the iPhone will provide users with the correct keyboard based on the data type requested!
JBoss Tools New BrowserSim
New in JBoss Tools is a browser simulator that allows you to mimic different mobile browsers. This is a great time saver for mobile web development as you can quickly check your application screens for adjustments before taking the longer steps of testing in emulators, or physical hardware.
To use the BrowserSim navigate to the index.html file, right click and choose "Open With --> BrowserSim". A new window like the one below will popup loading your page. You can then manipulate what browser to mimic different browsers using the "Devices" menu.
Diving in Deeper
In this article we've shown you how to get started with your own HTML5 based application for both desktop and mobile clients on JBoss. This is the just tip of the iceberg! To dig deeper in the code, and inner workings of this application please following the links below:
- HTML5 Mobile Quickstart & Archetype Deep Dive
- Testing HTML5 Applications
- Deploying HTML5 Applications To Openshift
You can also watch a webinar where Jay Balunas presented a version of the archetype, and discussed some of the inner workings in more detail:
Comments