Connect to XML over HTTP
This article will guide you through an example of connecting to an XML document over HTTP as a relational source, using Teiid Designer. It is assumed that you have already installed Teiid Designer version 7.6 or higher. This article is part of a complete demo, but can be used as a stand-alone demo for setting up and testing your XML over HTTP sources.
- Start your local teiid server instance
- Teiid Designer requires a running teiid server for Data Preview. We will use the Data Preview capability to test our XML source.
- In Teiid Designer, import from the XML source to create models
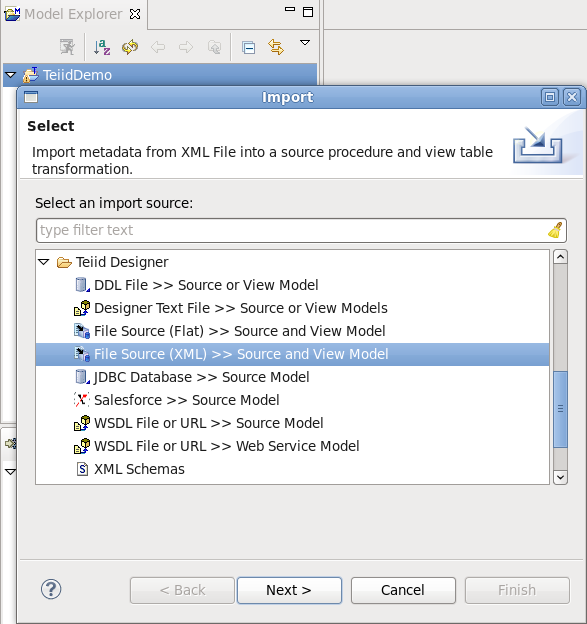
- Select File > Import... > File Source (XML) >> Source and View Model , then click Next
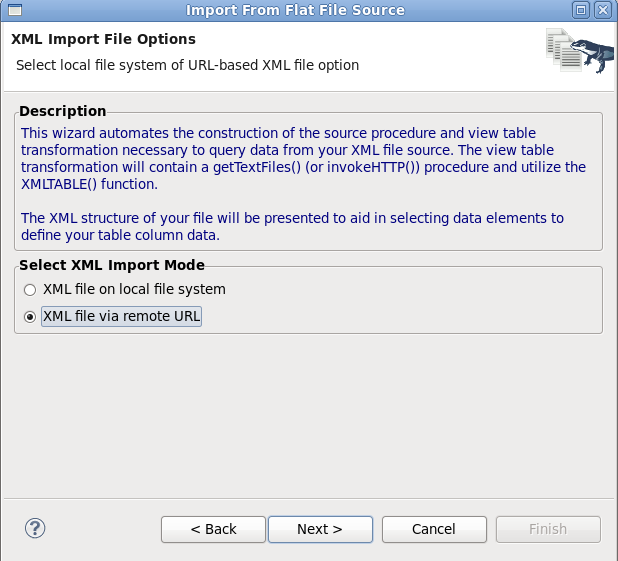
- On the 'XML Import File Options' page, under Select XML Import Mode, choose the XML file via remote URL option, then click Next.
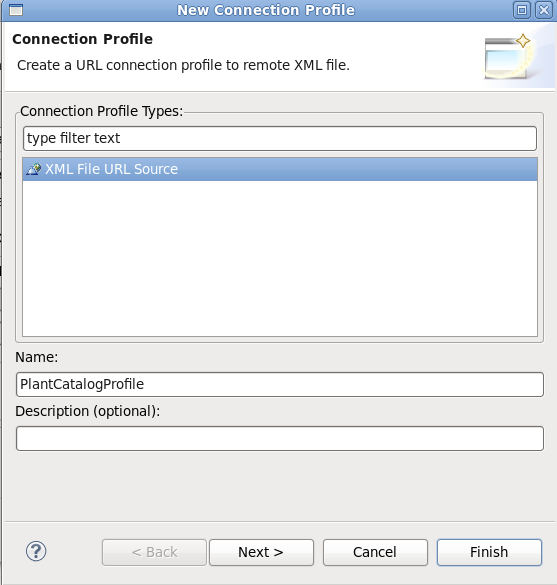
- On the 'New Connection Profile' page, XML File URL Source should be selected. Type in PlantCatalogXML for the profile Name, then click Next
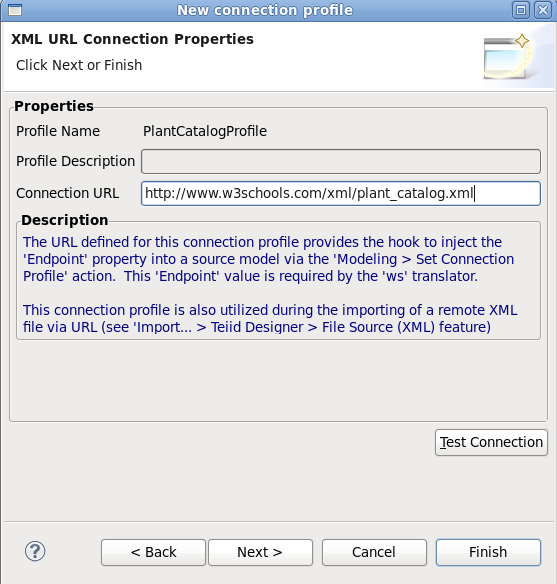
- On the XML URL Connection Properties page of the Connection Profile Wizard, enter http://www.w3schools.com/xml/plant_catalog.xml for the ConnectionURL. Click on the 'Test Connection' button to verify a successful connection. Click Next.
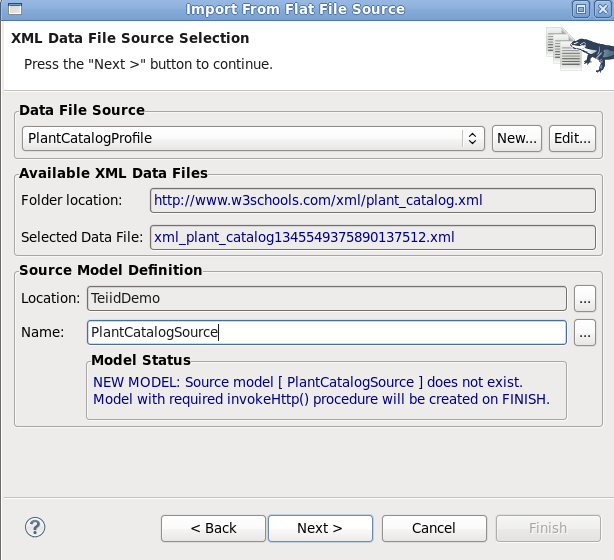
- Click Finish on the Connection Profile wizards summary page. Then back on the 'XML Data File Source Selection' page, the Folder location will show the URL, along with an auto-named File, as shown below. Under Source Model Definition, type 'PlantCatalogSource' for the Name: click Next
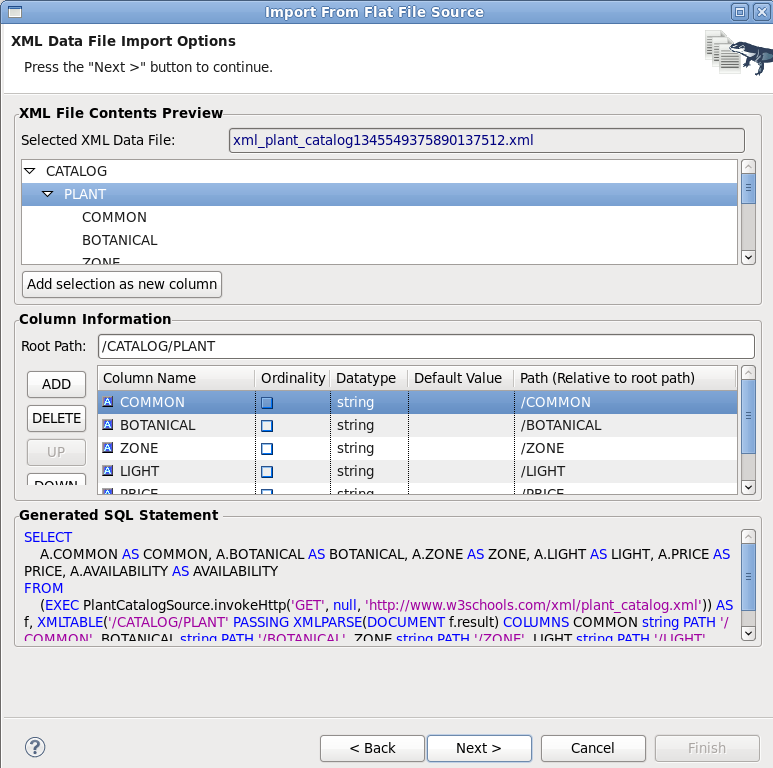
- On the 'XML Data File Import Options' page you are now presented with the XML File Contents Preview of the selected xml file. Expand the preview tree. Select the 'PLANT' node, then 'Rt-Click > Set As Root Path' This populates the Root Path under 'Column Information' section. Next, select each child node under 'PLANT' (COMMON, BOTANICAL, ZONE, LIGHT, PRICE, AVAILABILITY). For each node, click the 'Add selection as new column' button. Each child will generated as a column under 'Column Information'. You will also see the Generated SQL Statement which will be used. Click Next
- Finally on the 'View Model Definition' page, you will enter the name of the View Model and table that you'd like to place over the source. For 'Name', type 'PlantCatalogView'. Under 'New view table name' change the 'New view table name' to 'Plants' Click Finish

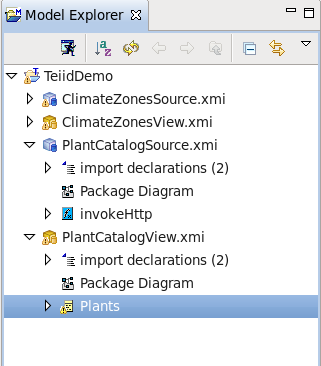
- Upon finish, you will see two additional Models in the 'Model Explorer' view, 'PlantCatalogSource' and 'PlantCatalogView'. The source model contains a single 'invokeHttp' function, which retrieves the contents at the specified URL. The 'PlantCatalogView' model contains a single table 'Plants', which exposes the data as a relational table.
- To test the Plants table, click on it in Model Explorer, then click on the 'running man' icon. You should get a result table of Plant catalog data as shown below

- Congratulations, you have successfully connected to XML over HTTP!
Comments