JBoss Tools introduced JSF 2 Composite Component support in version 3.2.0.M1, it matured through several development versions and got a lot of useful features like:
- Content assist for component developers
- Content assist for component users
- Validation and quick fixes
- Refactoring
- Rendering in Visual Editor
- Source Navigation
- in text editor by Ctrl+Right Mouse Button Click on hyperlink
- in visual part by Double Mouse Click
Prerequisites
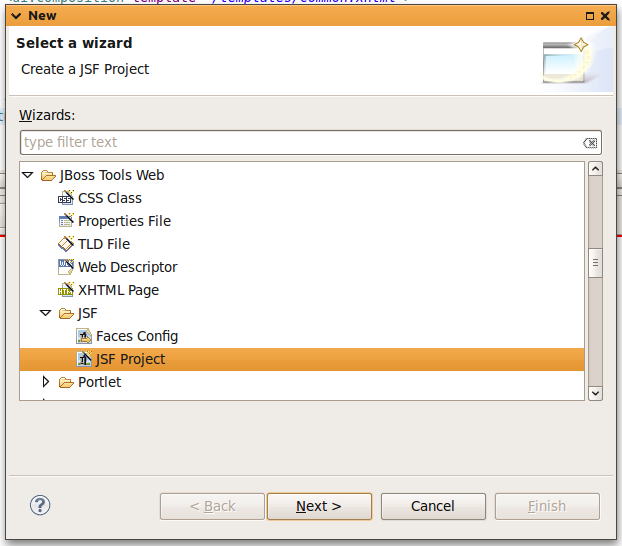
To check this out lets start from New JSF Project wizard and follow simple steps. Select "Find JBoss Tools Web -> JSF -> JSF Project" in New Dialog (see screenshot below)
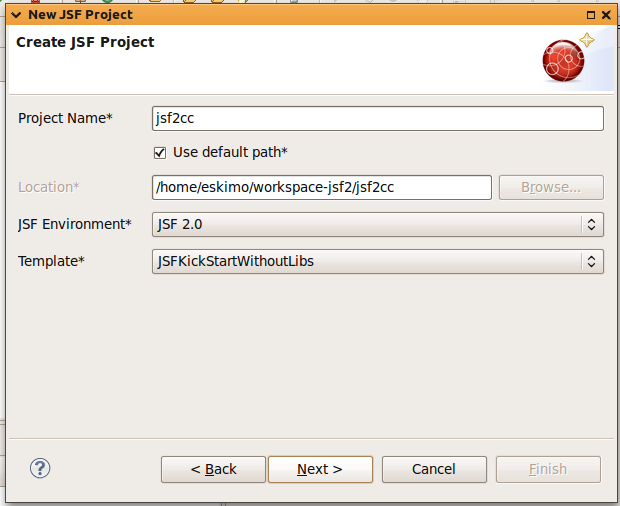
Then fill "Create JSF Project" step with name and select "JSF 2.0" in "JSF Environment"
On last step select Runtime Servlet Container and server to deploy your application to. Runtime is required, if you don't have one just create new.

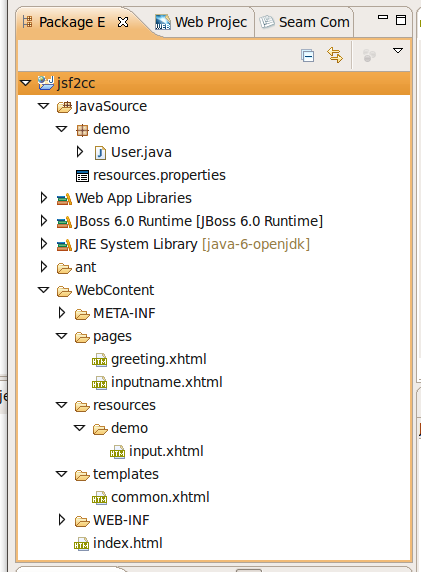
After Finish button's pressed new project appears in navigator. Its structure is shown below and it is reincarnation of JSF 1.2 KickStart project which is implemented using JSF 2 Composite Components.
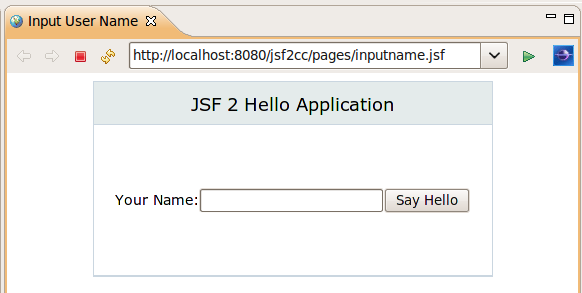
At runtime it should look in your browser like this
Lets see what features JBoss Tools provides for JSF 2 Composite Components.
Rendering in Visual Editor
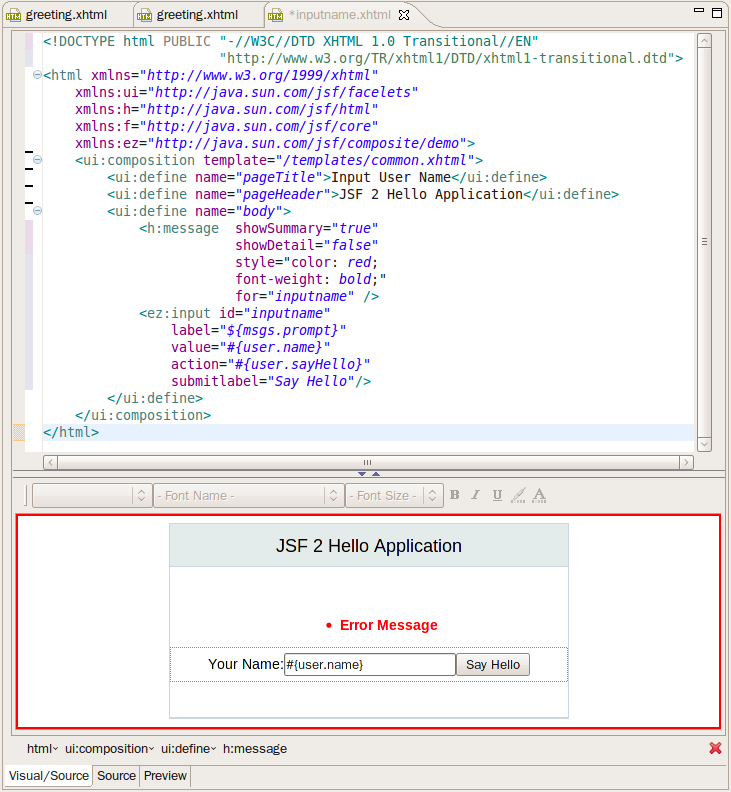
Visual Editor discovers composite components and it is able to render them. inputname.xhtml opened in xhtml editor looks almost the same (see picture below) as at runtime (see picture above)
greeting.xhtm does not use composite component to render greeting and this article is going to show how to do this using JBoss Tools features for composite components. We're going to replace greeting text rendering form greeting.xhtml with new demo:greeting component, which takes demo.User instance as attribute and render greeting the same way greeting.xhtml does.
Composite Component Wizard
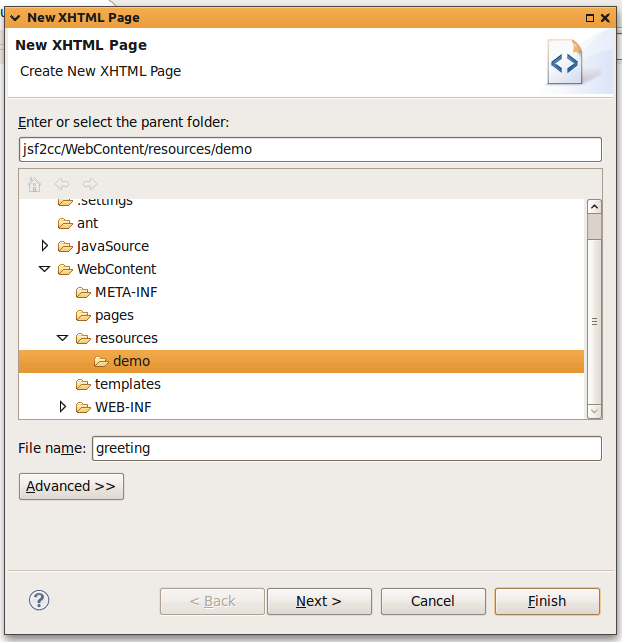
First, new composite component should be created using JBoss Tools XHTML New Wizard. Picture below show how to call XHTML New Wizard from Web Development Perspective.

Then in first step input component name as as shown below.
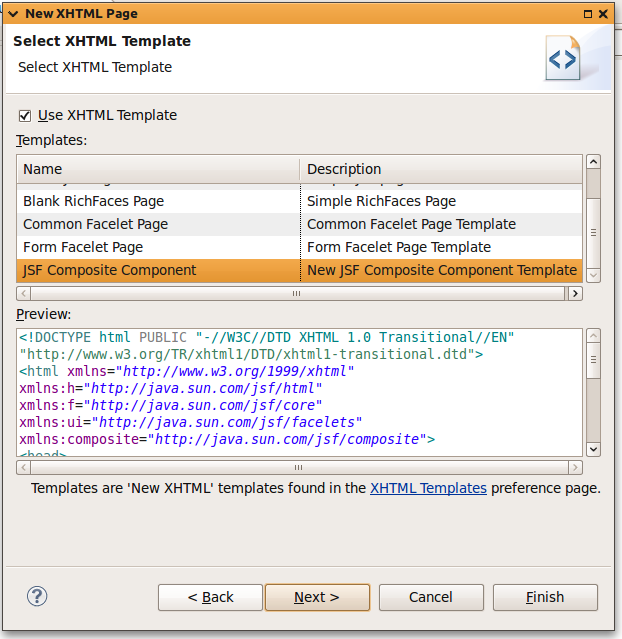
Select Use XHTL Template checkbox and JSF Composite Component from template list.
Content Assist
After finishing in opened editor composite:interface and composite:implementation elements should be filed with template attributes and template content. Short description can be provided for composite:interface through shortDescription attribute, but is not used now by JBoss Tools.
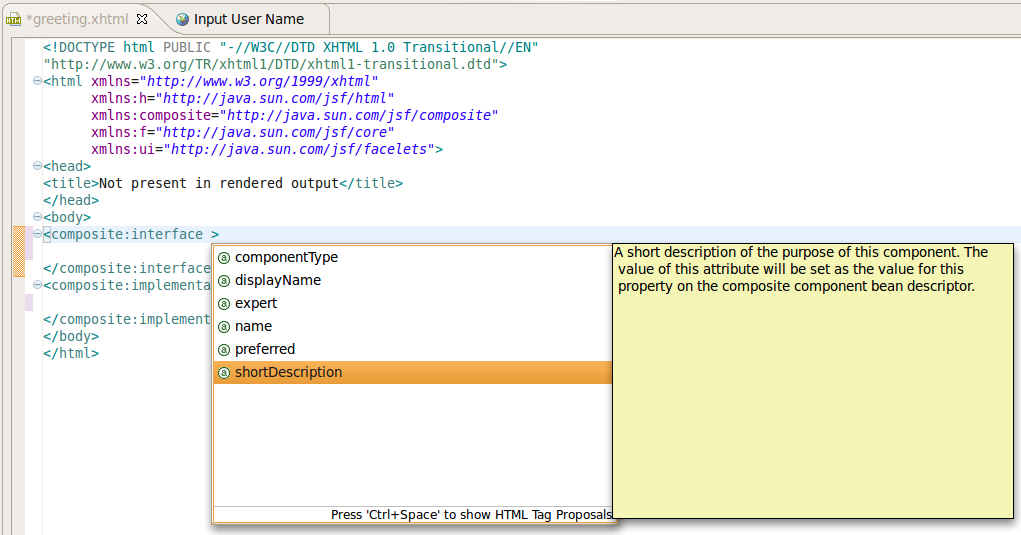
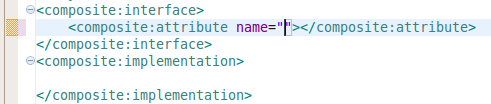
We are creating component to show greeting message for user, so we need to add attribute "user" to pass it to component. Content assist provides proposal list for all composite:interface children nodes. It also shows documentation in documentation hover for selected proposal.

Inserted attribute has cursor located inside quotation marks and that lets to type attribute name as "user" right after proposal is inserted.
Text editor provides content assist with help for attributes inside tags from composite component namespace.
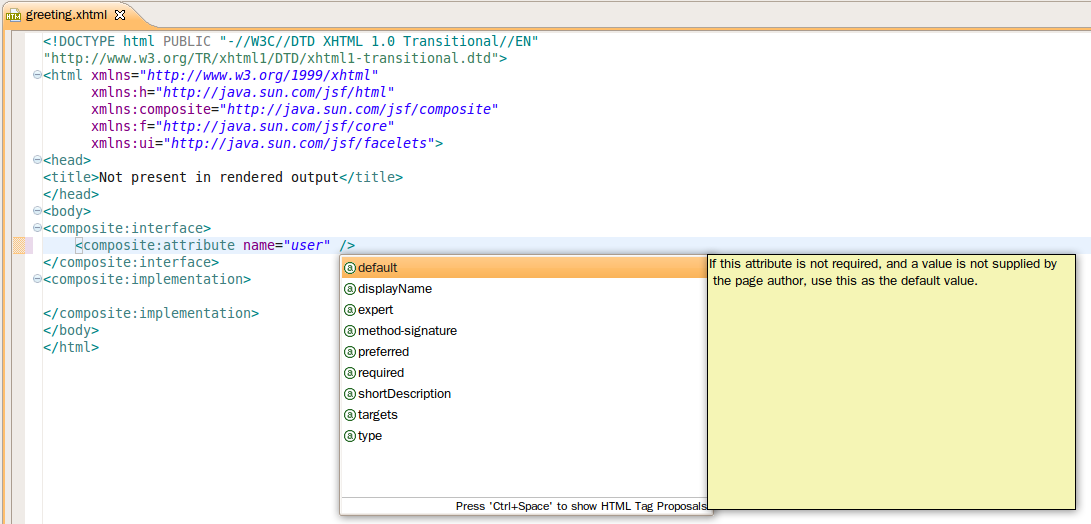
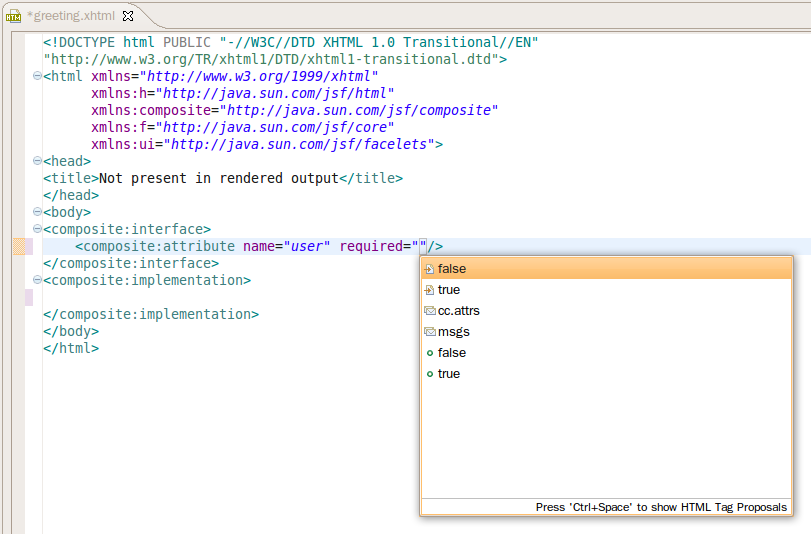
Using this content assist it is easy to mark new greeting component attribute "user" as required and provide short description for it. For most attributes there are predefined values available through content assist like it is shown below for "required" attribute.
After we're done with component's attribute definition it should look like this

Implementation for greeting component is going to be simple, it looks almost the same as body definition in greeting.xhtml page. The diffrence is in using cc.attr to reference user attribute.
#{megs.greeting} #{cc.attrs.user.name}!
Finished component in resources/demo/greeting.xhtml should look like it is shown below

Full text for greeting component is here:
<!DOCTYPE html PUBLIC "-//W3C//DTD XHTML 1.0 Transitional//EN"
"http://www.w3.org/TR/xhtml1/DTD/xhtml1-transitional.dtd">
<html xmlns="http://www.w3.org/1999/xhtml"
      xmlns:h="http://java.sun.com/jsf/html"
      xmlns:composite="http://java.sun.com/jsf/composite"
      xmlns:f="http://java.sun.com/jsf/core"
      xmlns:ui="http://java.sun.com/jsf/facelets">
<head>
<title>Not present in rendered output</title>
</head>
<body>
<composite:interface>
    <composite:attribute name="user" required=""/>
</composite:interface>
<composite:implementation>
    #{megs.greeting} #{cc.attrs.user.name}!
</composite:implementation>
</body>
</html>
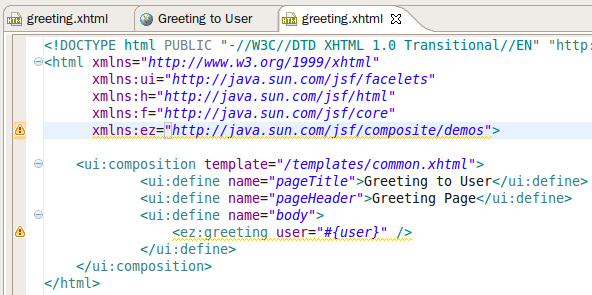
To use new greeting component in greeting.xhtml page root html element should be extended with demo composite component namespace. Add namespace xmlns:ez="http://java.sun.com/jsf/composite/demo" after xmlns:f namespce and save the file or new component is not going to be visible for content assist. After removing content of <ui:define name="body"> request content assist by Ctrl+Space and content assist proposal list with components from resources/demo directory appears.
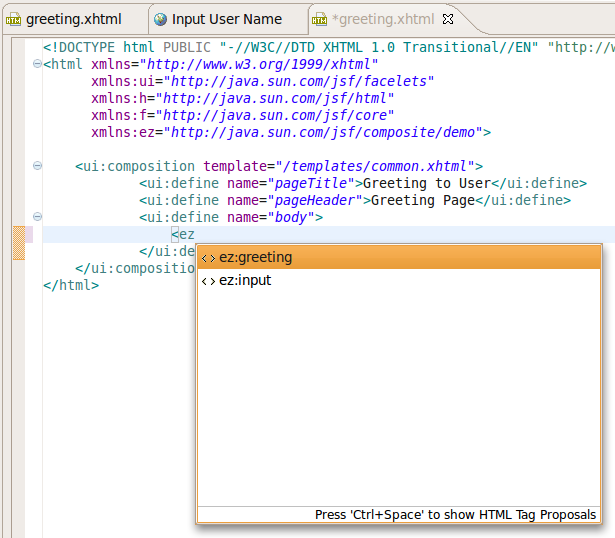
Select ez:greeting completion proposal and it inserts composite component tag with all required attributes, for greeting component we've defined above it is going to be only user attribute

If optional attribute should be set use content assist for composite component attributes. For example for greeting component. which has only one attribute, content assist would look like
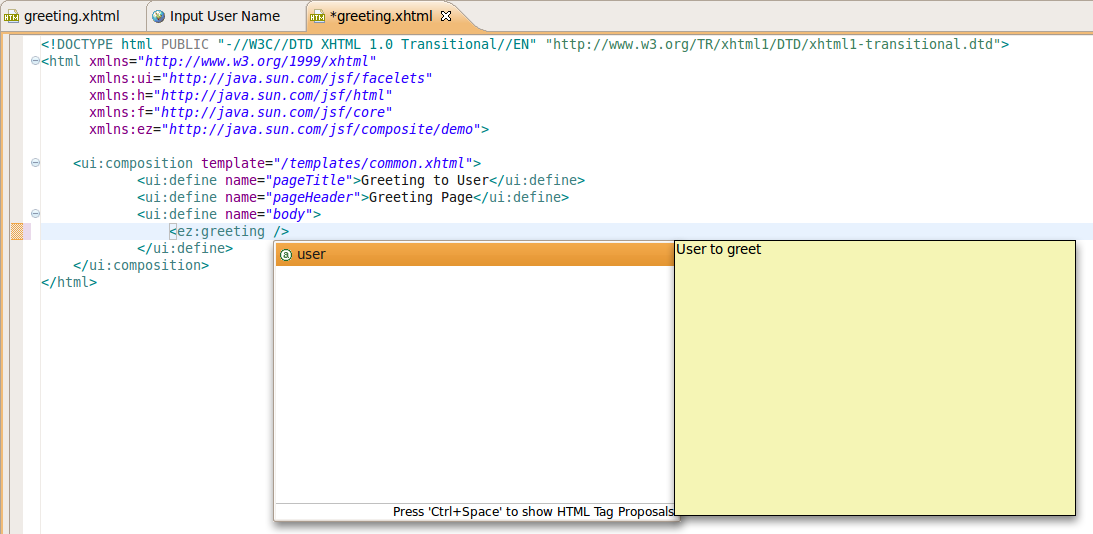
and it contains attributes with documentation hover filled with shortDescription text.
Validation
JSF 2 Composite Components validator checks correctness of namespace declaration for component and each component from declared namespace. If demo component from examples above is renamed to demos like it is done on screenshot below
then two warning markers are created for new file after it is saved.

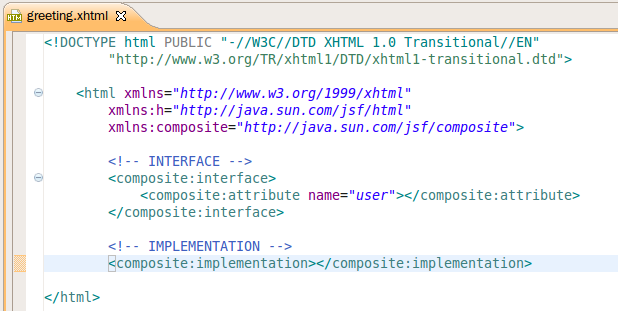
Marker for namespace declaration provides Quick Fix to create a missing folder. If it is selected, demos folder is created in JSF 2 resources folder.

Marker for component from missing namespace also provides Quick Fix, which suggests to create component XHTML file.
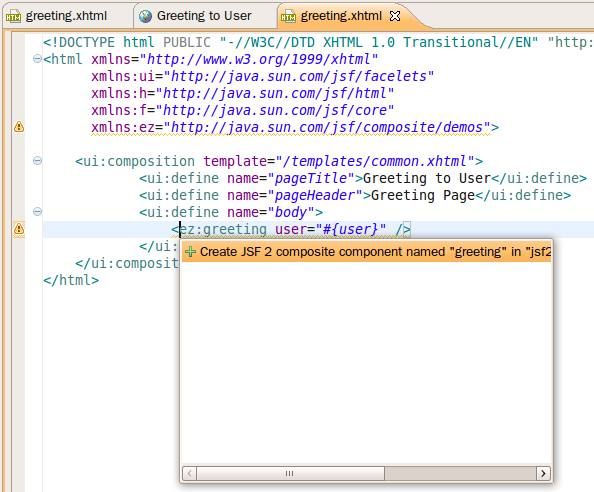
If Quick Fix for missing component is selected it reconstructs JSF 2 Composite Component based on tag name and attributes. It leaves implementation part of the component empty
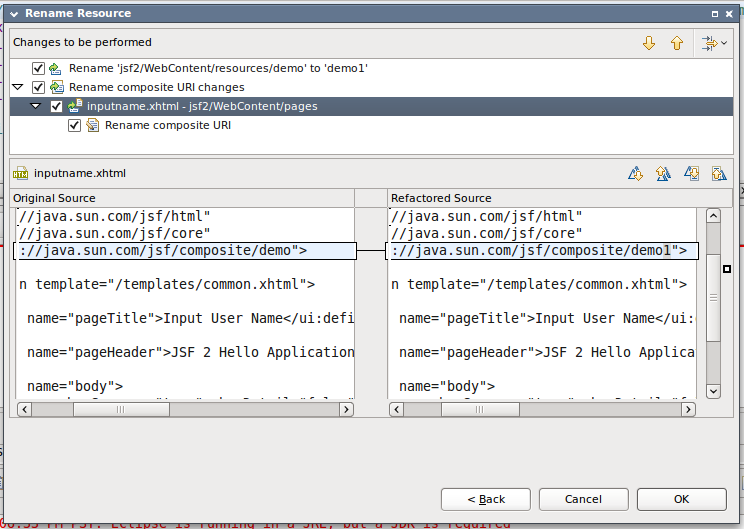
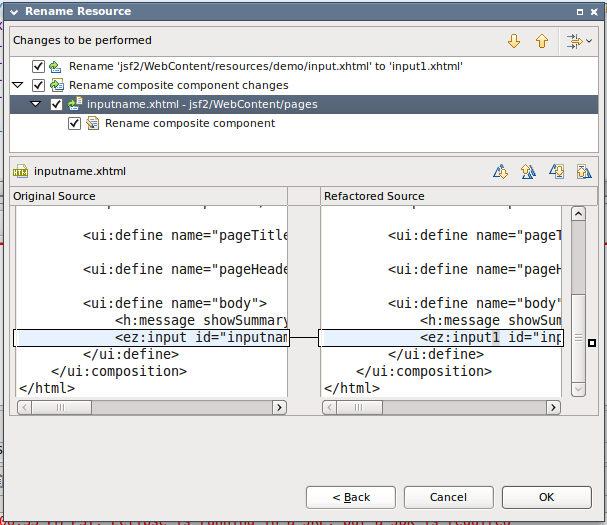
Refactoring
Refactoring supported for renaming folders referenced in composite component URI and for renaming component XHTML files.
Lets imagine WebContent/resources/demo folder from our project is going to be renamed through Rename action in Package Explorer view. After new folder name is entered, Preview button is going to be activated and it shows that renaming of demo folder affects composite component URI in inputname.xhtml page.
For renaming actual component's xhtml files it suggests to update component names in affected files. On screenshot below it shows what happens when input.xhtml component is renamed in demo folder
Comments