Note: This method is not supported for GateIn 3.2. Please referr to https://docs.jboss.org/author/display/GTNPORTAL/GateIn+Management for information on managing GateIn and Export/Import support.
Export / Import Gadget
An export/import gadget will allow the ability to export and import site layouts, pages, and navigation while inside the GateIn portal. The portal container which is used for export/import is the portal container the gadget is being used in. For example if you want to export/import data for a portal container 'myportal' you must be using the gadget under the /myportal context.
Note: Dashboard's are not supported for export/import.
Export:
The export feature of the gadget list the sites available for export. Choose a site from the tree navigation and select export to download a zip file containing the data for that site.
The three types of data included in an export are:
- Site layout - The layout of the site. Represented by the portal.xml file in the zip.
- Pages - All pages for the site. Represented by the pages.xml file in the zip.
- Navigation - All navigation for the site. Represented by the navigation.xml in the zip.
Import:
The import feature of the gadget will accept a zip file previously created via an export either by the gadget itself, or the command line tool mentioned below. To import the zip file through the gadget, click the import link which will prompt for file upload. Choose the zip file from your system, and upload the file to import the data.
Note: The site you are exporting from must exist on the destination portal you are importing to.
Installation procedure
To install the gadget, follow the instructions below :
- Download the attached ear archive (gatein-management.ear)
- Deploy the ear to GateIn (JBoss AS) server (ie $JBOSS_HOME/server/default/deploy)
- Start your server (if it was already started you need to restart), and log into the portal as an admin (ie root/gtn)
- Go to the application registry, select the Gadgets tab, you will see the gadget "Export/Import Tool" has been registered.
- Click the "Click here to add into categories" link and add the gadget to the 'Gadget' category( or another category).
- Once done, the gadget is ready to be used.
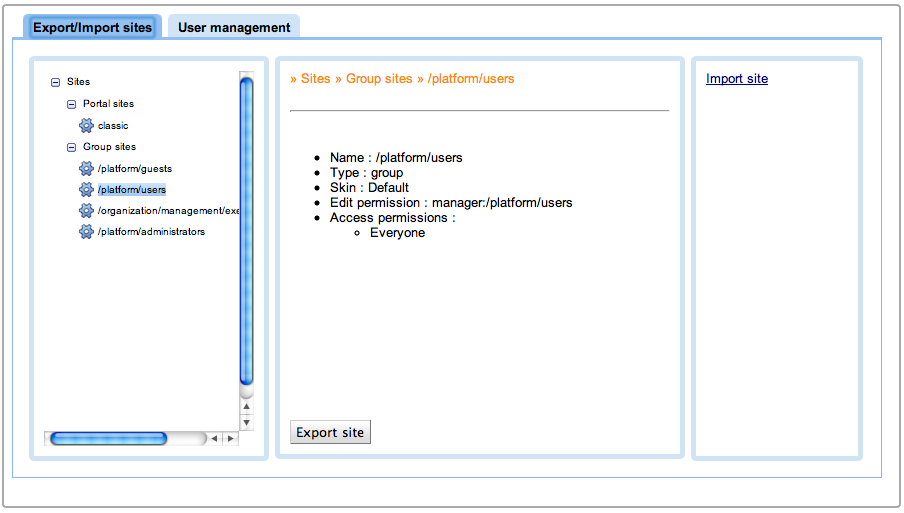
fig. 1: gatein management gadget - export
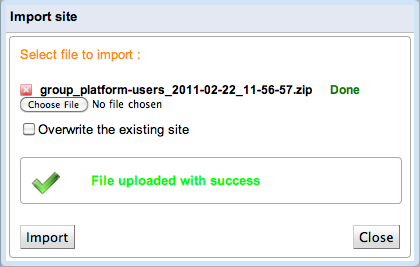
fig.2 : gatein management gadget - import
Export / Import Command Line Tool
An export/import command line tool will allow the ability to export and import site layout, pages, and navigation for each site in GateIn. There is one executable jar that can be used to either export or import.
Note: The export/import command line tool requires jdk/jre 6 or above.
Export
Usage:
$ java -jar portalobjects-cli.jar export --help
--basedirectory (-basedir) : Sets base directory for export
--config (-c) : Sets custom configuration file to be used for export.
--datatype (-d) : Data type (ie site, page, navigation). Use * for all data types.
--host (-h) : Host of the server the portal is running on.
--log4j (-l) : Sets custom log4j config file to be used for logging.
--loglevel : Sets log level of root log4j logger (ie debug, info).
--name (-n) : Name of page name or navigation path or * for all pages/navigations.
--ownerid (-o) : Owner id (ie classic, /platform/administrators, root). Use * for all ownerId's.
--password (-p) : Password to connect to portal with.
--port : Port of the server the portal is running on.
--portalcontainer (-pc) : Portal container name (ie portal)
--scope (-s) : Scope of data (ie portal, group, user). Use * for all scopes.
--username (-u) : Username to connect to portal with.
Each option can be configured by passing in a properties file via the command line option --config (-c). This properties file can contain any preconfigured option you want to specify when running the tool. The tool uses a preconfigured property file which will export all data from the portal container 'portal' running at localhost:8080 and with default admin credentials root/gtn. The default properties file used for the exporter is the following:
## Default export client configuration ##
## auth details ##
arg.username=root
arg.password=gtn
## this can be an IP address too
arg.host=localhost
arg.port=8080
## The following properties are typically entered as input to the program, but can be configured statically ##
arg.portalcontainer=portal
arg.scope=*
arg.ownerid=*
arg.datatype=*
arg.name=*
This is exactly how a custom property file would look like to preconfigure any command line option in a properties file. The naming convention is arg.<option-name>. So to configure the base directory for exports you would add arg.basedirectory=/tmp. Do not use aliases when defining arguments in the properties file. For example arg.basedir=/tmp will not work.
Note: All options passed in via command line will take priority over anything define in property files.
Some examples
Export all data for portal container sample-portal
$ java -jar portalobjects-cli.jar export -pc sample-portal
Export only navigation for user mary
$ java -jar portalobjects-cli.jar export --scope user --ownerid mary --datatype navigation
Export only the home page
$ java -jar portalobjects-cli.jar export --scope portal --ownerid classic --datatype page --name homepage
Export only the application registry navigation node
$ java -jar portalobjects-cli.jar export --scope group --ownerid /platform/administrators --datatype navigation --name administration/registry
Import
Usage:
$ java -jar portalobjects-cli.jar import --help
import file : Path to import file
--config (-c) : Sets custom configuration file to be used for import.
--force (-f) : Force all options without confirmation.
--host (-h) : Host of the server the portal is running on.
--log4j (-l) : Sets custom log4j config file to be used for logging.
--loglevel : Sets log level of root log4j logger (ie debug, info).
--overwrite (-o) : Indicates that the contents of each file should overwrite everything on the destination server.
This also means that anything not included will be deleted.
--password (-p) : Password to connect to portal with.
--port : Port of the server the portal is running on.
--portalcontainer (-pc) : Portal container name (ie portal).
--username (-u) : Username to connect to portal with.
Import file located in /tmp
$ java -jar portalobjects-cli.jar import /tmp/portal_export.zip
Other resources
Staging to production feature set: http://community.jboss.org/wiki/Stagingtoproduction-Featurelist
Portal object client and REST API: http://community.jboss.org/wiki/GateIn-PortalObjectsRESTAPI
Comments