This document describes the steps necessary to setup an eclipse project in order to work with GWT, CDI and Errai. It leverages the CDI integration which is part of project Errai.
Before we get started make sure you have Eclipse, the GWT plugin and the Maven plugin installed installed:
NOTE: Make sure to check the latest version of the userguide as well.
1.) Setup a project skeleton
To begin with we'll create a project layout using a maven build structure, which will provide us with
bare bone project, including all dependencies, which can later on be imported in eclipse.
In order to simplify things, Errai ships with a pre-build maven archetype that we can use:
mvn archetype:generate  \
 -DarchetypeGroupId=org.jboss.errai \
 -DarchetypeArtifactId=cdi-archetype \
 -DarchetypeVersion=1.2.2.Final \
 -DarchetypeRepository=https://repository.jboss.org/nexus/content/groups/public/

Define value for property 'groupId': : foo.bar
Define value for property 'artifactId': : gwt-webapp
Define value for property 'version': 1.0-SNAPSHOT:
Define value for property 'package': foo.bar: com.foo.bar
Confirm properties configuration:
groupId: foo.bar
artifactId: gwt-webapp
version: 1.0-SNAPSHOT
package: com.foo.bar
Y:
Customize the build properties according to your needs.
The archetype will be created in a directory that equals the artifactId.
Laika:Desktop hbraun$ cd gwt-webapp/
Laika:gwt-webapp hbraun$ ll
total 32
-rw-r--r--  1 hbraun  staff  13119 Jul 21 16:01 pom.xml
drwxr-xr-x  5 hbraun  staff    170 Jul 21 16:01 src
drwxr-xr-x  6 hbraun  staff    204 Jul 21 16:01 war
Great. Now we have fully working build environment setup in a few, simple steps.
You could already use it launch the GWT hosted mode or to package your webapp.
mvn gwt:run       (launch hosted mode)
mvn gwt:debug     (launch hosted with debug settings)
mvn install       (package and install the web application)
2.) Import project into eclipse
Next we'll import this project into eclipse. We assume the maven eclipse plugin is successfully installed.
a) In the menu bar select File > Import
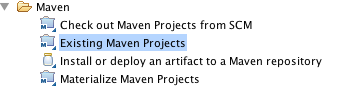
b) On the Import wizard select Existing Maven Projects
c) Select the project skeleton and you are done
3.) Enable the GWT plugin
In a next step we need to enable the GWT for our project and customize the launch configuration.
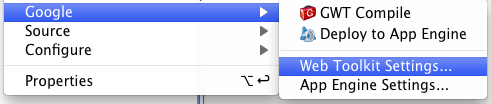
a) right click project, select Google -> Web Toolkit Settings
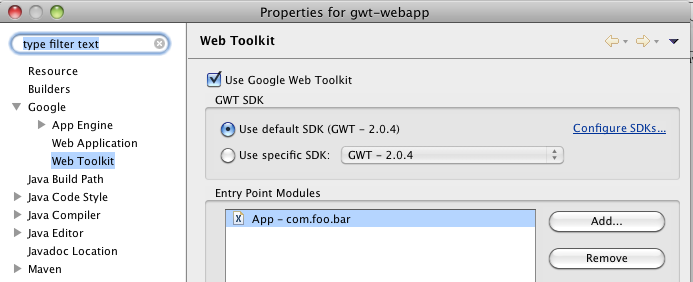
b) enable the "Use Goole Web Toolkit" checkbox
4.) Change the launch configuration
One last step and we are done. In order to bootstrap the CDI container within GWT hosted mode we need to change
the launch configuration and point it to a custom Jetty launcher.The most simple way is to run the GWT hosted mode with default settings first
(creates a default run configration) and then modify it afterwards.
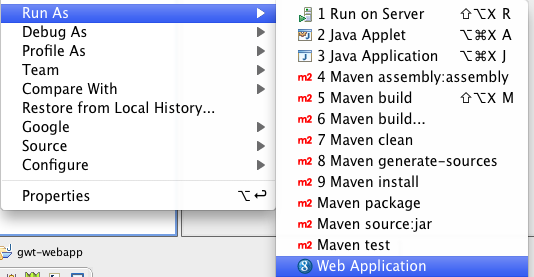
a) right click project -> Run As -> Web Application (abort this step)
b) right click project -> Run As-> Run Configurations
c) Chose the default run configuration (App.html)
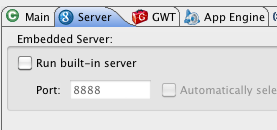
d) Disable built-in server (Server->Run built-in sever)
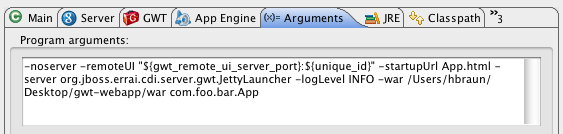
e) Change the Arguments and add
'-server org.jboss.errai.cdi.server.gwt.JettyLauncher' (Arguments -> Programm Arguments)
5.) Running the web application
If you now launch the custom configuration, it will bootstrap a CDI environment, deploy all beans and make them available to your GWT frontend.
Point your browser to http://127.0.0.1:8888/App.html?gwt.codesvr=127.0.0.1:9997 and start hacking.
Comments